包阅导读总结
1.
关键词:AlamaLinux、Webmin、GUI 管理器、安装步骤、服务器管理
2.
总结:本文介绍了在 AlamaLinux 上安装 Webmin GUI 服务器管理器的步骤,包括更新系统、添加必要的库、安装 Webmin、打开防火墙以及登录配置等操作,以帮助用户更便捷地管理服务器。
3.
主要内容:
– 安装 Webmin 的背景
– 对 Linux 新手而言,命令行操作有难度,Webmin 提供便利的图形界面。
– 安装前准备
– 运行的 AlmaLinux 实例和具有 sudo 权限的用户,以及 root 用户用于初始登录。
– 安装步骤
– 更新 AlmaLinux。
– 添加必要的仓库。
– 安装 Webmin。
– 打开防火墙的指定端口。
– 登录 Webmin 并进行配置
– 首次使用 root 账户登录。
– 添加其他用户并转换为 Webmin 用户。
– 创建新 Webmin 组。
– 为组分配可访问的 Webmin 模块。
思维导图:
文章地址:https://thenewstack.io/install-the-webmin-gui-server-manager-on-alamalinux/
文章来源:thenewstack.io
作者:Jack Wallen
发布时间:2024/7/3 14:11
语言:英文
总字数:1005字
预计阅读时间:5分钟
评分:81分
标签:Linux,服务器管理,Webmin,AlmaLinux,GUI
以下为原文内容
本内容来源于用户推荐转载,旨在分享知识与观点,如有侵权请联系删除 联系邮箱 media@ilingban.com
When you’re new to Linux, you might not want to have to do everything from the command line.
Although the CLI offers incredible power and flexibility, it can be a bit overwhelming to those who’ve not managed a server from within a terminal window. This is especially true for those migrating from Windows Server to Linux.
Fortunately, there are plenty of tools available for this purpose. Out of the box, you can always enable the Cockpit GUI for AlmaLinux, but that interface is a bit limited in the third-party modules that can be added.
There’s also Webmin, which has been around for a very long time. I remember, back when I first started working with Linux as a server OS, Webmin quickly became my best friend. With this powerful GUI app, I no longer felt as if my brain was about to implode with the sheer task of learning so many commands.
Webmin gave me all the power I needed so I could get the job done, while I learned the ins and outs of the command line tools necessary to manage a server.
But even though the CLI is second nature to me now, there are times when I prefer a GUI for the task. For instance, if I have numerous servers to manage or if I simply need to get a complicated job done quickly.
Out of the box, Webmin includes modules to help you manage:
- Bacula backups
- Bootup and shutdown
- Password management
- Disk and network file systems
- Disk quotas
- File system backups
- Log file rotation
- MIME-type programs
- PAM authentication
- Running processes
- Scheduled commands
- Scheduled cron jobs
- Software package updates
- Software packages
- System documentation
- System logs
- Users and groups
- Servers (such as SSH)
- HTTP tunnels
- Perl Modules
- Protected web directories
- Firewall
- Kerberos5
- NIS client and server
- TCP wrappers
- Linux RAID
- Partitions on local disks
- Cluster
If that’s not enough, there’s a site to search for third-party modules that can greatly expand the Webmin feature set.
I want to walk you through the steps for installing Webmin on AlmaLinux.
What You’ll Need
To install Webmin, you’ll need a running instance of AlmaLinux and a user with sudo privileges. You’ll also need access to the root user for the initial Webmin login. That’s it. Let’s make some GUI magic.
Update AlmaLinux
Before you start the installation, it’s best to go ahead and upgrade AlmaLinux. One thing to keep in mind is that, if the kernel is upgraded in the process, you’ll need to reboot the machine for the changes to take effect.
To upgrade AlmaLinux, log in to your server, open a terminal window and issue the command:
When the upgrade finishes, reboot if necessary.
Add the necessary repository
Because Webmin is not found in the standard repositories, you must create a new entry for dnf. Create the file with the command:
|
sudo nano /etc/yum.repos.d/webmin.repo |
In that file, paste the following:
|
[Webmin] name=Webmin mirrorlist=https://download.webmin.com/download/yum/mirrorlist enabled=1 gpgkey=http://www.webmin.com/jcameron–key.asc |
Save and close the file with the keyboard combination Ctrl+x. Run another update command so dnf is aware of the new repository (sudo dnf update).
Install Webmin
The next step is to install the Webmin manager, which can be accomplished with the command:
|
sudo dnf install webmin –y |
When this completes, the Webmin service is running and ready to accept connections. However, you still have to open the firewall, otherwise you won’t be able to access the GUI from a browser. To permanently open the required port, issue the command:
|
sudo firewall–cmd —add–port=10000/tcp —permanent |
You then must reload the firewall with the command:
sudo firewall-cmd –reload
Log In to Webmin
With Webmin up and running, open a web browser that’s on the same network as the hosting server and point it to http://SERVER:10000 (where SERVER is the IP address of the hosting server).
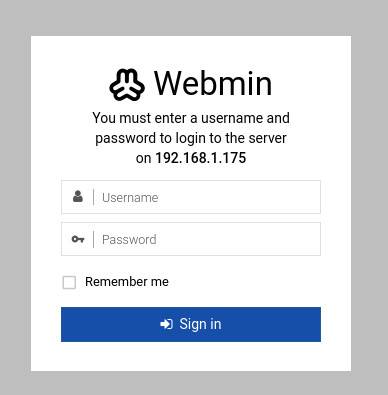
You’ll be greeted by a login window (Figure 1).
-

Figure 1: The Webmin login window
For your first login, you must use the root account, because you have to add any users who’ll need to access the GUI from within Webmin. Type root as the user and then type the root user password.
Once you’ve logged in, the first thing you should do is add any users to Webmin so the root user no longer has to be used. To do that, expand the Webmin entry in the sidebar and click Webmin users.
You don’t actually create new users but, instead, you convert existing users to Webmin users. To do that, click Create a New Webmin Group (Figure 2).
-

Figure 2: The Webmin users page is where you can convert existing users.
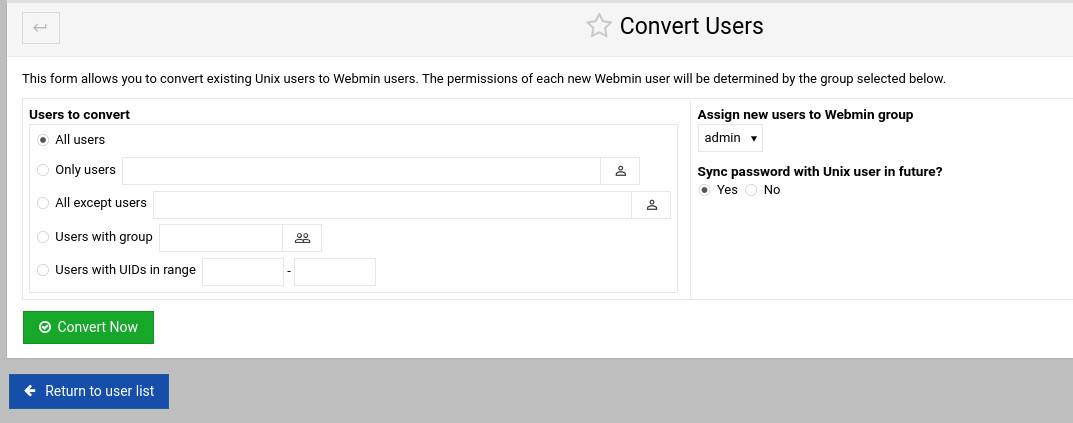
Next, give the new group a name (such as admin) and click Create. Back at the Webmin Users page, click Convert Unix to Webmin Users. On the resulting page (Figure 3), you can either select all users or type a list of users you want to convert.
-

Figure 3: Converting Unix users to Webmin users
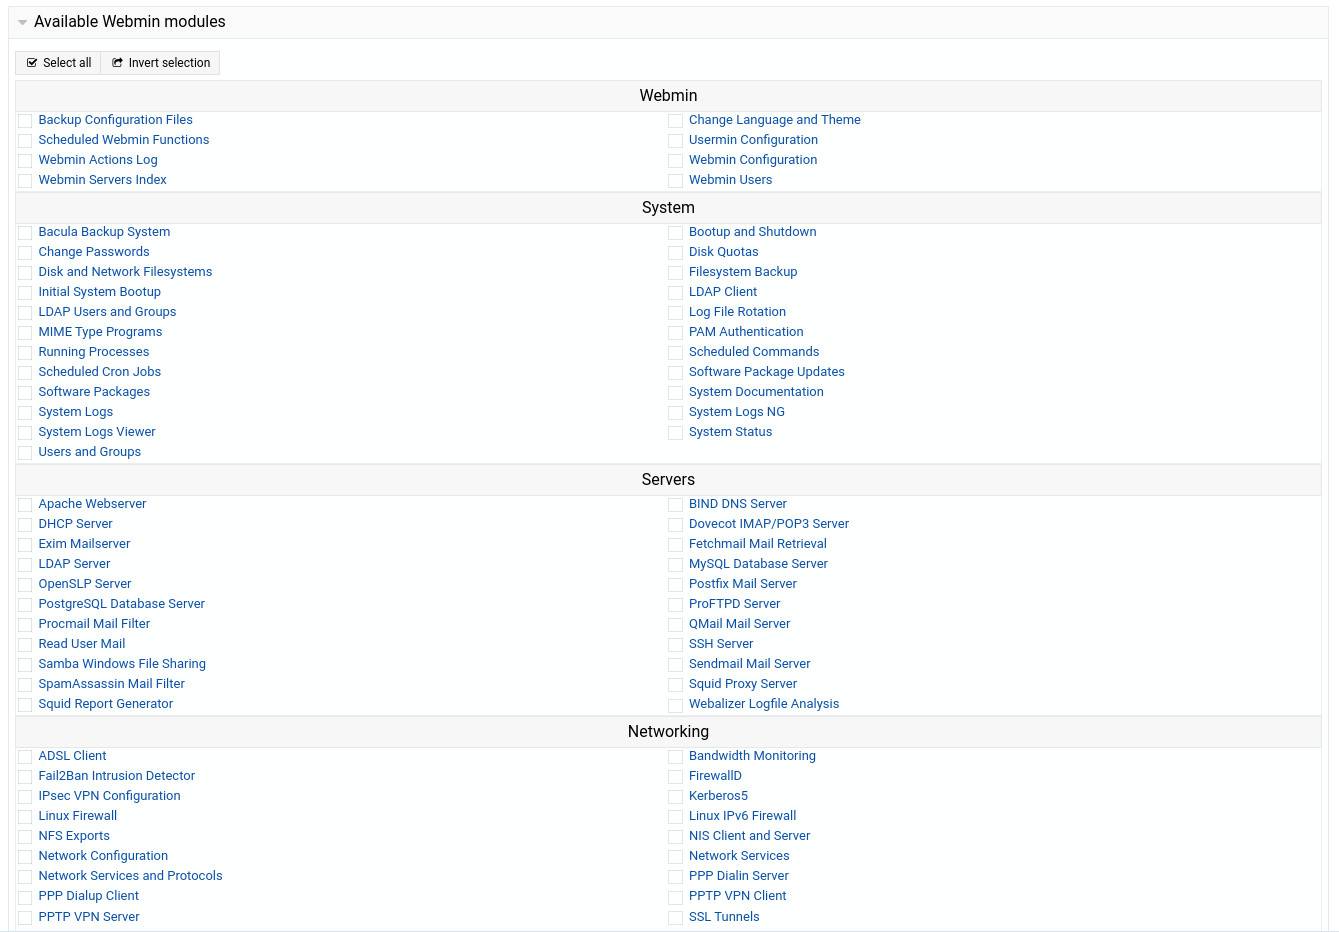
Make sure to select the newly added group from the Webmin Group drop-down menu on the left pane, and then click Convert Now. After converting the users, you’ll want to go back to the new group and select which Webmin modules it can access. To do that, click Available Webmin Modules, and then go through the full list (Figure 4), checking any/all modules to which that group should have access.
-

Figure 4: Adding modules to a new Webmin group
Once you’ve taken care of that, click Save and the assigned modules are now accessible to the users within that group.
You can now log out of Webmin and log back in as a standard user.
Congratulations! You now have the power of the Webmin GUI to help you manage and configure your AlmaLinux server.
YOUTUBE.COM/THENEWSTACK
Tech moves fast, don’t miss an episode. Subscribe to our YouTubechannel to stream all our podcasts, interviews, demos, and more.
