
包阅导读总结
1. 关键词:SSH 隧道、容器化应用、安全通信、云架构、网络安全
2. 总结:本文主要介绍了利用 SSH 隧道确保容器化应用安全通信的方法,阐述了 SSH 隧道的用途,并基于特定场景展示了在云中运行的容器与云 VM 中托管的 SSH 服务器之间设置 SSH 隧道的架构及实现脚本,包括创建资源组、虚拟网络、VNET 对等连接、网络安全组等步骤。
3. 主要内容:
– SSH 隧道简介
– 定义及作用:在现有 SSH 连接上创建加密通道,实现安全数据传输
– 应用场景:包括安全远程访问内部服务、绕过防火墙限制等多种情况
– 场景架构
– 架构组件:如虚拟网络、虚拟机、容器应用、容器注册表等
– 建立 SSH 隧道:在两个虚拟网络中的容器应用和虚拟机之间建立
– 脚本实现
– 先决条件:安装所需工具及具备相关知识
– 参数定义:定义资源组名、位置等参数
– 具体步骤:创建资源组、虚拟网络和子网、VNET 对等连接、网络安全组等
思维导图: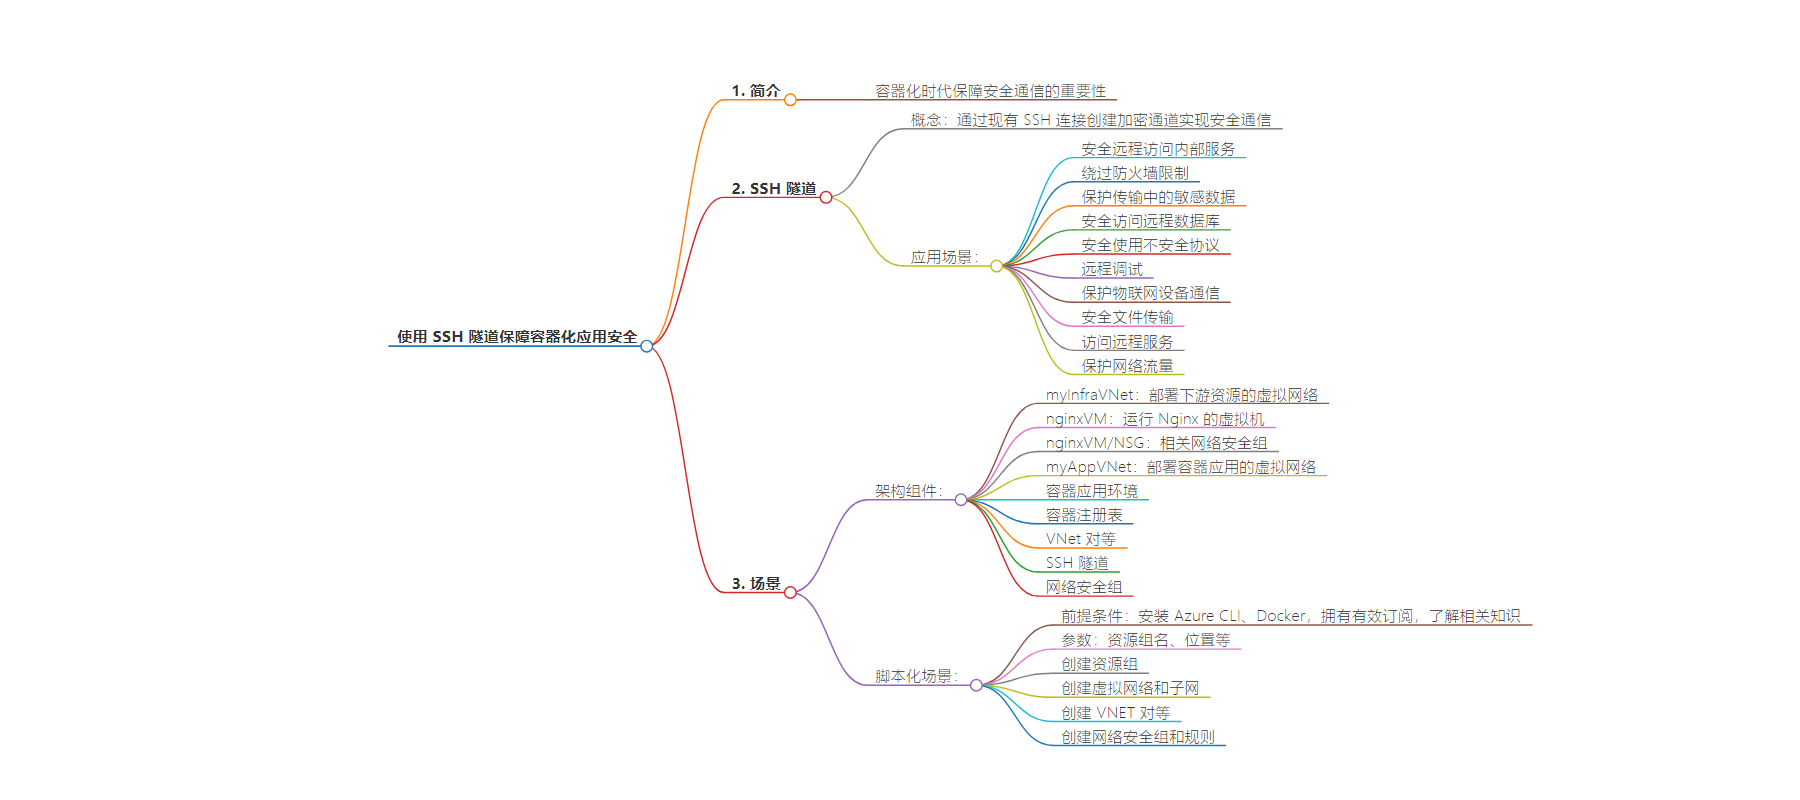
文章来源:techcommunity.microsoft.com
作者:NaveedKharadi-MSFT
发布时间:2024/9/10 23:07
语言:英文
总字数:2650字
预计阅读时间:11分钟
评分:84分
标签:安全,容器化,SSH 隧道,Azure,云安全
以下为原文内容
本内容来源于用户推荐转载,旨在分享知识与观点,如有侵权请联系删除 联系邮箱 media@ilingban.com
As cloud engineers and architects embrace containerization, ensuring secure communication becomes paramount. Data transmission and access control are critical aspects of security that need to be considered. SSH tunneling is a technique that can help achieve secure communication between different components of an application or solution. SSH tunneling creates an encrypted channel over an existing SSH connection, allowing secure data transmission between a local machine (SSH client) and a remote server (SSH server).
In this article, we will show how to set up SSH tunneling between containers running in the cloud that need to communicate with downstream resources via an SSH server hosted in a cloud VM.
SSH Tunneling
Before diving into the implementation, let’s have a quick refresher about SSH tunneling. Also known as SSH port forwarding, SSH tunneling allows secure communication between two endpoints by creating an encrypted tunnel over an existing SSH connection. It enables data to be transmitted securely between a local machine (SSH client) and a remote server (SSH server) through an intermediary channel. Here is an overview of different scenarios where SSH tunneling can be used:
1. Secure Remote Access to Internal Services:An organization has internal services (e.g., databases, internal web applications) that are not exposed to the public internet for security reasons. Using SSH tunneling, employees can securely connect to these internal services from remote locations without exposing the services to the internet.
2. Bypassing Firewall Restrictions:Developers need to access specific resources that are behind a corporate firewall, but the firewall restricts direct access. By setting up an SSH tunnel, developers can securely forward traffic through the firewall, allowing them to access the restricted resources.
3. Protecting Sensitive Data in Transit:An application needs to send sensitive data between different components or services, and there’s a risk of data interception. SSH tunneling can be used to encrypt the data as it travels between the components, ensuring that it remains secure in transit.
4. Accessing a Remote Database Securely:A developer needs to access a remote database server for maintenance or development purposes, but direct access is not permitted due to security policies. The developer can set up an SSH tunnel to securely connect to the remote database server without exposing it to the public internet.
5. Securely Using Insecure Protocols:An application uses an insecure protocol (e.g., FTP, HTTP) to communicate between different services. By wrapping the insecure protocol within an SSH tunnel, the communication can be secured, protecting the data from being intercepted.
6. Remote Debugging:A developer needs to debug an application running on a remote server, but direct access to the debugging port is restricted. SSH tunneling can be used to forward the debugging port from the remote server to the local machine, allowing the developer to securely debug the application.
7. Protecting IoT Device Communication:IoT devices need to communicate with a central server, but the communication is vulnerable to interception or tampering. By establishing an SSH tunnel between the IoT devices and the central server, the communication can be encrypted and secured, protecting the data in transit.
8. Secure File Transfer:Files need to be transferred securely between different systems or locations. SSH tunneling can be used to securely transfer files over the encrypted tunnel, ensuring that the data remains confidential and integrity is maintained.
9. Accessing Remote Services:A user needs to access services or resources hosted on a remote server securely. By setting up an SSH tunnel, the user can securely access the remote services as if they were running locally, protecting the data in transit.
10. Protecting Web Traffic:Web traffic needs to be secured when accessing websites or web applications over untrusted networks. SSH tunneling can be used to create a secure connection to a remote server, encrypting the web traffic and protecting it from eavesdropping or interception.
Scenario
For this article, we will implement the following scenario:

Architecture Components
- myInfraVNet: Virtual network where the downstream resources are deployed.
- nginxVM: A virtual machine running Nginx, a web server or reverse proxy, within myInfraVNet. It is assigned a private IP address, so that it is not directly accessible from the internet.
- nginxVM/NSG: Network Security Group associated with the nginxVM, controlling inbound and outbound traffic.
- myAppVNet: Virtual network where the container apps are deployed.
- Container Apps Environment: This environment hosts two containerized applications:
- mycontainerapp: A simple containerized Python application that fetches content from the NGINX server running on the VM and renders this content along with other content.
- sshclientcontainerapp: Another containerized application, used to establish secure SSH tunnels to other resources.
- Container Registry: Stores container images that can be deployed to the container apps.
- VNet Peering: Allows resources in myAppVNet and myInfraVNet to communicate with each other. It essentially bridges the two VNets, enabling low-latency, high-bandwidth interconnectivity.
- SSH Tunnel: The sshclientcontainerapp in the myAppVNet establishes an SSH tunnel to the nginxVM in the myInfraVNet to enable secure communication between the containerized app and the VM.
- Network Security Group (NSG): The nginxVM/NSG ensures that only allowed traffic can reach the nginxVM. It’s crucial to configure this NSG correctly to allow SSH traffic from the sshclientcontainerapp and restrict unwanted access.
Scripting the Scenario
Based on the scenario described above, we will now script the implementation of the architecture. The script will create the necessary resources, configure the SSH tunnel, and deploy the containerized applications.
Prerequisites
Before running the script, ensure that you have the following prerequisites:
- Azure CLI installed on your local machine.
- Docker installed on your local machine.
- A valid Azure subscription.
- A basic understanding of Azure Container Apps, Azure Container Registry, and Azure Virtual Networks.
Parameters
Let’s start by defining the parameters that will be used in the script. These parameters include the resource group name, location, virtual network names, subnet names, VM name, VM image, VM size, SSH key, admin username, admin password, container apps environment name, container registry name, container app image names, SSH client container image name, SSH port, and NGINX port. A random string is generated and appended to the resource group name, container apps environment name, and container registry name to ensure uniqueness.
random=$(echo $RANDOM | tr '[0-9]' '[a-z]')echo "Random:" $randomexport RESOURCE_GROUP=rg-ssh-$(echo $random)echo "RESOURCE_GROUP:" $RESOURCE_GROUPexport LOCATION="australiaeast"export INFRA_VNET_NAME="myInfraVNet"export APP_VNET_NAME="myAppVNet"export INFRA_SUBNET_NAME="mySubnet"export APP_SUBNET_NAME="acaSubnet"export VM_NAME="nginxVM"export VM_IMAGE="Ubuntu2204"export VM_SIZE="Standard_DS1_v2"export VM_KEY=mykey$(echo $random)export ADMIN_USERNAME="azureuser"export ADMIN_PASSWORD="Password123$" # Replace with your actual passwordexport CONTAINER_APPS_ENV=sshacae$(echo $random)export REGISTRY_NAME=sshacr$(echo $random)export REGISTRY_SKU="Basic"export CONTAINER_APP_IMAGE="mycontainerapp:latest"export SSH_CLIENT_CONTAINER_IMAGE="sshclientcontainer:latest"export CONTAINER_APP_NAME="mycontainerapp"export SSH_CLIENT_CONTAINER_APP_NAME="sshclientcontainerapp"export SSH_PORT=22export NGINX_PORT=80Create Resource Group
Create a resource group using theaz group createcommand. The resource group name and location are passed as parameters.
az group create --name $RESOURCE_GROUP --location $LOCATION Create Virtual Networks and Subnets
Create two virtual networks,myInfraVNetandmyAppVNet, using theaz network vnet createcommand. The address prefixes and subnet prefixes are specified for each virtual network. Theaz network vnet subnet updatecommand is used to delegate theMicrosoft.App/environmentsto themyAppVNetsubnet.
az network vnet create --resource-group $RESOURCE_GROUP --name $INFRA_VNET_NAME --address-prefix 10.0.0.0/16 --subnet-name $INFRA_SUBNET_NAME --subnet-prefix 10.0.0.0/24 az network vnet create --resource-group $RESOURCE_GROUP --name $APP_VNET_NAME --address-prefix 10.1.0.0/16 --subnet-name $APP_SUBNET_NAME --subnet-prefix 10.1.0.0/24 az network vnet subnet update --resource-group $RESOURCE_GROUP --vnet-name $APP_VNET_NAME --name $APP_SUBNET_NAME --delegations Microsoft.App/environmentsCreate VNET Peering
Create a VNET peering betweenmyInfraVNetandmyAppVNetusing theaz network vnet peering createcommand. Two peering connections are created, one frommyInfraVNettomyAppVNetand the other frommyAppVNettomyInfraVNet.
az network vnet peering create --name VNet1ToVNet2 --resource-group $RESOURCE_GROUP --vnet-name $INFRA_VNET_NAME --remote-vnet $APP_VNET_NAME --allow-vnet-access az network vnet peering create --name VNet2ToVNet1 --resource-group $RESOURCE_GROUP --vnet-name $APP_VNET_NAME --remote-vnet $INFRA_VNET_NAME --allow-vnet-access Create Network Security Group and Rules
Create a network security group (NSG) for thenginxVMusing theaz network nsg createcommand. Two NSG rules are created to allow SSH traffic on port 22 and HTTP traffic on port 80.
az network nsg create --resource-group $RESOURCE_GROUP --name ${VM_NAME}NSG az network nsg rule create --resource-group $RESOURCE_GROUP --nsg-name ${VM_NAME}NSG --name AllowSSH --protocol Tcp --direction Inbound --priority 1000 --source-address-prefixes '*' --source-port-ranges '*' --destination-address-prefixes '*' --destination-port-ranges $SSH_PORT --access Allow az network nsg rule create --resource-group $RESOURCE_GROUP --nsg-name ${VM_NAME}NSG --name AllowHTTP --protocol Tcp --direction Inbound --priority 1001 --source-address-prefixes '*' --source-port-ranges '*' --destination-address-prefixes '*' --destination-port-ranges $NGINX_PORT --access Allow Create Network Interface
Create a network interface for the nginxVM using theaz network nic createcommand. The NIC is associated with themyInfraVNetandmySubnetand the NSG created earlier.
az network nic create --resource-group $RESOURCE_GROUP --name ${VM_NAME}NIC --vnet-name $INFRA_VNET_NAME --subnet $INFRA_SUBNET_NAME --network-security-group ${VM_NAME}NSG Create VM
Create a virtual machine using theaz vm createcommand. The VM is created with the specified image, size, admin username, and password. The NIC created earlier is associated with the VM. Ensure that you have provided a value for the password in theADMIN_PASSWORDvariable.
az vm create --resource-group $RESOURCE_GROUP --name $VM_NAME --image $VM_IMAGE --size $VM_SIZE --admin-username $ADMIN_USERNAME --admin-password $ADMIN_PASSWORD --nics ${VM_NAME}NIC export VM_PRIVATE_IP=$(az vm show -d -g $RESOURCE_GROUP -n $VM_NAME --query privateIps -o tsv) echo "VM Private IP: $VM_PRIVATE_IP"Generate SSH Key Pair and Add the Public Key to the VM
Generate an SSH key pair using thessh-keygencommand. The public key is added to the VM using theaz vm user updatecommand.
# Generate an SSH key pair ssh-keygen -t rsa -b 4096 -f $VM_KEY -N "" # Add the public key to the VM az vm user update --resource-group $RESOURCE_GROUP --name $VM_NAME --username $ADMIN_USERNAME --ssh-key-value "$(cat $VM_KEY.pub)" # Print success message echo "SSH key pair generated and public key added to VM $VM_NAME" Install NGINX and SSH Server on the VM
Install NGINX and SSH server on the VM using theaz vm run-command invokecommand. This command runs a shell script on the VM to update the package repository, install NGINX, start the NGINX service, install the SSH server, and start the SSH service.
az vm run-command invoke --command-id RunShellScript --name $VM_NAME --resource-group $RESOURCE_GROUP --scripts "sudo apt-get update && sudo apt-get install -y nginx && sudo systemctl start nginx && sudo apt-get install -y openssh-server && sudo systemctl start ssh"Create Azure Container Registry
Create an Azure Container Registry using theaz acr createcommand to store the container images that will be deployed to the container apps.
az acr create --resource-group $RESOURCE_GROUP --name $REGISTRY_NAME --sku $REGISTRY_SKU --location $LOCATION --admin-enabled true Login to Azure Container Registry
Login to the Azure Container Registry using theaz acr logincommand.
az acr login --name $REGISTRY_NAME Create Dockerfile for mycontainerapp
Create a Dockerfile for themycontainerapp. The Dockerfile specifies the base image, working directory, copy files, install packages, expose port, define environment variable, and run the application.
echo "# Use an official Python runtime as a parent image FROM python:3.8-slim # Set the working directory in the container WORKDIR /app # Copy the current directory contents into the container at /app COPY . /app # Install any needed packages specified in requirements.txt RUN pip install --no-cache-dir -r requirements.txt # Make port 80 available to the world outside this container EXPOSE 80 # Define environment variable ENV NAME World # Run app.py when the container launches CMD [\"python\", \"app.py\"]" > Dockerfile.mycontainerappCreate Dockerfile for sshclientcontainer
Create a Dockerfile for thesshclientcontainer. The Dockerfile specifies the base image, install SSH client, copy SSH key, set working directory, copy files, expose port, and run the SSH client.
echo "# Use an official Ubuntu as a parent image FROM ubuntu:20.04 # Install SSH client RUN apt-get update && apt-get install -y openssh-client && apt-get install -y curl # Copy SSH key COPY ${VM_KEY} /root/.ssh/${VM_KEY} RUN chmod 600 /root/.ssh/${VM_KEY} # Set the working directory in the container WORKDIR /app # Copy the current directory contents into the container at /app COPY . /app # Make port 80 available to the world outside this container EXPOSE 80 # Run the SSH client when the container launches CMD [\"bash\", \"-c\", \"ssh -i /root/.ssh/${VM_KEY} -o StrictHostKeyChecking=no -L 0.0.0.0:80:localhost:80 ${ADMIN_USERNAME}@${VM_PRIVATE_IP} -N\"]" > Dockerfile.sshclientcontainer Create an App for mycontainerapp
Create a simple app that can be hosted on mycontainerapp. Theapp.pyfile contains a simple Flask application that fetches content from the NGINX server running on the VM and renders it along with other content.
echo "import requestsfrom flask import Flask, render_template_stringapp = Flask(__name__)@app.route('/')def hello_world(): response = requests.get('http://sshclientcontainerapp:80') html_content = \"\"\" <!DOCTYPE html> <html lang="en"> <head> <meta charset="UTF-8"> <meta name="viewport" content="width=device-width, initial-scale=1.0"> <title>Response Page</title> </head> <body> <header> <h1>Welcome to My Container App</h1> </header> <main> <div>Response Content - The following response has been received from the NGINX server running on the VM via SSH tunnel</div> <hr/> <div>{}</div> </main> <footer> <hr/> <p>© 2024 My Flask App</p> </footer> </body> </html> \"\"\".format(response.text) return render_template_string(html_content)if __name__ == '__main__': app.run(host='0.0.0.0', port=80)" > app.pyecho "Flask==2.0.0Werkzeug==2.2.2requests==2.25.1" > requirements.txtBuild and Push Docker Images
Build the Docker images forsshclientcontainerandmycontainerappusing thedocker buildcommand. The images are tagged with the Azure Container Registry name and pushed to the registry using thedocker pushcommand.
# Build the Docker image for sshclientcontainer docker build -t $REGISTRY_NAME.azurecr.io/$SSH_CLIENT_CONTAINER_IMAGE -f Dockerfile.sshclientcontainer . # Push the Docker image for sshclientcontainer to Azure Container Registry docker push $REGISTRY_NAME.azurecr.io/$SSH_CLIENT_CONTAINER_IMAGE # Build the Docker image for mycontainerapp docker build -t $REGISTRY_NAME.azurecr.io/$CONTAINER_APP_IMAGE -f Dockerfile.mycontainerapp . # Push the Docker image for mycontainerapp to Azure Container Registry docker push $REGISTRY_NAME.azurecr.io/$CONTAINER_APP_IMAGE Create Azure Container Apps Environment
Create an Azure Container Apps environment using theaz containerapp env createcommand. The environment is associated with the virtual network and subnet created earlier.
# Get the subnet ID for the infrastructure subnetexport INFRA_SUBNET_ID=$(az network vnet subnet show --resource-group $RESOURCE_GROUP --vnet-name $APP_VNET_NAME --name $APP_SUBNET_NAME --query id --output tsv)echo $INFRA_SUBNET_ID# Create the Azure Container Apps environmentaz containerapp env create --name $CONTAINER_APPS_ENV --resource-group $RESOURCE_GROUP --location $LOCATION --infrastructure-subnet-resource-id $INFRA_SUBNET_IDDeploy Container Apps
Deploy the container apps to the Azure Container Apps environment using theaz containerapp createcommand. The container images are pulled from the Azure Container Registry, and the container apps are configured to use the SSH tunnel for secure communication.
Deploy sshclientcontainerapp
az acr login --name $REGISTRY_NAME# Deploy sshclientcontainerappaz containerapp create --name $SSH_CLIENT_CONTAINER_APP_NAME --resource-group $RESOURCE_GROUP --environment $CONTAINER_APPS_ENV --image $REGISTRY_NAME.azurecr.io/$SSH_CLIENT_CONTAINER_IMAGE --target-port 80 --ingress 'external' --registry-server $REGISTRY_NAME.azurecr.ioDeploy mycontainerapp
az acr login --name $REGISTRY_NAMEaz containerapp create --name $CONTAINER_APP_NAME --resource-group $RESOURCE_GROUP --environment $CONTAINER_APPS_ENV --image $REGISTRY_NAME.azurecr.io/$CONTAINER_APP_IMAGE --target-port 80 --ingress 'external' --registry-server $REGISTRY_NAME.azurecr.ioTesting the Deployment
After deploying the container apps, you can test the deployment by accessing the public URL of themycontainerapp. The app should fetch content from the NGINX server running on the VM through the SSH tunnel and render it along with other content.
-
Retrieve the public URL of the
mycontainerapp:MY_CONTAINER_APP_URL=$(az containerapp show --name $CONTAINER_APP_NAME --resource-group $RESOURCE_GROUP --query 'properties.configuration.ingress.fqdn' -o tsv) echo "mycontainerapp URL: http://$MY_CONTAINER_APP_URL" -
Open the URL in your web browser by copying and pasting the URL printed in the previous step.
You should see a webpage that includes the response content from the NGINX server running on the VM via the SSH tunnel.

Clean Up
After testing the deployment, you can clean up the resources by deleting the resource group. This will remove all the resources created in the script.
az group delete --name $RESOURCE_GROUP --yes --no-waitConclusion
In this article, we demonstrated how to secure containerized applications using SSH tunneling. We covered the steps to set up the necessary infrastructure, create and deploy containerized applications, and establish an SSH tunnel for secure communication between the container apps and a VM hosting an NGINX server.
By following these steps, you can ensure that your containerized applications communicate securely with downstream resources, enhancing the overall security of your cloud-native architecture.
For more information on securing containerized applications, refer to theAzure Container Apps documentation.
If you have any questions or need further assistance, feel free to consult theAzure documentationor reach out to Microsoft support.