
包阅导读总结
1. 关键词:Linux、用户管理、组管理、命令、权限
2. 总结:本文介绍了 Linux 系统中的用户和组管理,包括创建、修改、删除用户和组的命令及操作,强调设置密码和组织用户到相应组的重要性,指出这是控制文件访问权限的基础,也是管理员日常任务和认证考试常见内容。
3. 主要内容:
– 用户管理
– 创建用户账户:使用 `useradd` 命令,可添加选项。
– 修改用户账户:使用 `usermod` 命令。
– 删除用户账户:使用 `userdel` 命令,可添加 `-r` 选项删除用户的家目录。
– 设置用户密码:使用 `passwd` 命令。
– 组管理
– 创建组:使用 `groupadd` 命令。
– 重命名组:使用 `groupmod` 命令。
– 删除组:使用 `groupdel` 命令。
– 将用户添加到组:使用 `usermod` 命令的 `-aG` 选项。
– 总结
– 强调实践这些命令的重要性,创建用户和组是控制文件访问权限的第一步。
思维导图: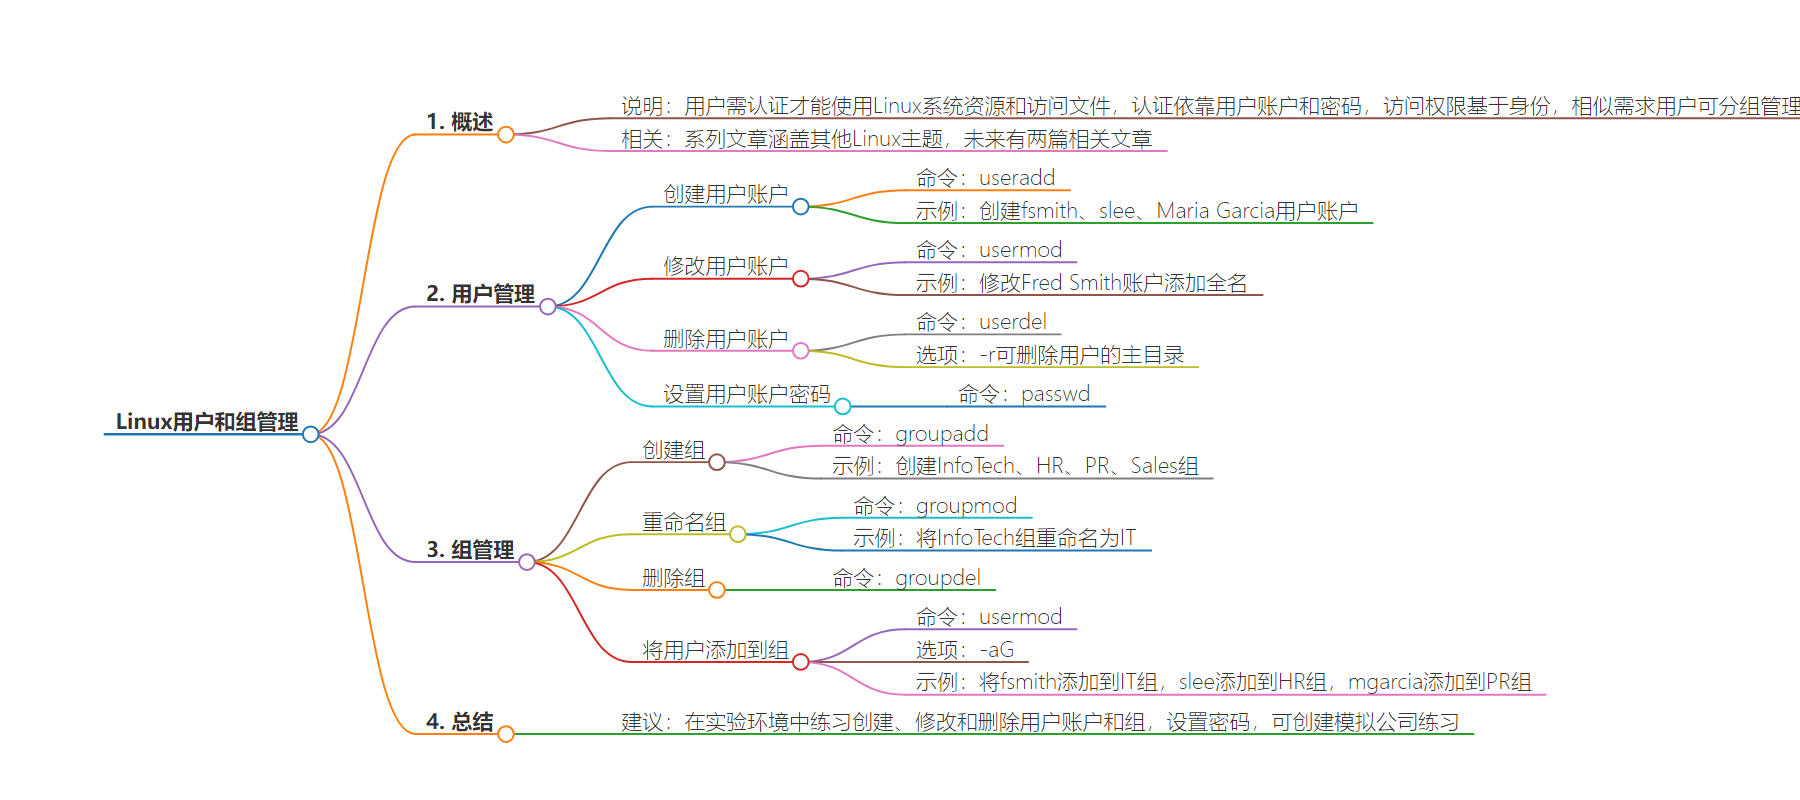
文章地址:https://thenewstack.io/linux-user-and-group-management/
文章来源:thenewstack.io
作者:Damon M. Garn
发布时间:2024/6/18 17:45
语言:英文
总字数:1763字
预计阅读时间:8分钟
评分:83分
标签:运维
以下为原文内容
本内容来源于用户推荐转载,旨在分享知识与观点,如有侵权请联系删除 联系邮箱 media@ilingban.com
Users must authenticate to a Linux system before they can use resources or access files on it. The authentication process relies on a user account to represent the person, and this account is protected with a password. Linux grants or denies access to directories and files based on this identity.
To make things easier on administrators, users with similar access requirements are placed into groups. Rather than having to grant ten individual users access to a folder, an administrator can place them all in a group and grant access to the group.
This article provides commands you can use on a Linux system to manage users and groups.
This article on services fits into a larger series of Linux articles covering various sysadmin topics, including hardware identification and managing system processes. You can build a lab environment by following the information in the Linux: Companion Lab for Linux Skill Blocks Repository article. If you need to review Linux command syntax, read Understand the Linux Command Line.
In this series, we also covered how to pick a distribution, how the Linux kernel interacts with hardware and how Linux manages system services.
Two companion articles follow this one in the weeks to come. The first of those covers managing directories and files. The second demonstrates standard Linux permissions. You can control access to directories and files using permissions applied to the users and groups created in this tutorial.
Manage Users
Managing Linux users from the command line is straightforward. You must know three related commands to create, modify, or delete users, and one command to reset passwords.
I’ll provide examples of each of these commands. I suggest you work with the same accounts I do so that the next section (Linux groups) makes sense.
Create a User Account
Creating a new user account is as simple as typing theuseraddcommand and a unique username. As with other commands, plenty of options exist to modify the results. Check the useradd man page for examples.
Create a user namedfsmith (a likely account name for user Fred Smith):

Figure 1: The useradd command creates user accounts.
Note: It is a poor security practice to log on to a Linux system as the root (administrator) user. Most systems force you to log on as a regular user and then use the sudo (super user do) command to elevate your privileges. You may be prompted for your password when usingsudo.
You will probably not receive any response from your system, which indicates the command succeeded. Type the following command to confirm the account exists:
Linux stores user accounts in a file namedpasswd in a directory named/etc. The tail command displays the last ten lines of that file — and new user accounts always appear at the end of the file.
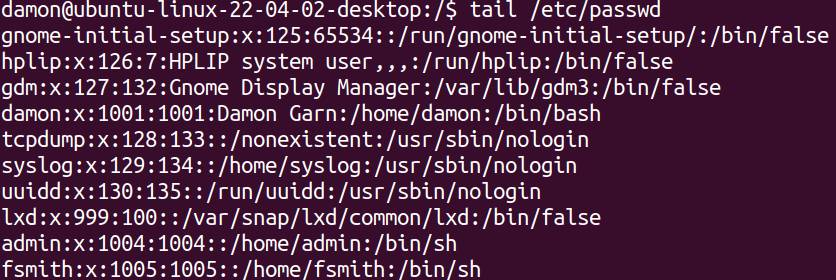
Figure 2: The /etc/passwd file stores user accounts. Note the new fsmith account at the bottom of the file.
On most Linux systems, theuseradd command automatically creates a home folder for the user. Use the followingls command to check:
You should see a home directory namedfsmith.

Figure 3: The fsmith account has a home directory located in the /home parent folder.
Create another user account, this time adding the comment field using the–c option. You’ll place the user’s full name in the comment field.
|
$ sudo useradd –c “Sean Lee” slee |
Use the same tail command as above to display the new account. Do you see a section with the user’s full name?
You enclosed the user’s full name (Sean Lee) in double quotes due to the space between the first and last name. Normally, Linux would treat those as two values—one calledSean and the other calledLee. By enclosing them in quotes, you tell Linux to treat the two words as a single value—”Sean Lee“.
Create a third account for user Maria Garcia using the same command and option as you did for Sean Lee. Don’t forget to check the/etc/passwd file to confirm the account exists.

Figure 4: Use the -c (comment) option to add full names to the user accounts. Note the double quotes due to the space between first and last names.
Modify a User Account
Notice that you did not enter a comment field for Fred Smith’s account containing his full name. Use theusermod command to update the account with the user’s full name:
|
$ sudo usermod –c “Fred Smith” fsmith |
The–c “Fred Smith” option remains the same but this time you used theusermod command to modify an existing account rather than theuseradd command to create a new one.
Check the usermod man page to see what other modifications you can make.
Delete a User Account
Now that you can create and modify accounts, it’s time to demonstrate removing accounts from the system. Create an account to delete namedsgomez (for Saul Gomez) and confirm it exists in the/etc/passwd file.
|
$ sudo useradd –c “Saul Gomez” sgomez |
Delete user accounts using theuserdelcommand. If you add the–r option the system will delete the user’s home directory, too. There are a few other options in the userdel man page.
Set a Password for a User Account
Most Linux distributions don’t prompt you to set a user password during the account creation process. A user cannot log on with an account until it has a password configured. Use the passwd command to set a password:
You’ll be prompted to enter the password twice. For now, set a simple password likePa$$w0rd. Note that there is no indication on the screen that you’re typing a password.

Figure 5: The useradd command does not automatically set passwords, so you must use the passwd command to do so.
Set a password for theslee andmgarcia accounts, too. Use the same process to reset a forgotten password.
Manage Users (summary)
Practice using the three Linux commands for adding, modifying, and deleting user accounts and explore the related options using the man pages. Don’t forget to set passwords for each account using thepasswdcommand.
Manage Groups
Groups are collections of user accounts with similar security requirements. These requirements usually center on directory and file access (permissions).
The commands to manage Linux groups are similar to user management commands.
In the earlier section, you created several user accounts, perhaps for a mock company. Next, you’ll organize those users into groups based on company departments.
Use the groupadd command to create a group namedInfoTech:
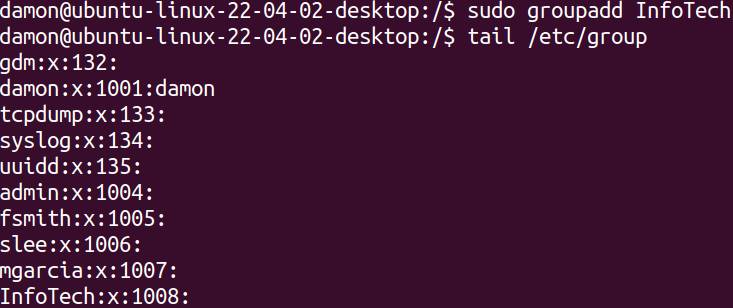
Figure 6: Use the groupadd command to create a group, and view information about the group in the /etc/group file.
Linux stores groups in the/etc/group file. Use thetail command to display the last few lines of this file. You should see the newInfoTech group.
Create two more groups — one namedHR and the other namedPR to represent the Human Resources and Public Relations departments. Verify they exist in the/etc/group file.
The primary modification you might make to a group is renaming it. Use the groupmod command to rename theInfoTech group toIT:
|
$ sudo groupmod –n IT InfoTech |
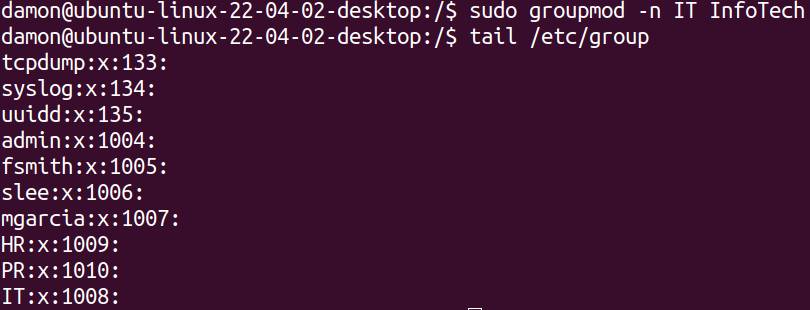
Figure 7: Rename a group using the -a option.
Observe the order of arguments for thegroupmod –n command. Specify the new group name followed by the current group name.
The groupdel command deletes groups. Note that deleting a group does not delete any user accounts contained in the group.
Create a group namedSales using thegroupadd command. Confirm it exists in the/etc/group file. Next, delete theSales group using thegroupdel command:
Verify the group is gone.
Place Users into Groups
You have now created, modified, and removed users. You’ve done the same for groups. However, you have not yet added a user to a group, which is essential. The following table shows how the users need to be organized.
Adding a user to a group modifies the user, so the appropriate command isusermod . You’ll need the–a and–G options, too. The syntax to add userfsmith to theIT group looks like this:
|
$ sudo usermod –aG IT fsmith |
Use thetail command to display the/etc/group file. You should see thefsmith account associated with theIT group.

Figure 8: Add a user to a group with the usermod command.
Add theslee account to theHR group and themgarcia account to thePR group. Confirm the memberships by checking the/etc/group file.
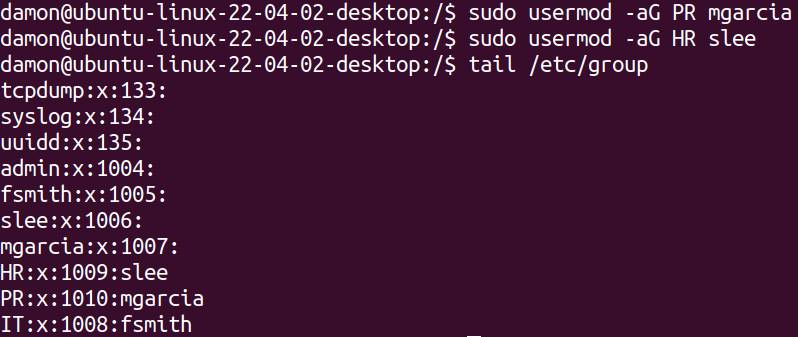
Figure 9: Display the /etc/group file to view group memberships.
Manage Groups (summary)
Practice using these commands by creating several groups and adding users to them. Review the/etc/group file to confirm the groups and determine who is a member of each.
Wrap up
Spend some time in your lab environment creating, modifying, and deleting user accounts. Get in the habit of setting passwords for each account you create, too. Create some groups and practice adding users to them. These are daily tasks for Linux administrators and common objectives for Linux certification exams like CompTIA Linux+. Creating users is the first step toward controlling access to Linux files using permissions. The system must know the user’s identity to determine whether the user should be able to access a file.
You might find it useful to create a small demo company that contains four/five departments and up to ten employees. Create accounts and groups for this demo organization. Work with these commands until they become second nature!
YOUTUBE.COM/THENEWSTACK
Tech moves fast, don’t miss an episode. Subscribe to our YouTubechannel to stream all our podcasts, interviews, demos, and more.