
包阅导读总结
1.
关键词:TimescaleDB、Azure、安装、PostgreSQL、时间序列数据
2.
总结:本文是关于在微软 Azure 上安装 TimescaleDB 的指南,介绍了从创建 Azure 账户、设置 VM 实例、安装 TimescaleDB 到配置 PostgreSQL 及使用的全过程,并提供了后续探索的建议。
3.
主要内容:
– 介绍 TimescaleDB 是基于 PostgreSQL 的强大开源时间序列数据库
– 优化数据摄入和复杂查询,具有传统关系数据库易用性和 NoSQL 数据库的扩展性
– 在 Azure 上安装 TimescaleDB 的步骤
– 创建 Azure 账户
– 创建 Virtual Machine (VM) 实例
– 导航到 Azure Marketplace 选择 Ubuntu Server 20.04 LTS
– 配置 VM 基础、管理员账户等信息
– 连接到 VM
– 安装 TimescaleDB
– 添加 TimescaleDB PPA
– 安装 TimescaleDB
– 配置 PostgreSQL
– 检查版本
– 修改配置
– 调整 PostgreSQL
– 重启
– 切换到 PostgreSQL 用户
– 使用 TimescaleDB
– 访问 PostgreSQL
– 创建数据库
– 连接数据库
– 初始化扩展
– 创建超表
– 插入和查询数据
– 后续步骤
– 探索更多示例数据集和高级教程
– 考虑使用 Timescale Cloud 管理解决方案
思维导图: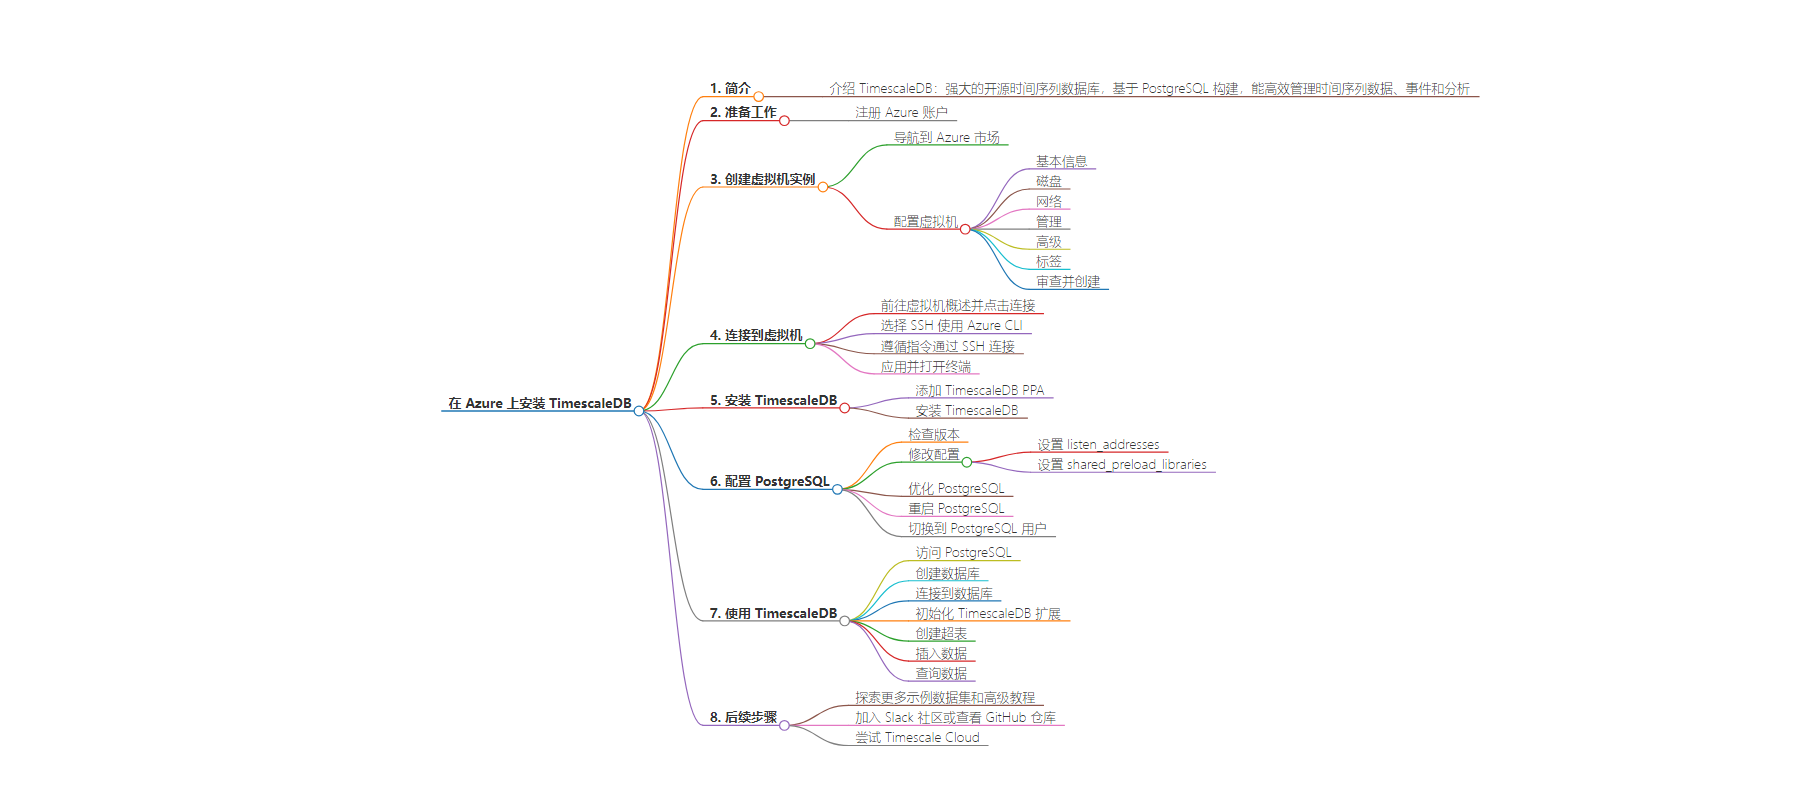
文章地址:https://www.timescale.com/blog/how-to-install-timescaledb-on-azure/
文章来源:timescale.com
作者:Juan Jose
发布时间:2024/7/22 13:38
语言:英文
总字数:788字
预计阅读时间:4分钟
评分:87分
标签:TimescaleDB,Azure,时间序列数据库,PostgreSQL,虚拟机
以下为原文内容
本内容来源于用户推荐转载,旨在分享知识与观点,如有侵权请联系删除 联系邮箱 media@ilingban.com
TimescaleDB is a powerful, open-source time-series database built on top of PostgreSQL to efficiently manage time-series data, events, and analytics. Optimized for fast ingest and complex queries, it speaks “full SQL” and is correspondingly easy to use like a traditional relational database, yet scales in ways previously reserved for NoSQL databases.
This guide will walk you through the process of setting up TimescaleDB on Microsoft Azure, ensuring you have a scalable and high-performance database ready to handle your time-series data needs.
What you’ll learn:
- Getting started with Azure
- Setting up your VM instance
- Installing TimescaleDB
- Configuring PostgreSQL
- Using TimescaleDB
Get Started With Azure and TimescaleDB
First, head over to Azure and create your Azure account. Once you’ve logged into the Azure portal, you’ll see a dashboard similar to this:
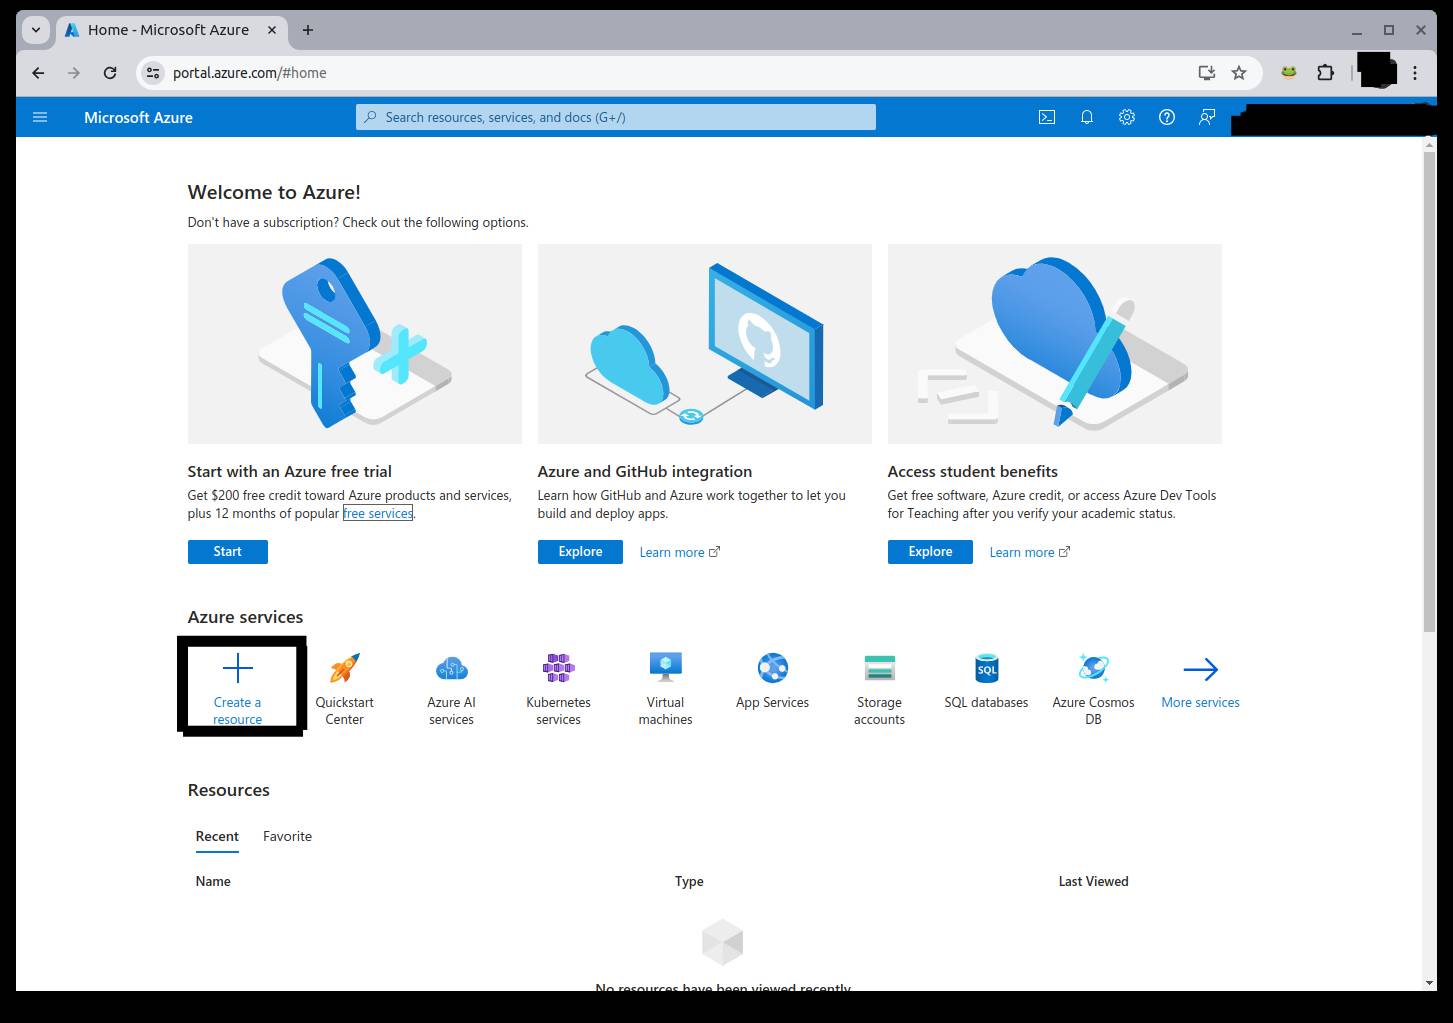
Create a Virtual Machine (VM)
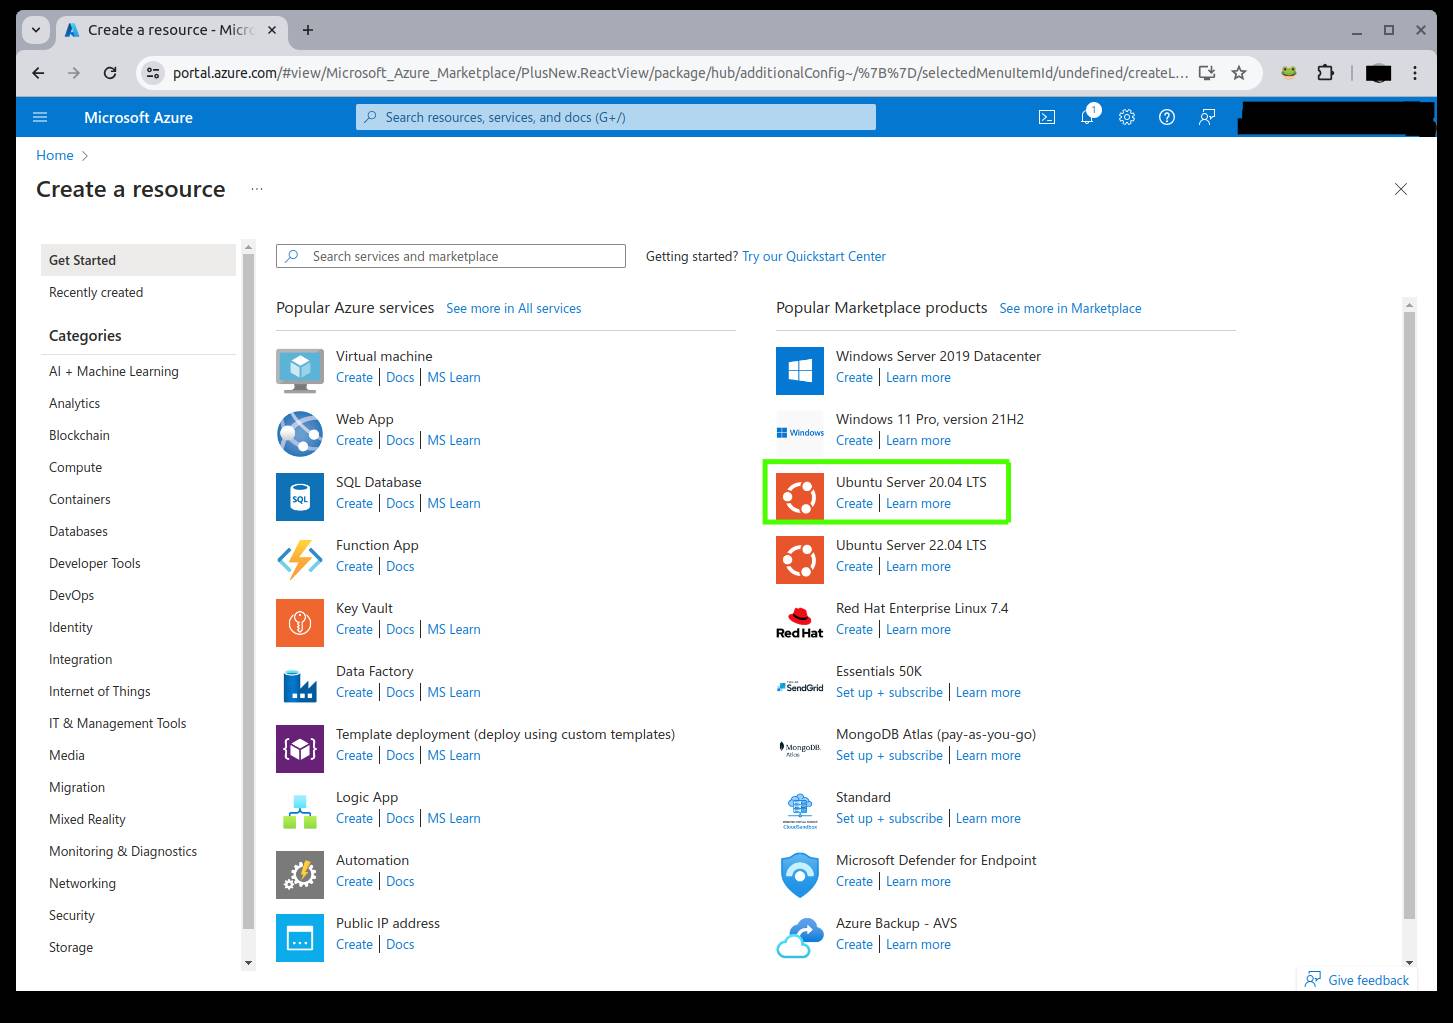
1. Navigate to the Azure Marketplace: In the Dashboard, click on “Create a resource” and search for “Ubuntu Server 20.04 LTS.” Select it from the list.
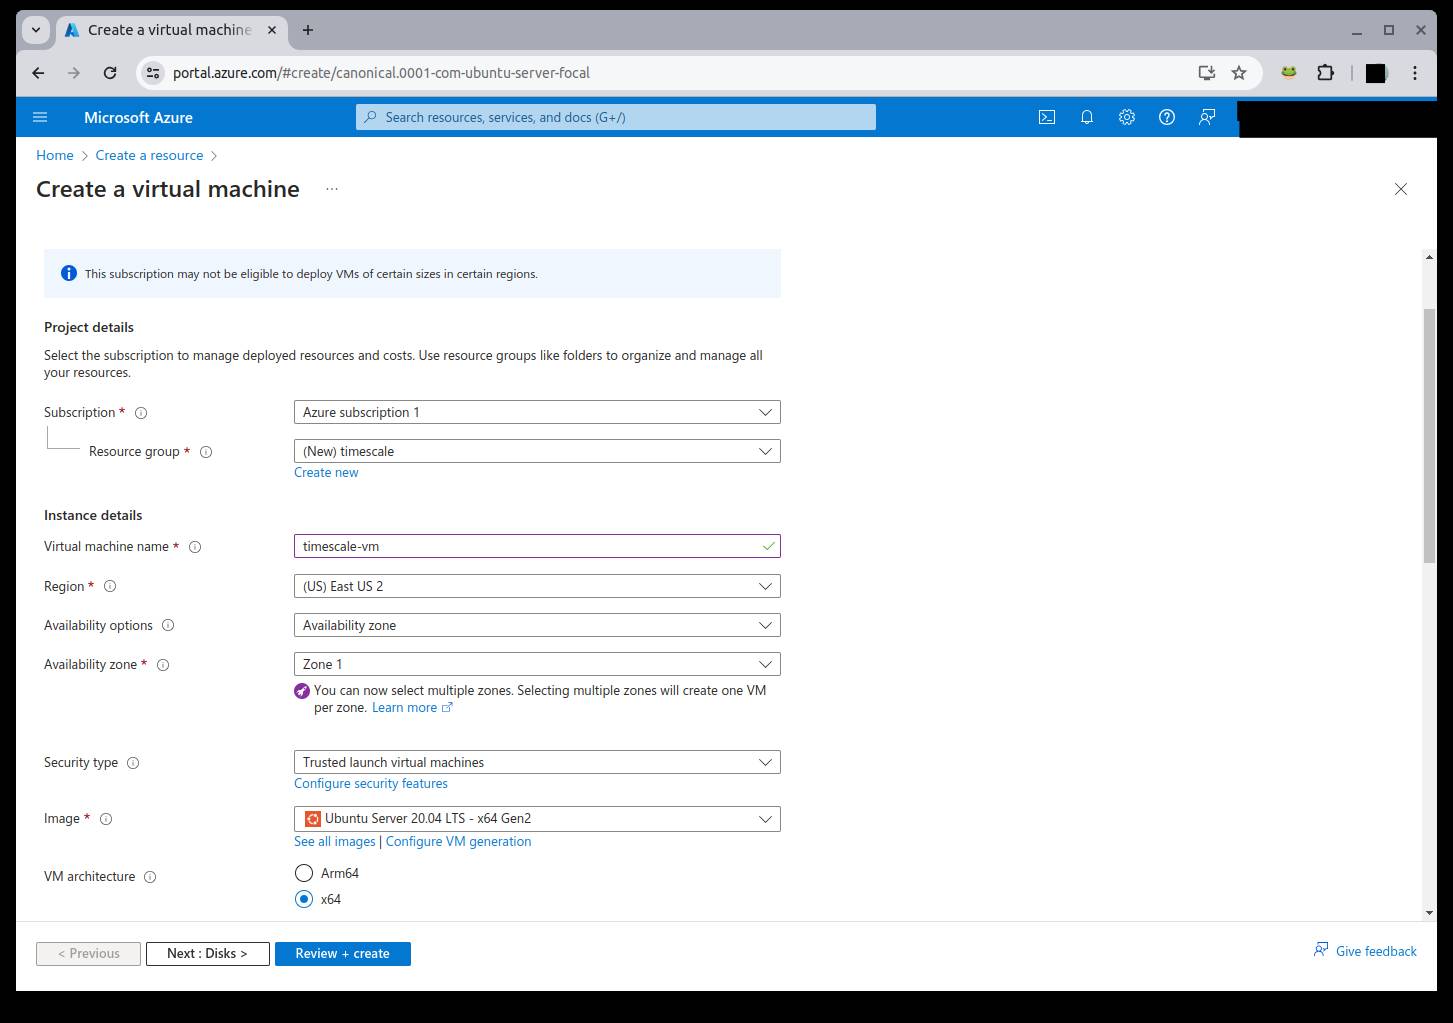
2. Configure the VM: Click on “Create” and follow these steps:
Basics:
- Subscription: Select your subscription.
- Resource group: Create a new resource group named
timescaleor use an existing one. - Virtual machine name: Enter
timescale-vm. - Region: Select your preferred region.
- Image: Ensure “Ubuntu Server 20.04 LTS” is selected.
- Size: Select
Standard_B1sfor this tutorial.
Administrator account:
- Authentication type: Select “Password”.
- Username: Enter your preferred username. We will use “timescale”.
- Password: Enter a strong password.
- Disks: Use the default settings for simplicity.
- Networking: Use the default settings.
- Management: Use the default settings.
- Advanced: Use the default settings.
- Tags: Optionally, add tags for resource management.
- Review + create: Review your settings.
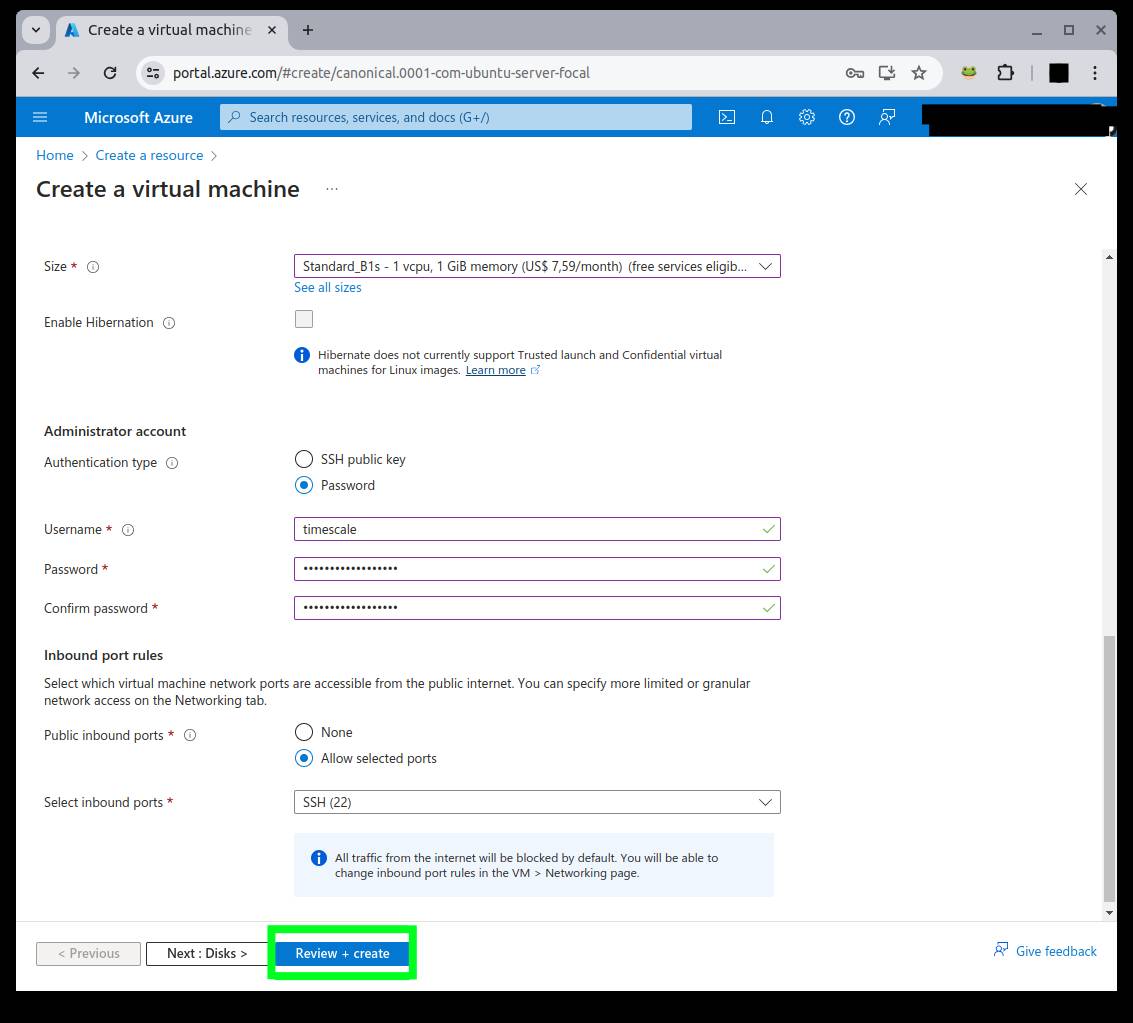
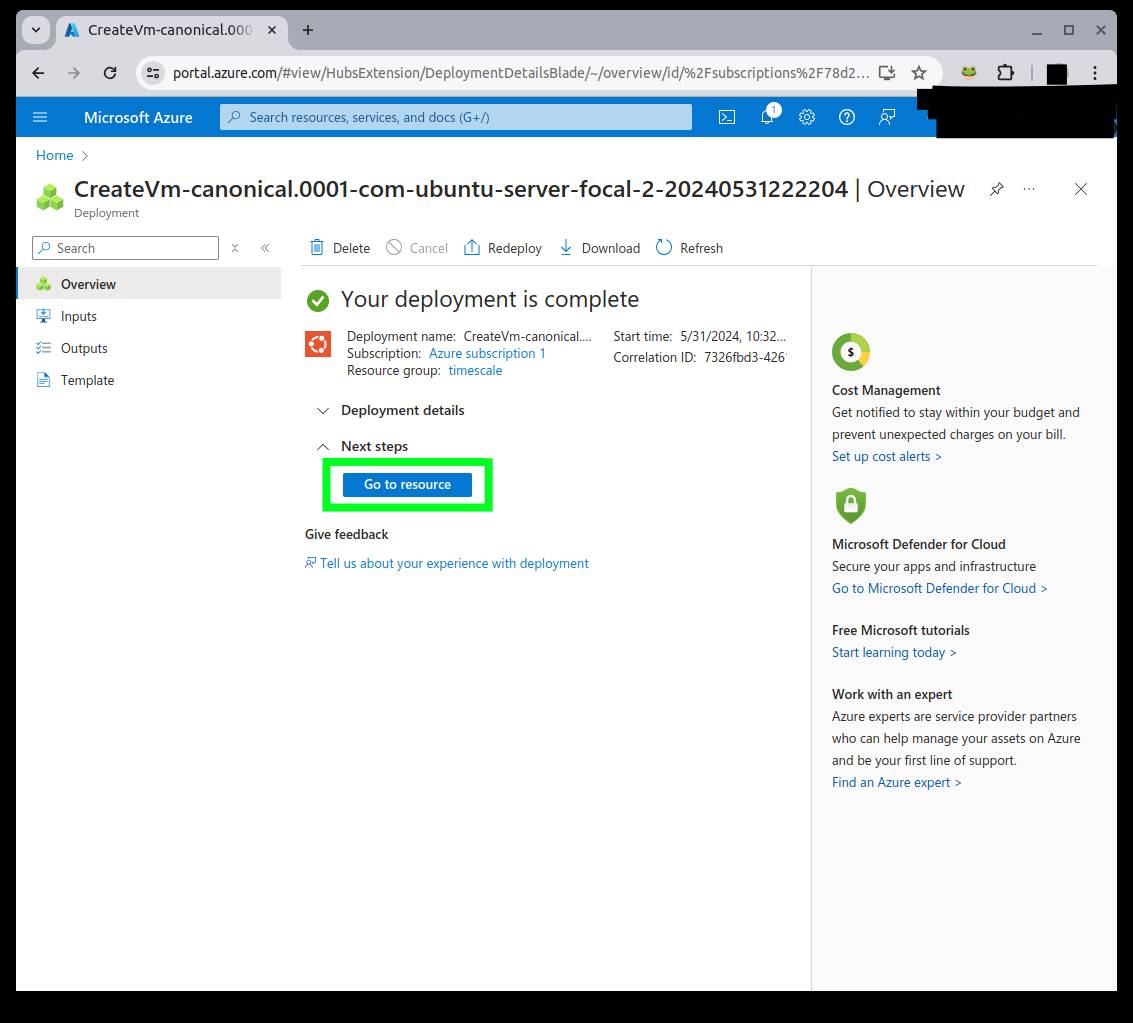
Click on “Create.”

Once the deployment is completed, click on “Go to resource.”
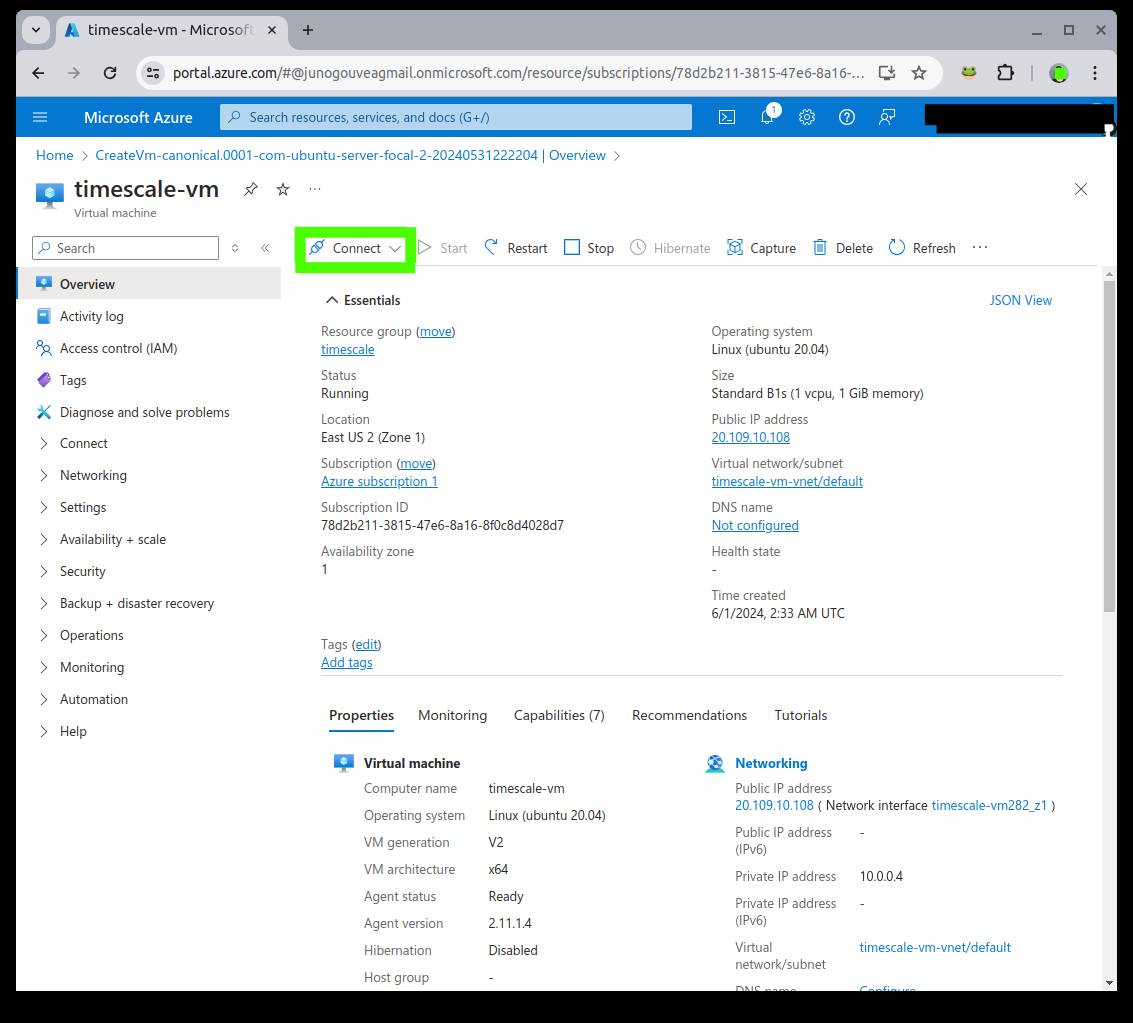
Connect to your VM
1. Once your VM is deployed, go to the “Overview” section of your VM and click on “Connect”.
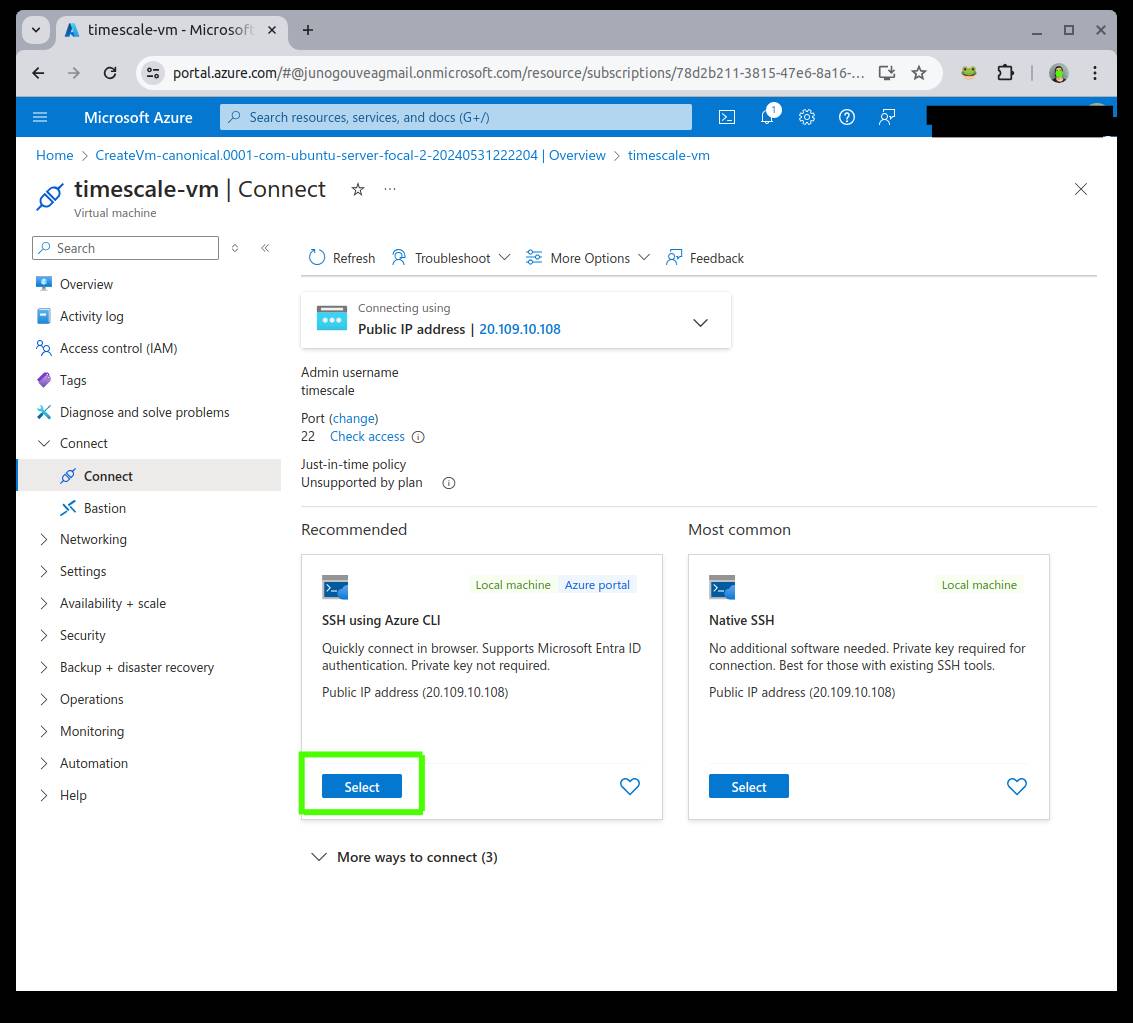
2. Select the SSH using Azure CLI. Click on “Select.”
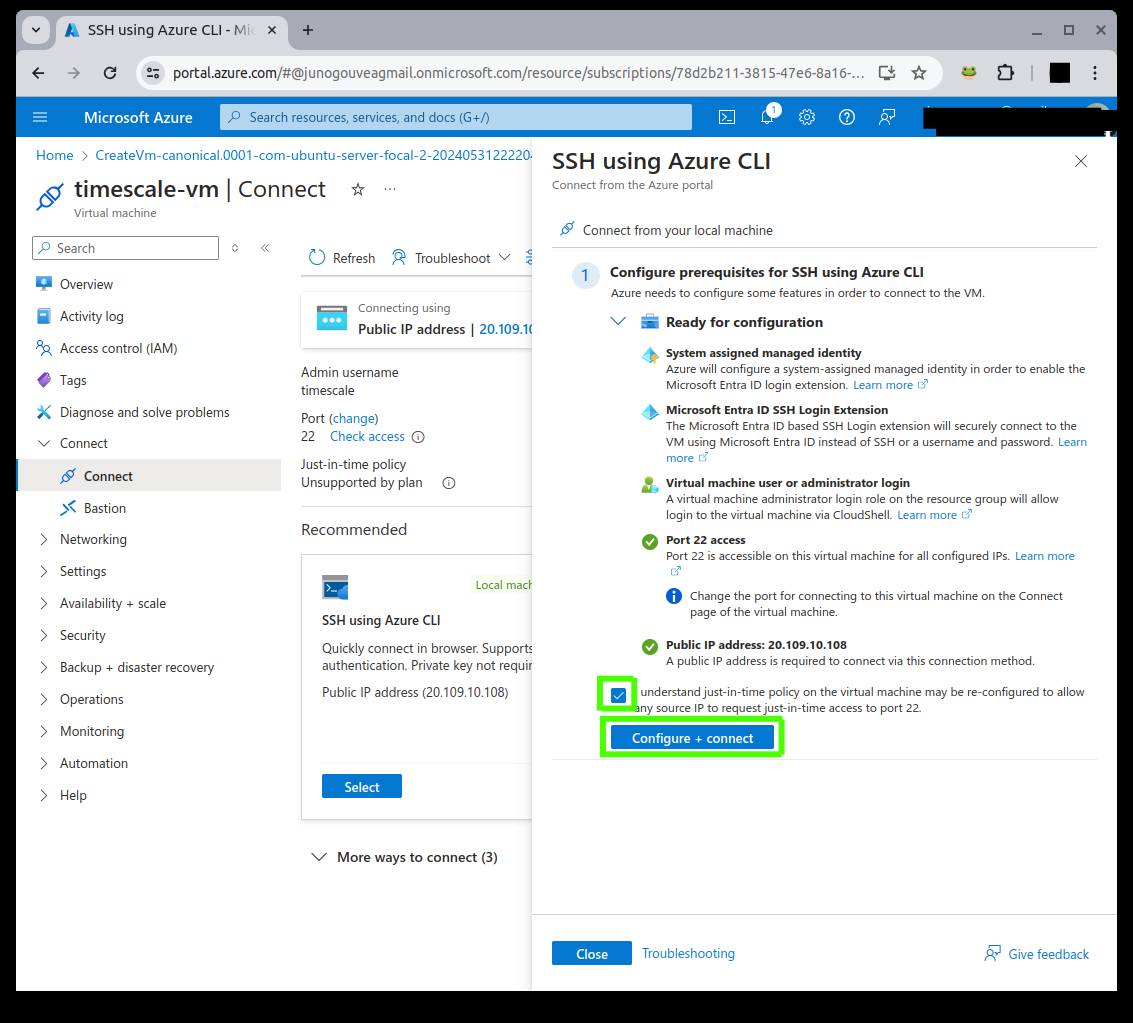
3. Follow the instructions to connect to your VM using SSH. Check the policies, and then click on “Configure + connect.”
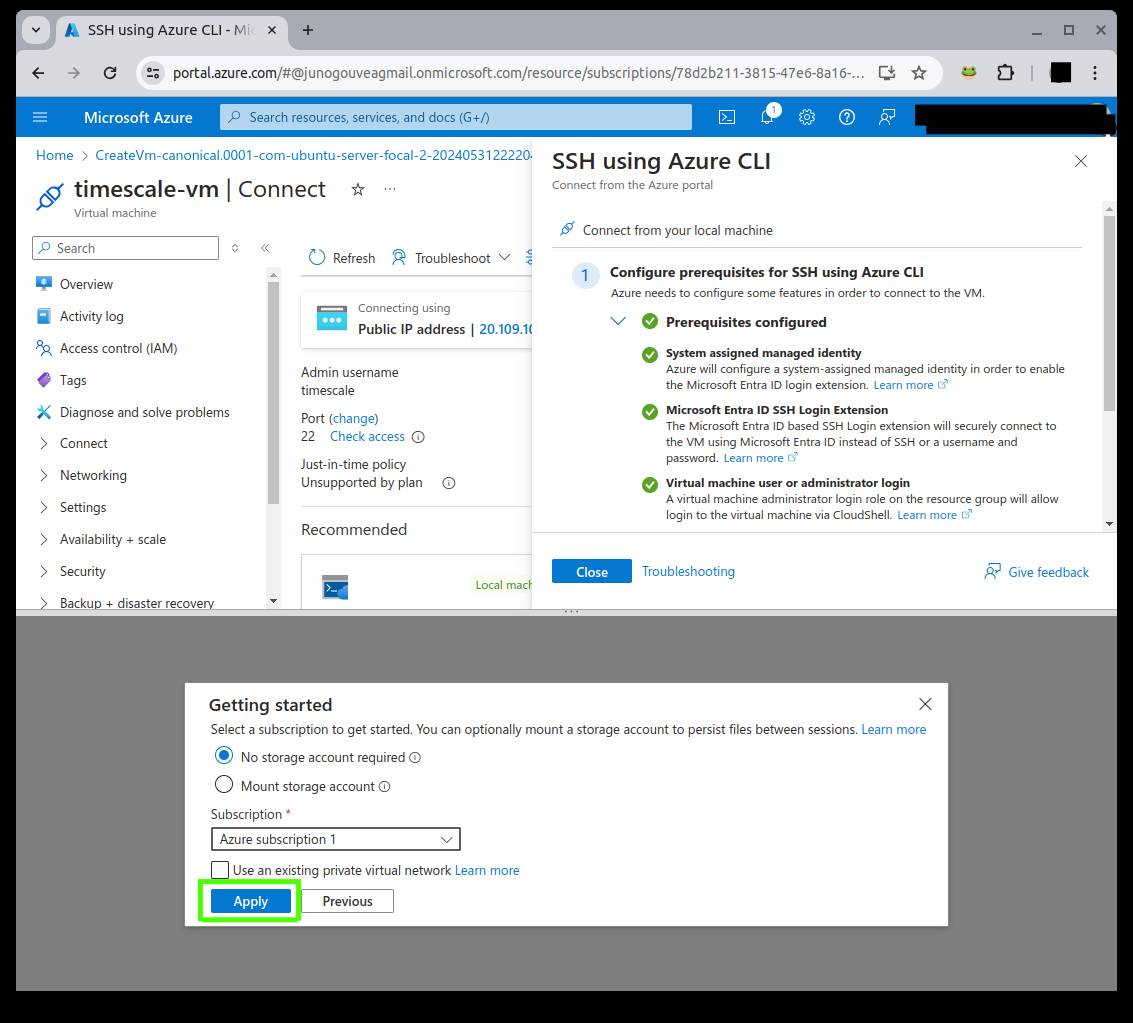
4. A tab will open. Click on “Apply” to continue.
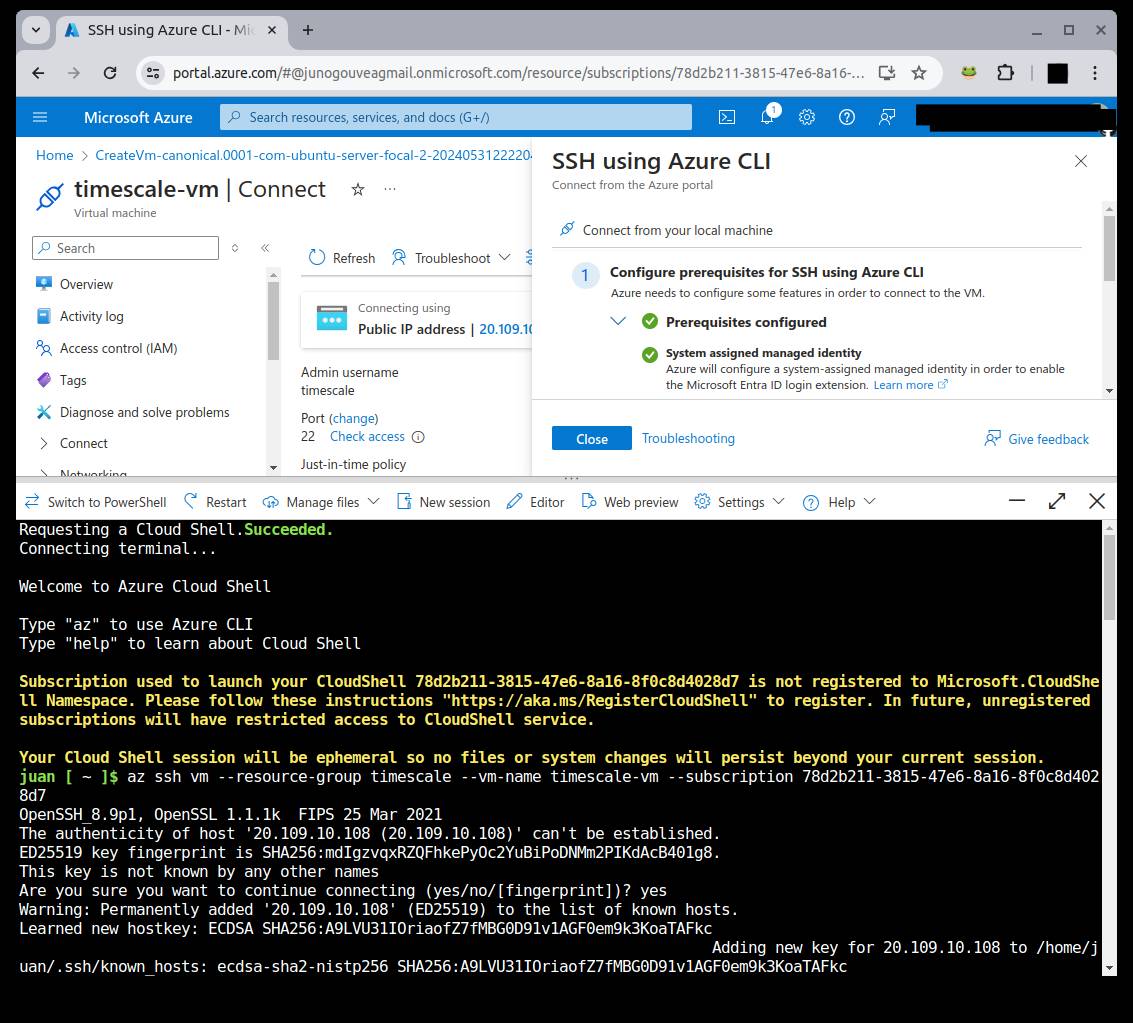
5. Finally, the terminal will open. The connection is established and now you can go on with the next step, which is installing TimescaleDB.
Install TimescaleDB
1. Add TimescaleDB PPA:
sudo apt install gnupg postgresql-common apt-transport-https lsb-release wgetsudo /usr/share/postgresql-common/pgdg/apt.postgresql.org.shecho "deb https://packagecloud.io/timescale/timescaledb/ubuntu/ $(lsb_release -c -s) main" | sudo tee /etc/apt/sources.list.d/timescaledb.listwget --quiet -O - https://packagecloud.io/timescale/timescaledb/gpgkey | sudo gpg --dearmor -o /etc/apt/trusted.gpg.d/timescaledb.gpgsudo apt update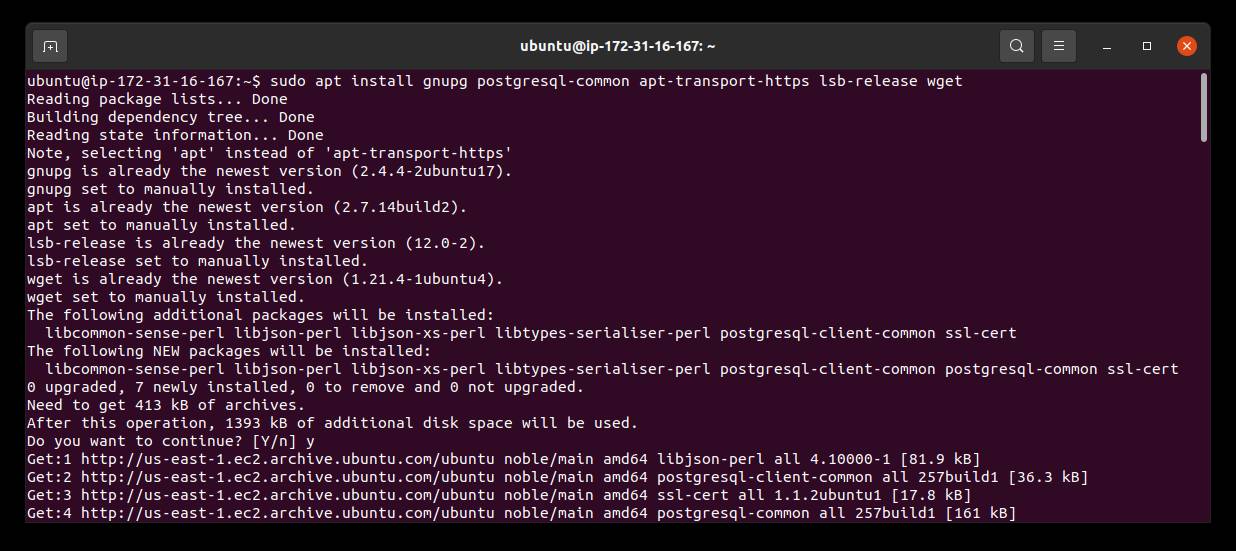
2. Install TimescaleDB:
sudo apt install timescaledb-2-postgresql-16 postgresql-clientConfigure PostgreSQL
1. Check PostgreSQL Version (Ensure it shows psql (PostgreSQL) 16.x):
psql --version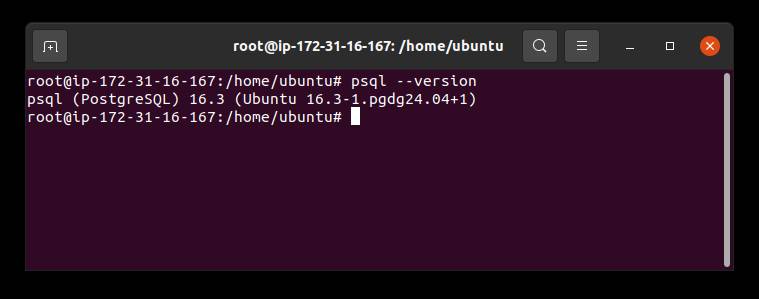
2. Modify configuration:
cd /etc/postgresql/16/mainsudo chmod 644 postgresql.confnano postgresql.conf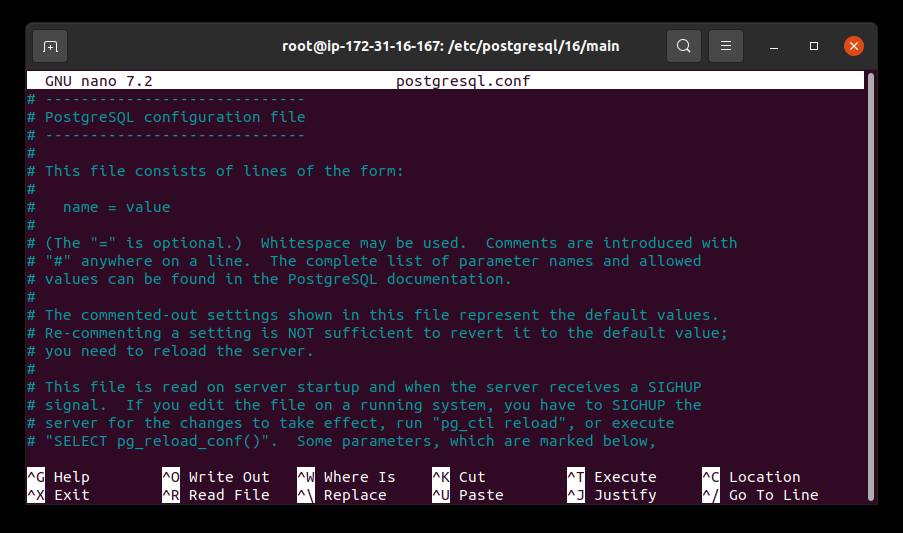
3. Update postgresql.conf:
Set listen_addresses to '*':
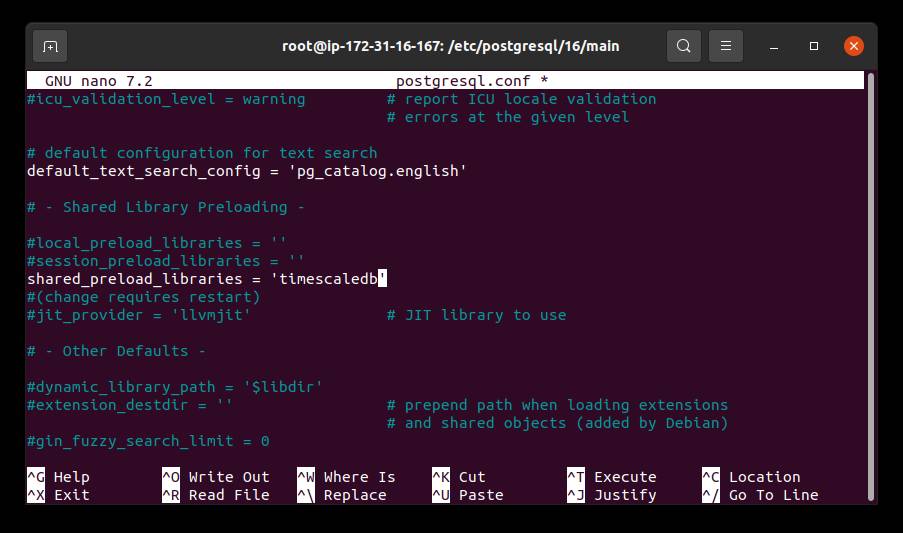
listen_addresses = '*'Set shared_preload_libraries to timescaledb:
shared_preload_libraries = 'timescaledb'Save and exit the editor.
4. Tune PostgreSQL:
sudo timescaledb-tune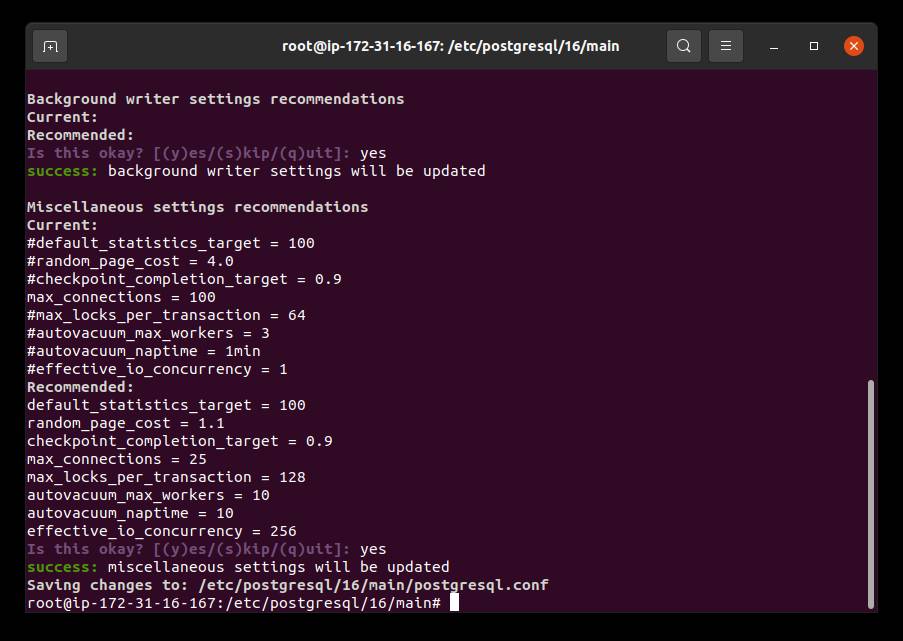
5. Restart PostgreSQL:
sudo systemctl restart postgresql6. Switch to PostgreSQL user:
sudo su - postgresUsing TimescaleDB
- Access PostgreSQL:
psql -U postgres2. Create database:
CREATE DATABASE tutorial;3. Connect to the database:
\c tutorial4. Initialize TimescaleDB extension:
CREATE EXTENSION IF NOT EXISTS timescaledb;5. Create a hypertable:
CREATE TABLE conditions (time TIMESTAMPTZ NOT NULL,location TEXT NOT NULL,temperature DOUBLE PRECISION NULL,humidity DOUBLE PRECISION NULL);SELECT create_hypertable('conditions', 'time');6. Insert data:
INSERT INTO conditions(time, location, temperature, humidity)VALUES (NOW(), 'office', 70.0, 50.0);7. Query data:
SELECT * FROM conditions ORDER BY time DESC LIMIT 100;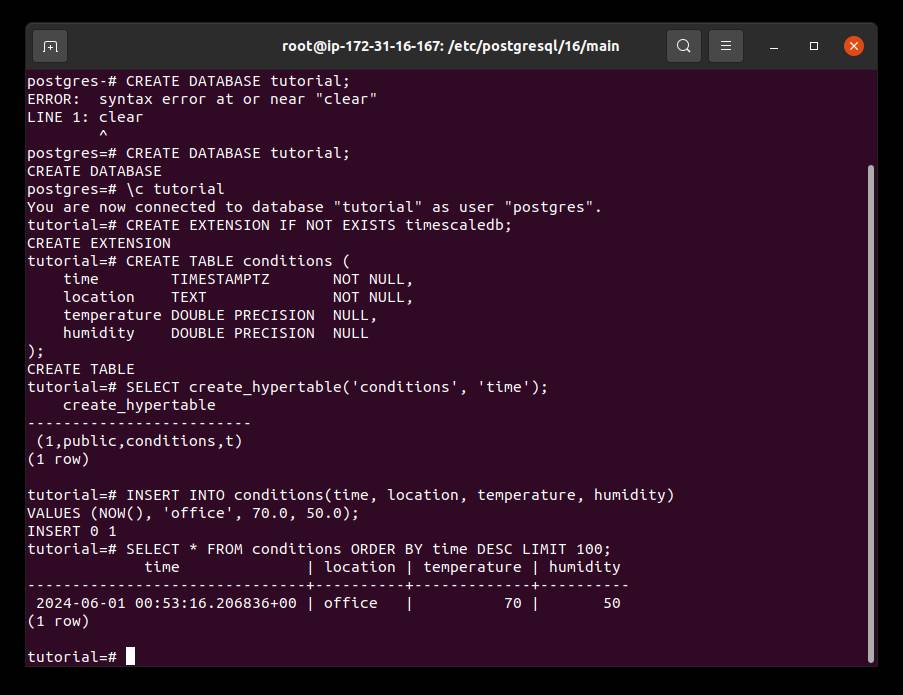
Next Steps
You now have TimescaleDB up and running on Azure. Explore more with sample datasets and advanced tutorials available in the TimescaleDB documentation. If you have any questions, feel free to join our Slack community or check out our GitHub repository (GitHub ⭐ are welcome!).
For smaller teams wanting to focus on application development and not their database or enterprises looking for scale, cost-effectiveness, and the peace of mind of a managed solution (with one-click high availability, forking, connection pooling, a low-cost storage tier for older data, SOC 2 Type 2 compliance, and much more), try Timescale Cloud. It’s free for 30 days, no credit card required.
Ingest and query in milliseconds, even at terabyte scale.