包阅导读总结
1.
关键词:Form 组件、Ant Design、校验规则、Store、实现原理
2.
总结:本文主要介绍了手写中后台系统常用的 Form 组件的实现原理,包括通过 Store 保存表单值,利用 Item 组件同步和校验,对比了自实现与 antd 的 Form 实现的异同,antd 有独立的 FormStore 及 useForm hook。
3.
– 手写 Form 组件的背景
– 中后台系统常用 Ant Design 的 Form 组件,介绍其常见用法。
– 手写 Form 组件的原理
– 每个表单项有 value 和 onChange 参数,值收集到全局 Store 中。
– 通过 Context 让 Item 组件获取 Store 同步表单值。
– 详细介绍了 Form 组件和 Item 组件的代码实现及相关逻辑。
– 与 antd 的 Form 实现对比
– antd 有 FormStore 类和 useForm hook,可独立创建 store 并通过 context 传递。
– 自实现的 Store 内置在 Form 组件中,思路相似。
思维导图: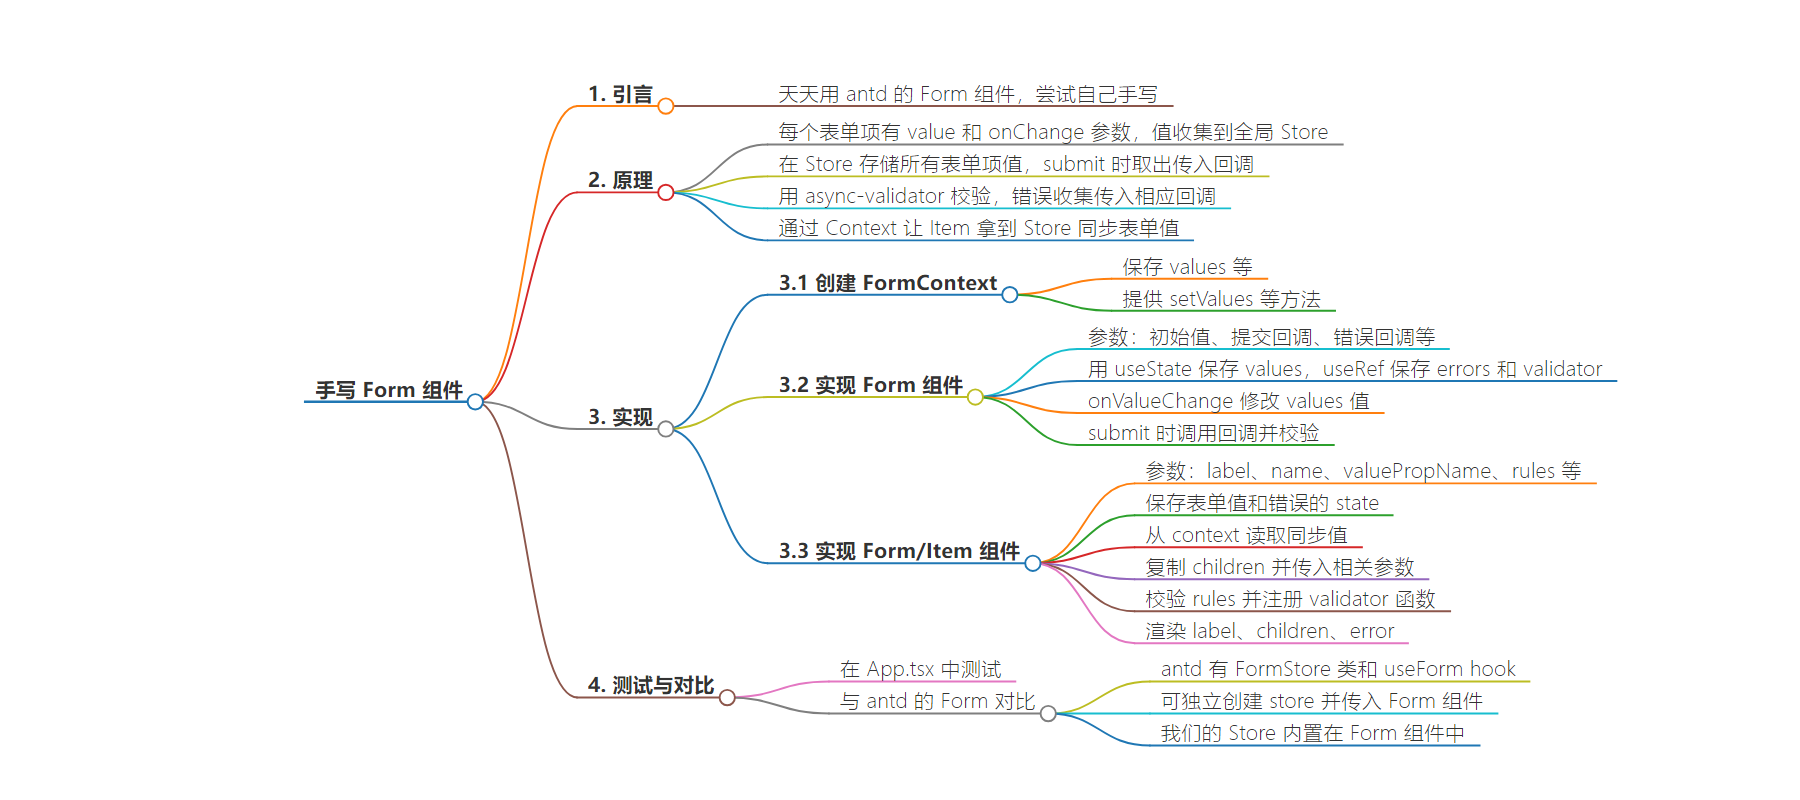
文章地址:https://mp.weixin.qq.com/s/GiFSdWs5OZaLYrU3UBs5Cw
文章来源:mp.weixin.qq.com
作者:神说要有光zxg
发布时间:2024/9/3 8:35
语言:中文
总字数:2687字
预计阅读时间:11分钟
评分:91分
标签:前端开发,React,Form组件,表单校验,Ant Design
以下为原文内容
本内容来源于用户推荐转载,旨在分享知识与观点,如有侵权请联系删除 联系邮箱 media@ilingban.com
大家写中后台系统的时候,应该都用过 Ant Design 的 Form 组件:
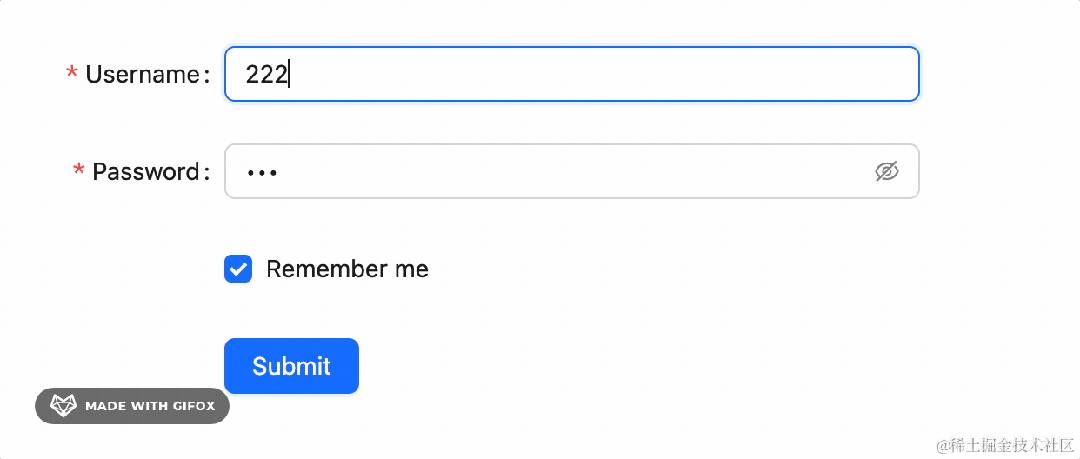
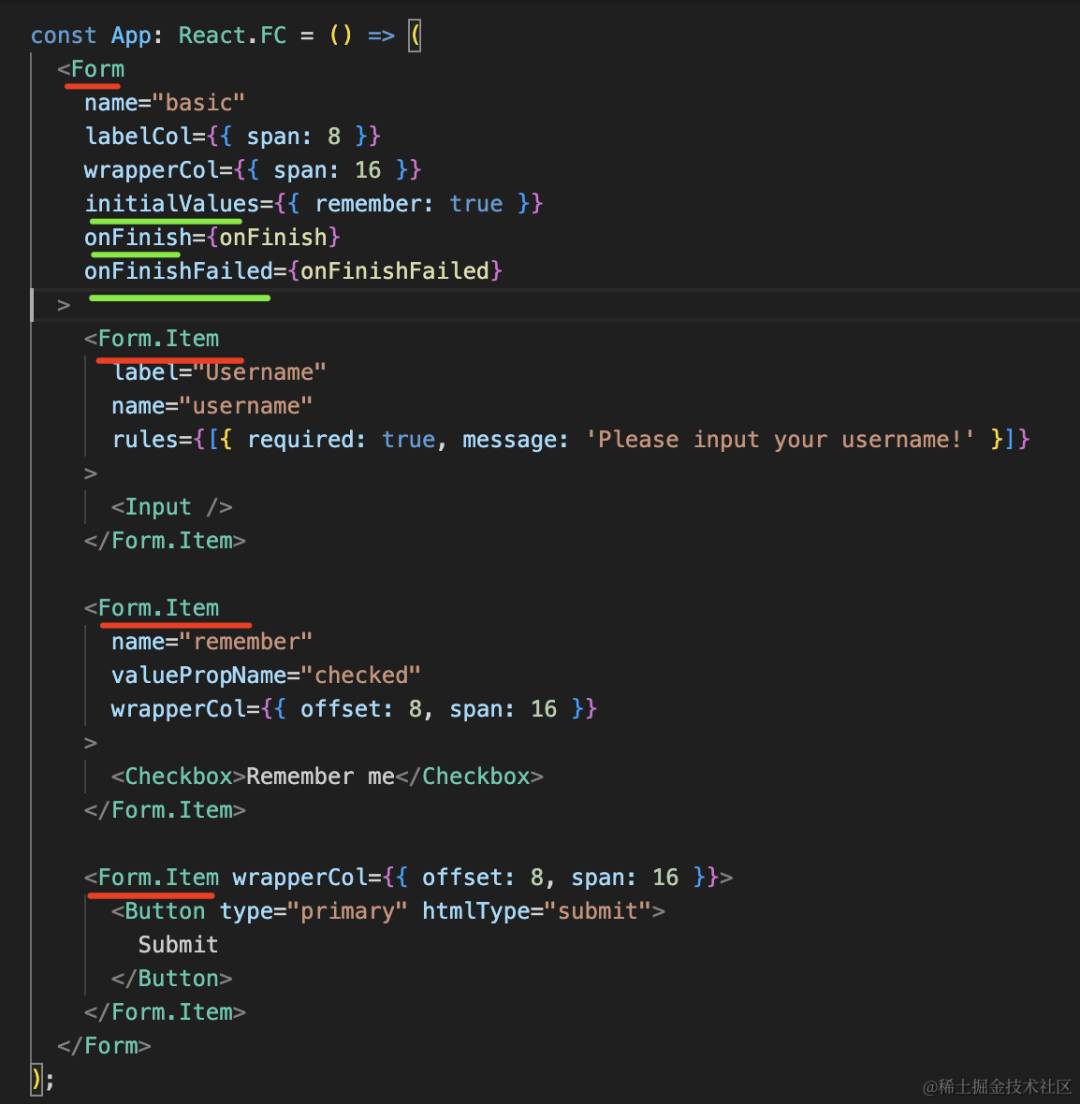
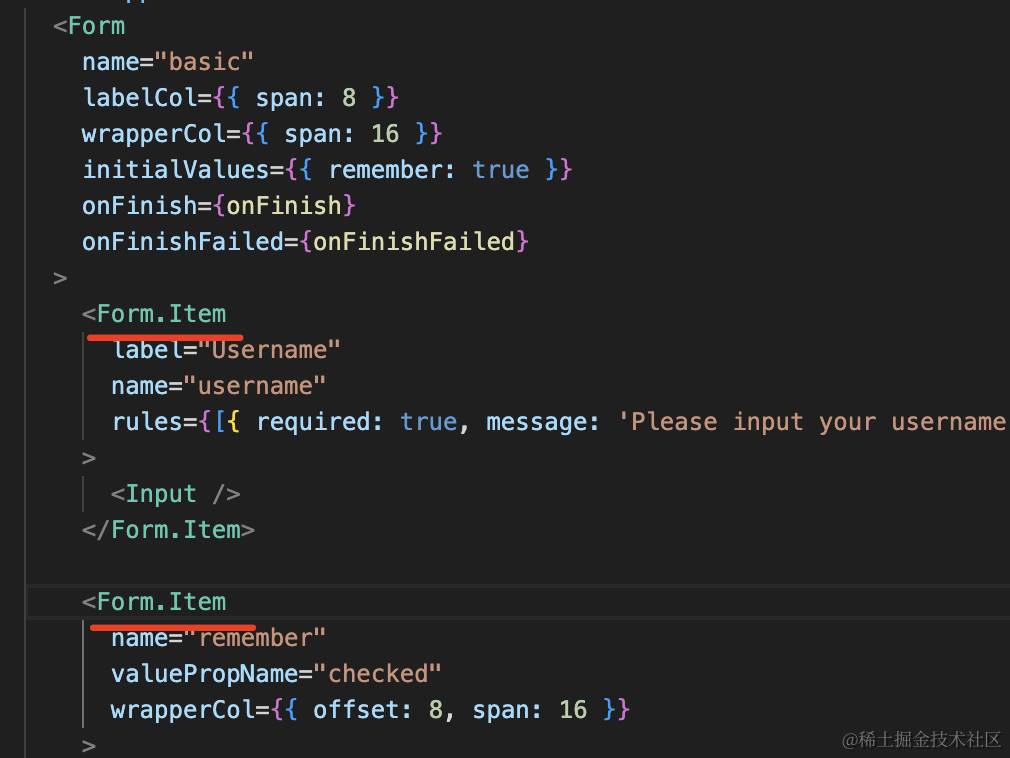
用 Form.Item 包裹 Input、Checkbox 等表单项,可以定义 rules,也就是每个表单项的校验规则。
外层 Form 定义 initialValues 初始值,onFinish 当提交时的回调,onFinishFailed 当提交有错误时的回调。
Form 组件每天都在用,那它是怎么实现的呢?
其实原理不复杂。
每个表单项都有 value 和 onChange 参数,我们只要在 Item 组件里给 children 传入这俩参数,把值收集到全局的 Store 里。

这样在 Store 里就存储了所有表单项的值,在 submit 时就可以取出来传入 onFinish 回调。
并且,还可以用 async-validator 对表单项做校验,如果有错误,就把错误收集起来传入 onFinishFailed 回调。
那这些 Item 是怎么拿到 Store 来同步表单值的呢?
用 Context。
在 Form 里保存 Store 到 Context,然后在 Item 里取出 Context 的 Store 来,同步表单值到 Store。
我们来写下试试:
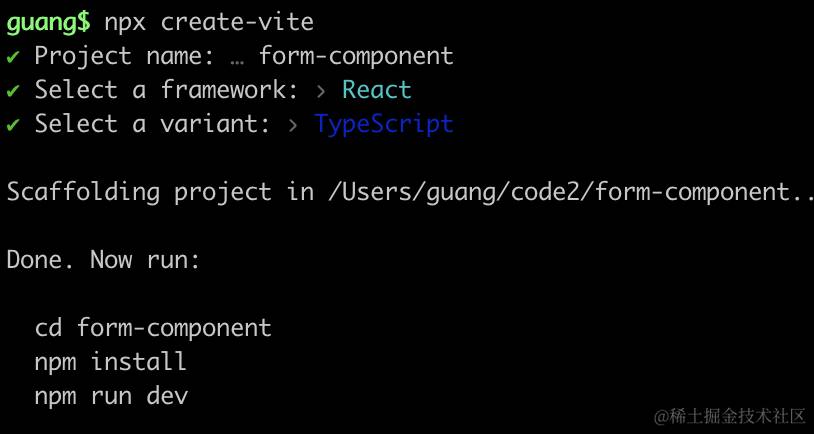
npxcreate-vite
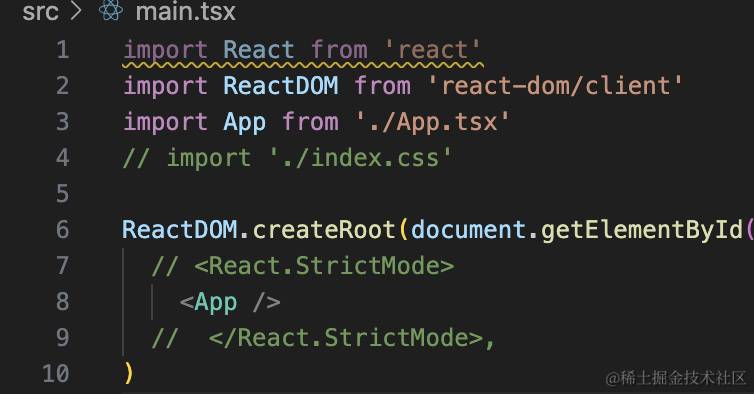
安装依赖,改下 main.tsx
然后创建 Form/FormContext.ts
import{createContext}from'react';

exportinterfaceFormContextProps{
values?:Record<string,any>;
setValues?:(values:Record<string,any>)=>void;
onValueChange?:(key:string,value:any)=>void;
validateRegister?:(name:string,cb:Function)=>void;
}

exportdefaultcreateContext<FormContextProps>({})
在 context 里保存 values 也就是 Store 的值。
然后添加 setValues 来修改 values
onValueChange 监听 value 变化
validateRegister 用来注册表单项的校验规则,也就是 rules 指定的那些。
然后写下 Form 组件 Form/Form.tsx
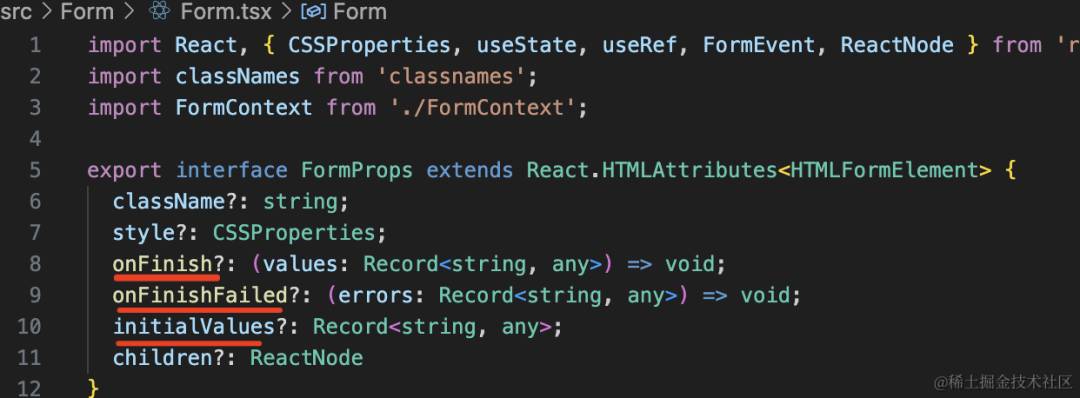
参数传入初始值 initialValues、点击提交的回调 onFinish、点击提交有错误时的回调 onFinishFailed。
这里的 Record<string,any> 是 ts 的类型,任意的对象的意思。
用 useState 保存 values,用 useRef 保存 errors 和 validator

为什么不都用 useState 呢?
因为修改 state 调用 setState 的时候会触发重新渲染。
而 ref 的值保存在 current 属性上,修改它不会触发重新渲染。
errors、validator 这种就是不需要触发重新渲染的数据。
然后 onValueChange 的时候就是修改 values 的值。
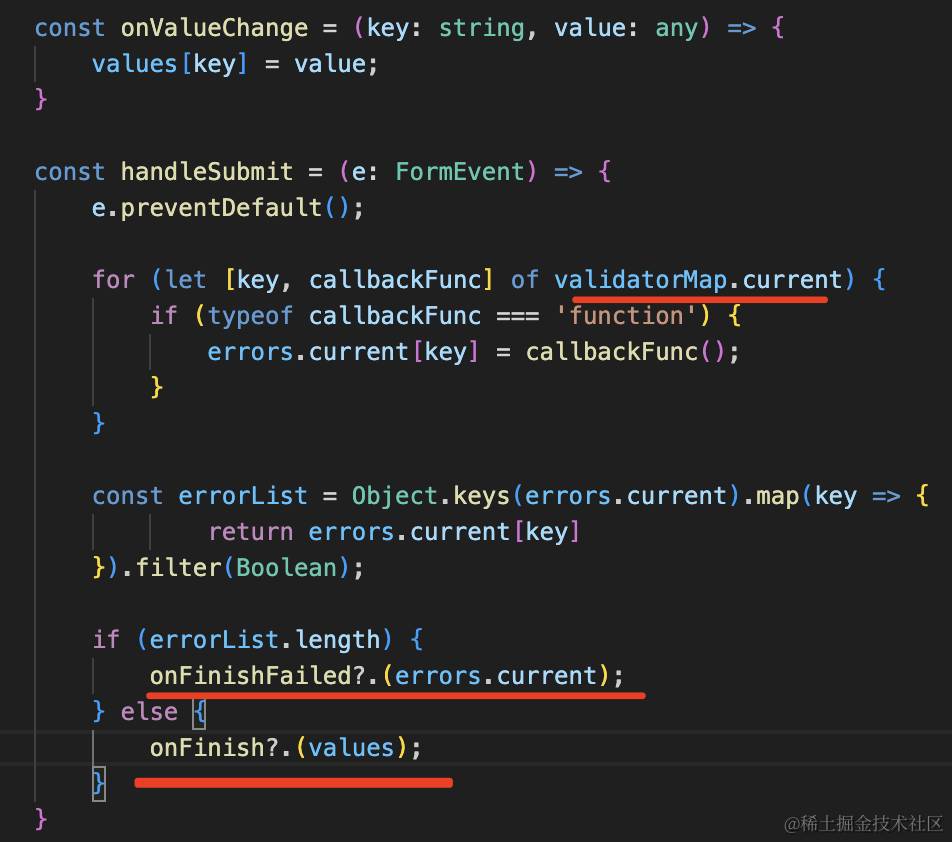
submit 的时候调用 onFinish,传入 values,再调用所有 validator 对值做校验,如果有错误,调用 onFinishFailed 回调:
然后把这些方法保存到 context 中,并且给原生 form 元素添加 onSubmit 的处理:
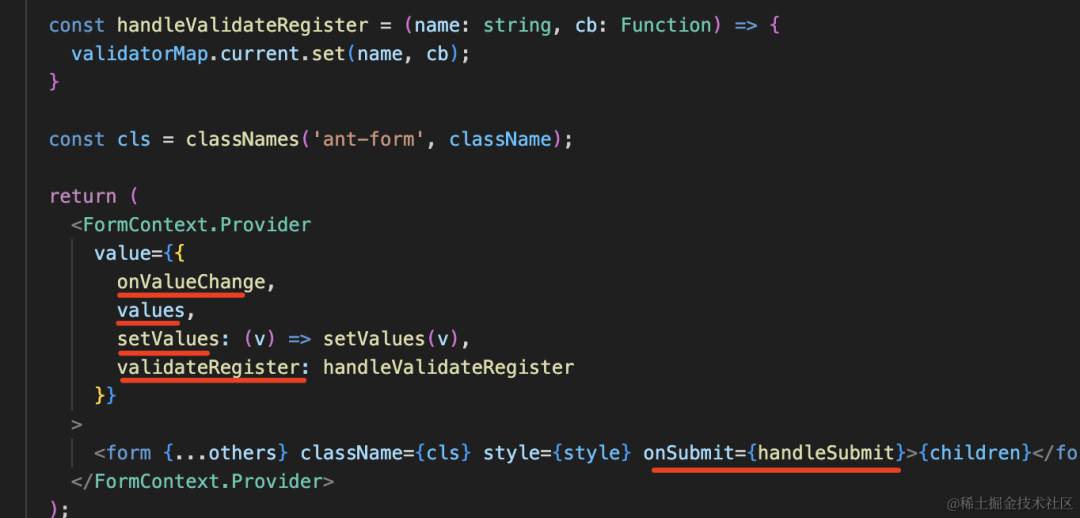
importReact,{CSSProperties,useState,useRef,FormEvent,ReactNode}from'react';
importclassNamesfrom'classnames';
importFormContextfrom'./FormContext';

exportinterfaceFormPropsextendsReact.HTMLAttributes<HTMLFormElement>{
className?:string;
style?:CSSProperties;
onFinish?:(values:Record<string,any>)=>void;
onFinishFailed?:(errors:Record<string,any>)=>void;
initialValues?:Record<string,any>;
children?:ReactNode
}

constForm=(props:FormProps)=>{
const{
className,
style,
children,
onFinish,
onFinishFailed,
initialValues,
...others
}=props;

const[values,setValues]=useState<Record<string,any>>(initialValues||{});

constvalidatorMap=useRef(newMap<string,Function>());

consterrors=useRef<Record<string,any>>({});

constonValueChange=(key:string,value:any)=>{
values[key]=value;
}

consthandleSubmit=(e:FormEvent)=>{
e.preventDefault();

for(let[key,callbackFunc]ofvalidatorMap.current){
if(typeofcallbackFunc==='function'){
errors.current[key]=callbackFunc();
}
}

consterrorList=Object.keys(errors.current).map(key=>{
returnerrors.current[key]
}).filter(Boolean);

if(errorList.length){
onFinishFailed?.(errors.current);
}else{
onFinish?.(values);
}
}

consthandleValidateRegister=(name:string,cb:Function)=>{
validatorMap.current.set(name,cb);
}

constcls=classNames('ant-form',className);

return(
<FormContext.Provider
value={{
onValueChange,
values,
setValues:(v)=>setValues(v),
validateRegister:handleValidateRegister
}}
>
<form{...others}className={cls}style={style}onSubmit={handleSubmit}>{children}</form>
</FormContext.Provider>
);
}

exportdefaultForm;
这里用到了 classnames 包要安装下:
npminstall--saveclassnames
接下来添加 Form/Item.tsx,也就是包装表单项用的组件:
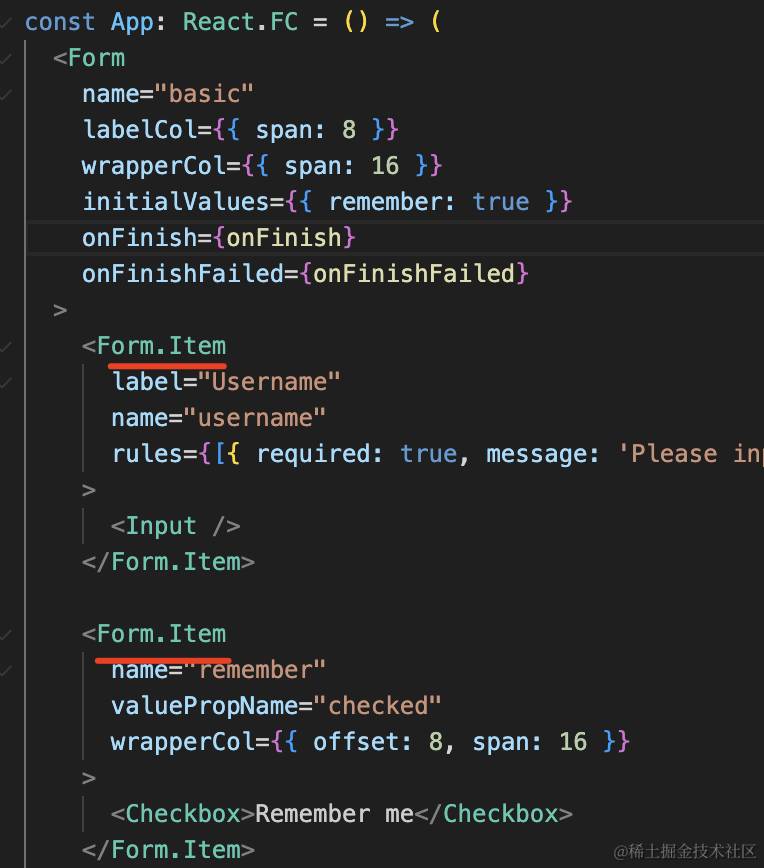
首先是参数,可以传入 label、name、valuePropName、rules 等:
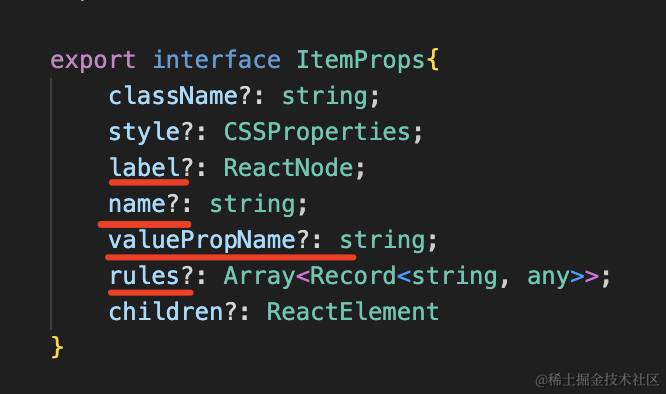
valuePropName 默认是 value,当 checkbox 等表单项就要取 checked 属性了:

这里 children 类型为 ReactElement 而不是 ReactNode。
因为 ReactNode 除了包含 ReactElement 外,还有 string、number 等:
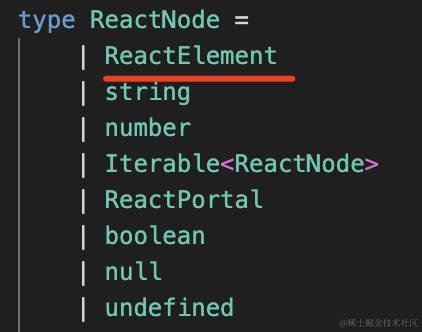
而作为 Form.Item 组件的 children,只能是 ReactElement。
然后实现下 Item 组件:
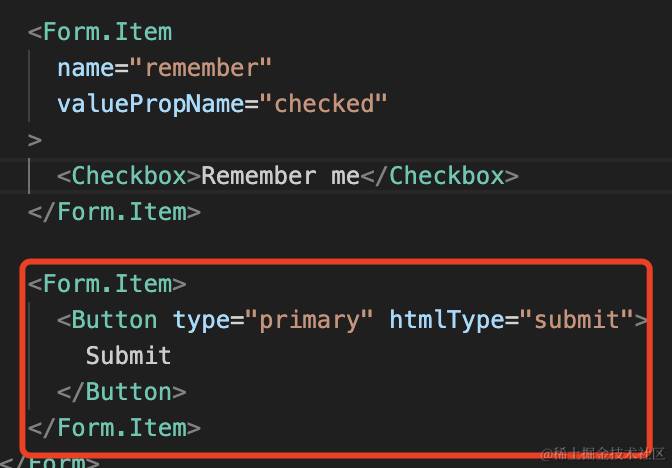
如果没有传入 name 参数,那就直接返回 children。
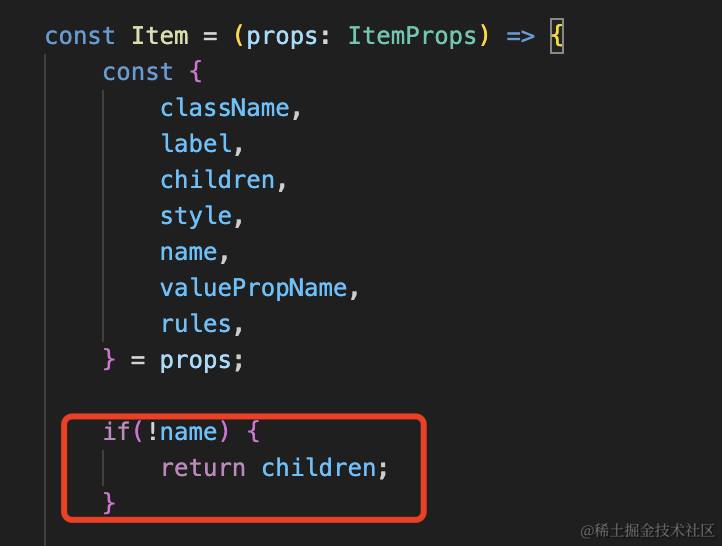
比如这种就不需要包装:
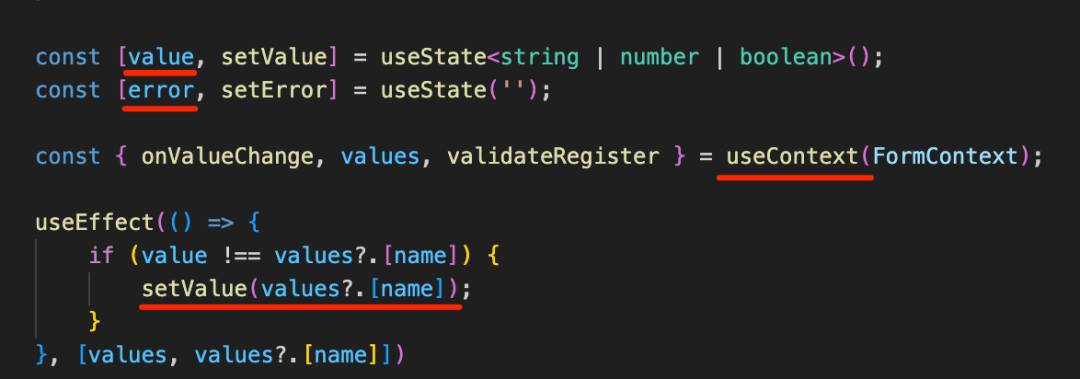
创建两个 state,分别存储表单值 value 和 error。
从 context 中读取对应 name 的 values 的值,同步设置 value:
然后 React.cloneElement 复制 chilren,额外传入 value、onChange 等参数:
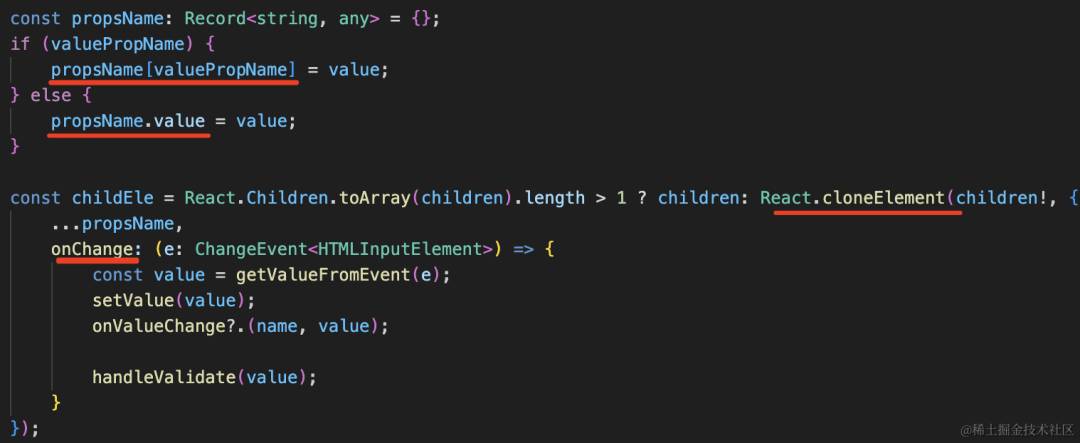
onChange 回调里设置 value,并且修改 context 里的 values 的值:

这里的 getValueFromEvent 是根据表单项类型来获取 value:
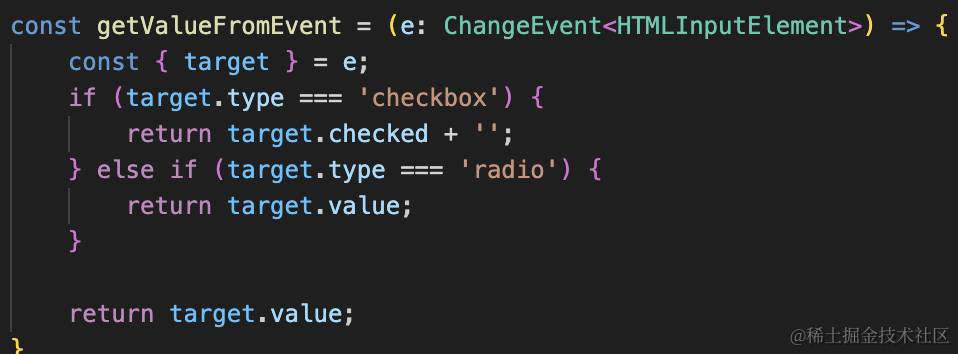
然后是校验 rules,这个是用 async-validator 这个包:
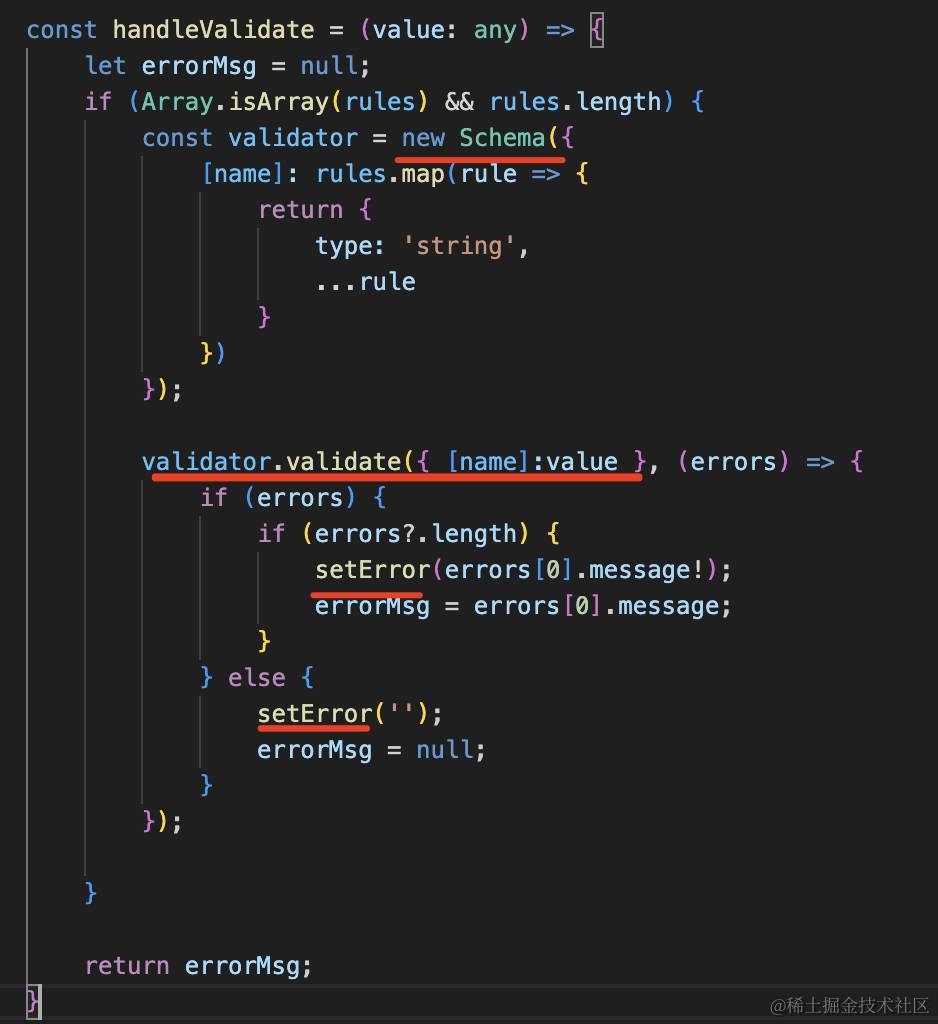
在 context 注册 name 对应的 validator 函数:

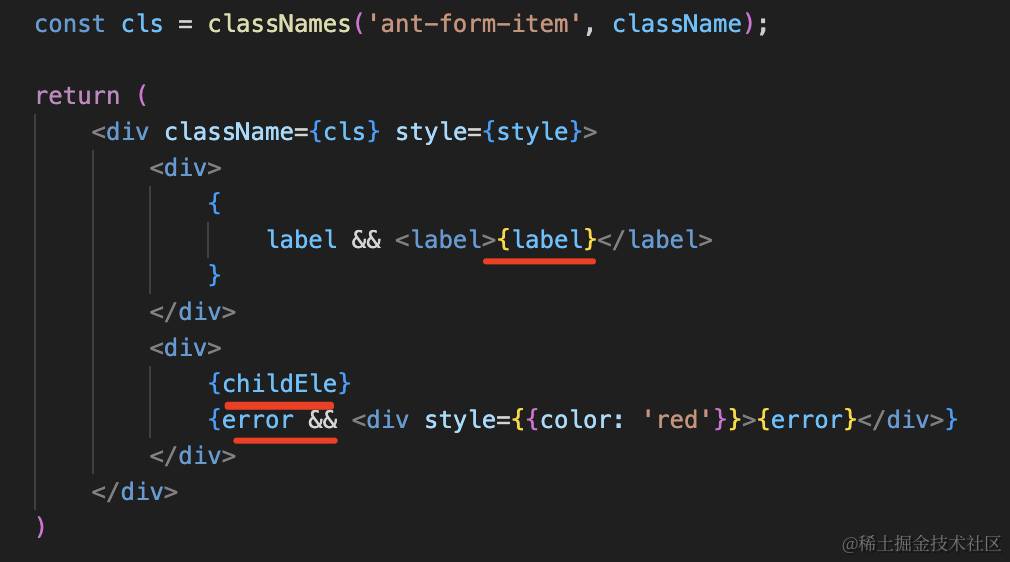
然后 Item 组件渲染 label、children、error
importReact,{ReactNode,CSSProperties,useState,useContext,ReactElement,useEffect,PropsWithChildren,ChangeEvent}from'react';
importclassNamesfrom'classnames';
importSchema,{Rules}from'async-validator';

importFormContextfrom'./FormContext';

exportinterfaceItemProps{
className?:string;
style?:CSSProperties;
label?:ReactNode;
name?:string;
valuePropName?:string;
rules?:Array<Record<string,any>>;
children?:ReactElement
}

constgetValueFromEvent=(e:ChangeEvent<HTMLInputElement>)=>{
const{target}=e;
if(target.type==='checkbox'){
returntarget.checked;
}elseif(target.type==='radio'){
returntarget.value;
}

returntarget.value;
}

constItem=(props:ItemProps)=>{
const{
className,
label,
children,
style,
name,
valuePropName,
rules,
}=props;

if(!name){
returnchildren;
}

const[value,setValue]=useState<string|number|boolean>();
const[error,setError]=useState('');

const{onValueChange,values,validateRegister}=useContext(FormContext);

useEffect(()=>{
if(value!==values?.[name]){
setValue(values?.[name]);
}
},[values,values?.[name]])

consthandleValidate=(value:any)=>{
leterrorMsg=null;
if(Array.isArray(rules)&&rules.length){
constvalidator=newSchema({
[name]:rules.map(rule=>{
return{
type:'string',
...rule
}
})
});

validator.validate({[name]:value},(errors)=>{
if(errors){
if(errors?.length){
setError(errors[0].message!);
errorMsg=errors[0].message;
}
}else{
setError('');
errorMsg=null;
}
});

}

returnerrorMsg;
}

useEffect(()=>{
validateRegister?.(name,()=>handleValidate(value));
},[value]);

constpropsName:Record<string,any>={};
if(valuePropName){
propsName[valuePropName]=value;
}else{
propsName.value=value;
}

constchildEle=React.Children.toArray(children).length>1?children:React.cloneElement(children!,{
...propsName,
onChange:(e:ChangeEvent<HTMLInputElement>)=>{
constvalue=getValueFromEvent(e);
setValue(value);
onValueChange?.(name,value);

handleValidate(value);
}
});

constcls=classNames('ant-form-item',className);

return(
<divclassName={cls}style={style}>
<div>
{
label&&<label>{label}</label>
}
</div>
<div>
{childEle}
{error&&<divstyle={{color:'red'}}>{error}</div>}
</div>
</div>
)
}

exportdefaultItem;
安装用到的 async-validator:
npminstall--saveasync-validator
然后在 Form/index.tsx 导出下:
importInternalFormfrom'./Form';
importItemfrom'./Item';

typeInternalFormType=typeofInternalForm;

interfaceFormInterfaceextendsInternalFormType{
Item:typeofItem;
}

constForm=InternalFormasFormInterface;

Form.Item=Item;

exportdefaultForm;
主要是把 Item 挂在 Form 下。
在 App.tsx 测试下:
import{Button,Checkbox,Input}from"antd";
importFormfrom"./Form/index";

constBasic:React.FC=()=>{
constonFinish=(values:any)=>{
console.log('Success:',values);
};

constonFinishFailed=(errorInfo:any)=>{
console.log('Failed:',errorInfo);
};

return(
<Form
initialValues={{remember:true,username:'神说要有光'}}
onFinish={onFinish}
onFinishFailed={onFinishFailed}
>
<Form.Item
label="Username"
name="username"
rules={[
{required:true,message:'请输入用户名!'},
{max:6,message:'长度不能大于6'}
]}
>
<Input/>
</Form.Item>

<Form.Item
label="Password"
name="password"
rules={[{required:true,message:'请输入密码!'}]}
>
<Input.TextArea/>
</Form.Item>

<Form.Itemname="remember"valuePropName="checked">
<Checkbox>记住我</Checkbox>
</Form.Item>

<Form.Item>
<div>
<Buttontype="primary"htmlType="submit">
登录
</Button>
</div>
</Form.Item>
</Form>
);
};

exportdefaultBasic;
除了 Form 外,具体表单项用的 antd 的组件。
试一下:
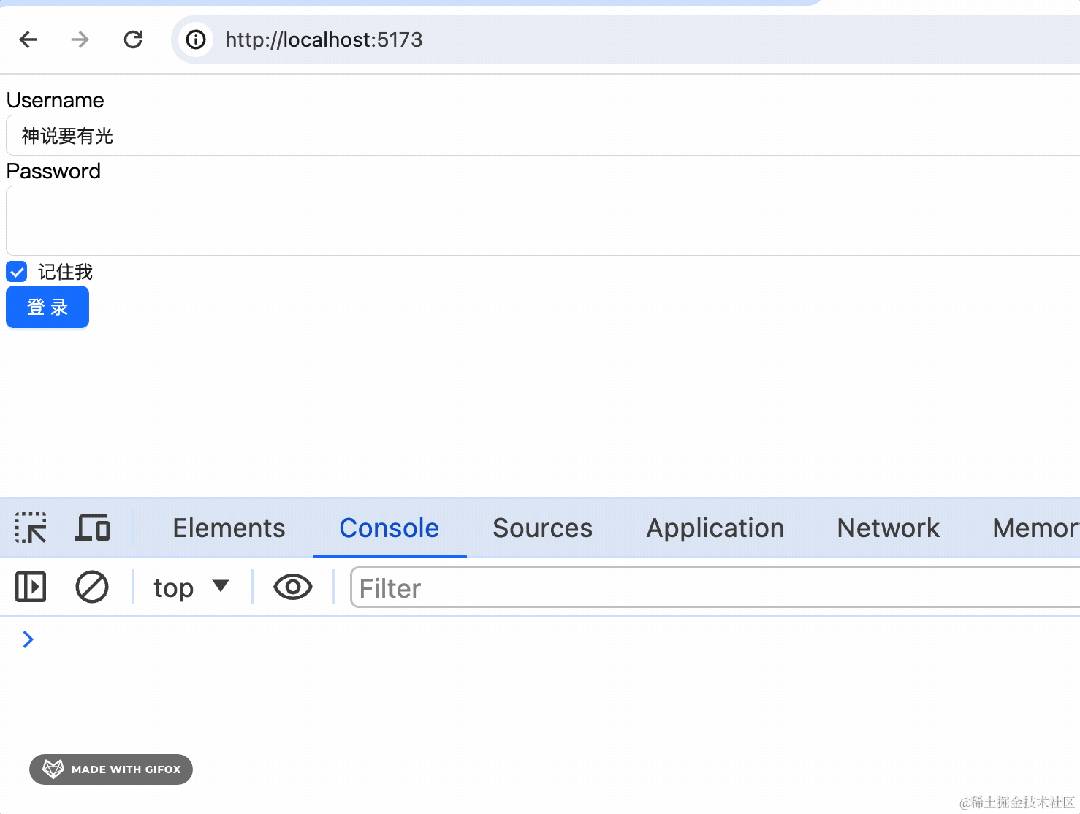
form 的 initialValues 的设置、表单的值的保存,规则的校验和错误显示,都没问题。
这样,Form 组件的核心功能就完成了。
核心就是一个 Store 来保存表单的值,然后用 Item 组件包裹具体表单,设置 value 和 onChange 来同步表单的值。
当值变化以及 submit 的时候用 async-validator 来校验。
那 antd 的 Form 也是这样实现的么?
基本是一样的。
我们来看下源码:
antd 的 Form 有个叫 FormStore 的类:
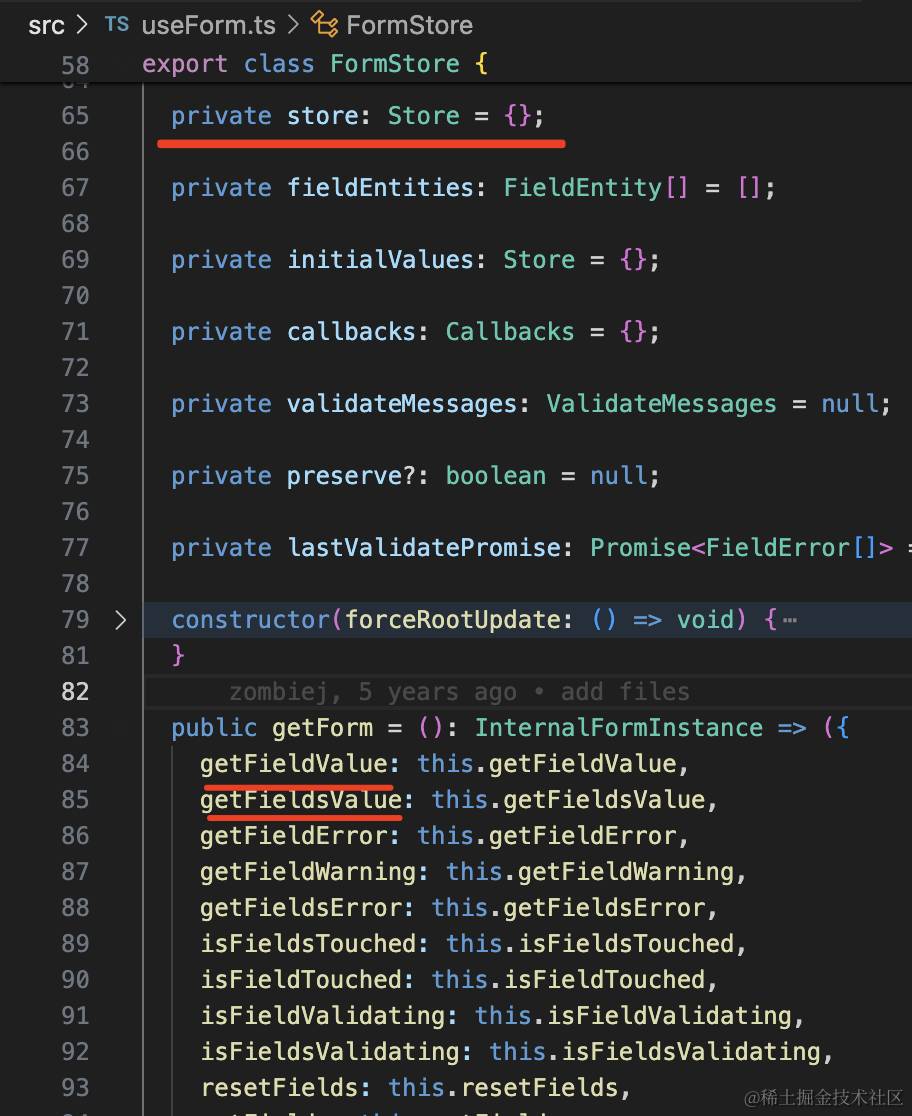
它的 store 属性保存表单值,然后暴露 getFieldValue、setFieldValue 等方法来读写 store。
然后它提供了一个 useForm 的 hook 来创建 store:
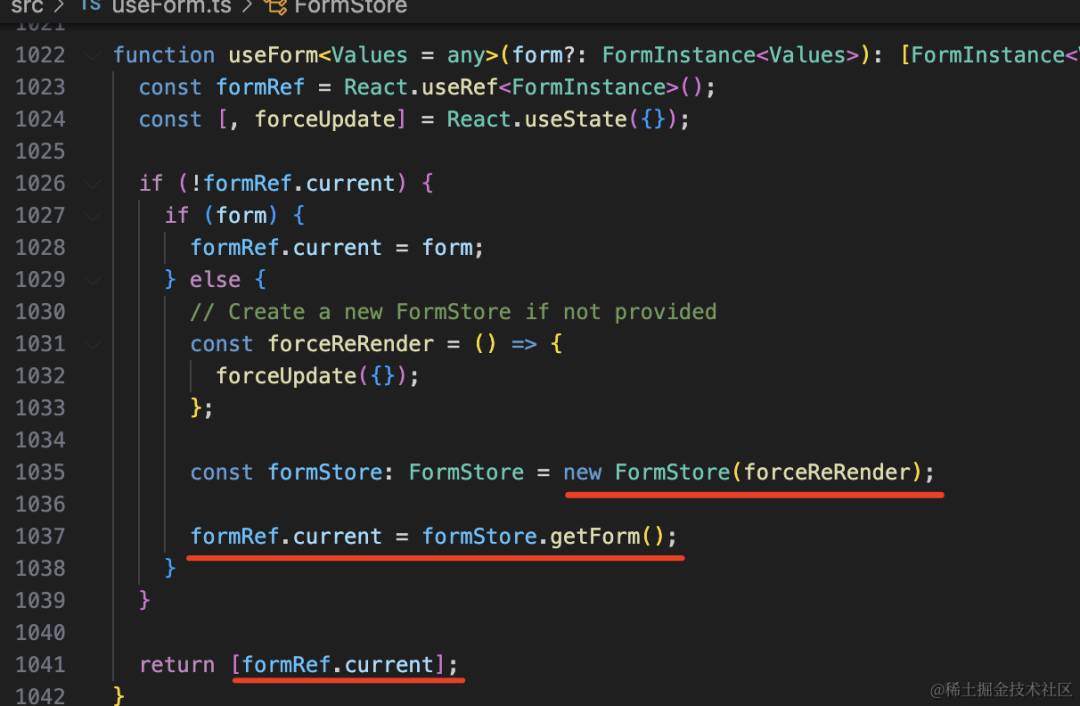
用的时候这样用:

这样,Form 组件里就可以通过传进来的 store 的 api 来读写 store 了:
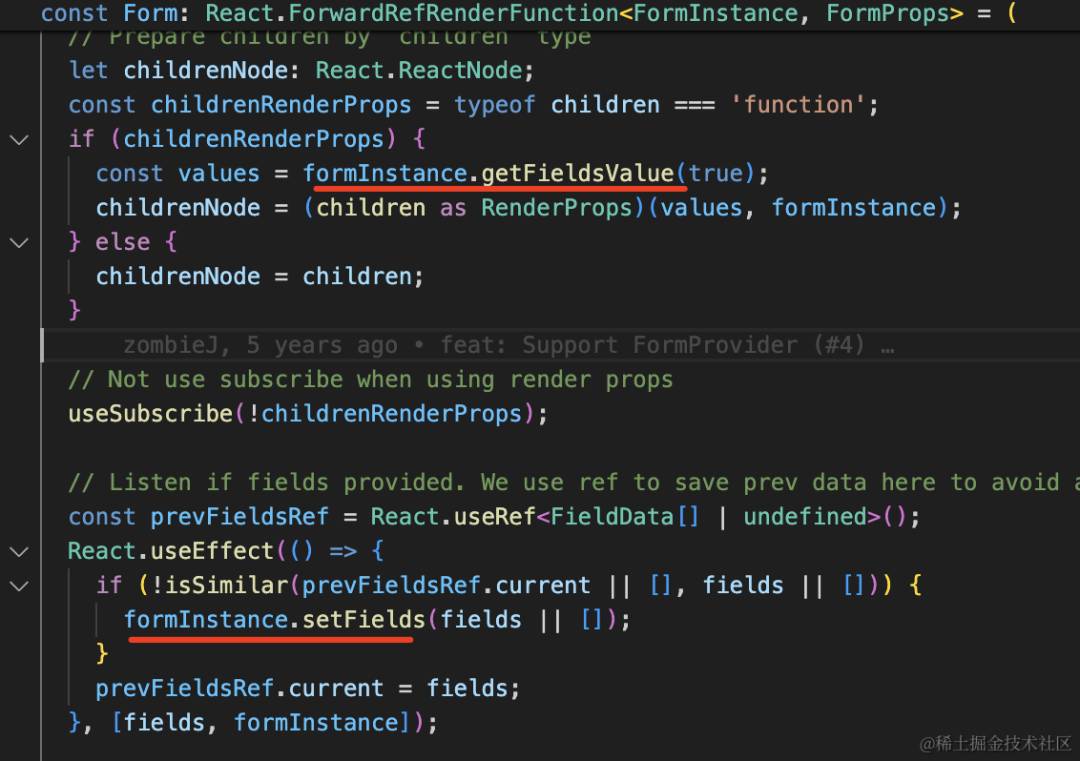
当然,它会通过 context 把 store 传递下去: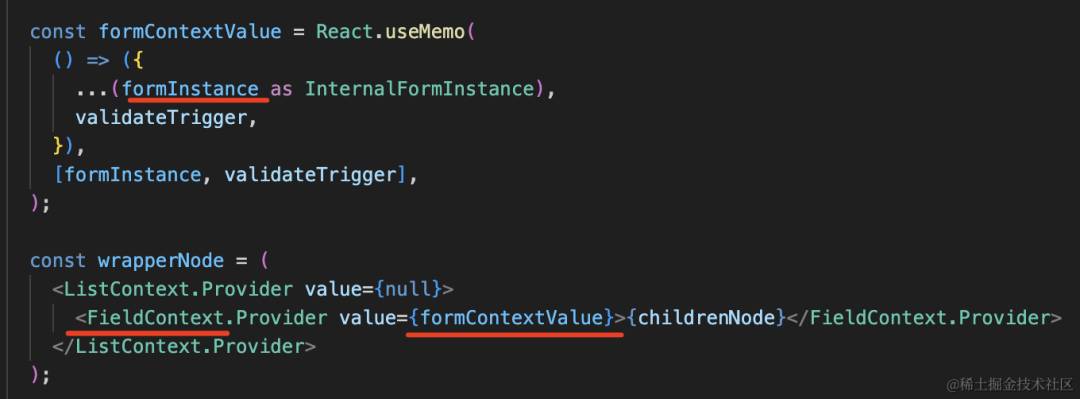
在 Field 也就是 Item 组件里就通过 context 取出 store 的 api 来读写 store:

和我们的实现有区别么?
有点区别,antd 的 FormStore 是可以独立出来的,通过 useForm 创建好传入 Form 组件。
而我们的 Store 没有分离出来,直接内置在 Form 组件里了。
但是实现的思路都是一样的。
提供个 useForm 的 api 的好处是,外界可以拿到 store 的 api 来自己修改 store。
当然,我们也可以通过 ref 来做这个:
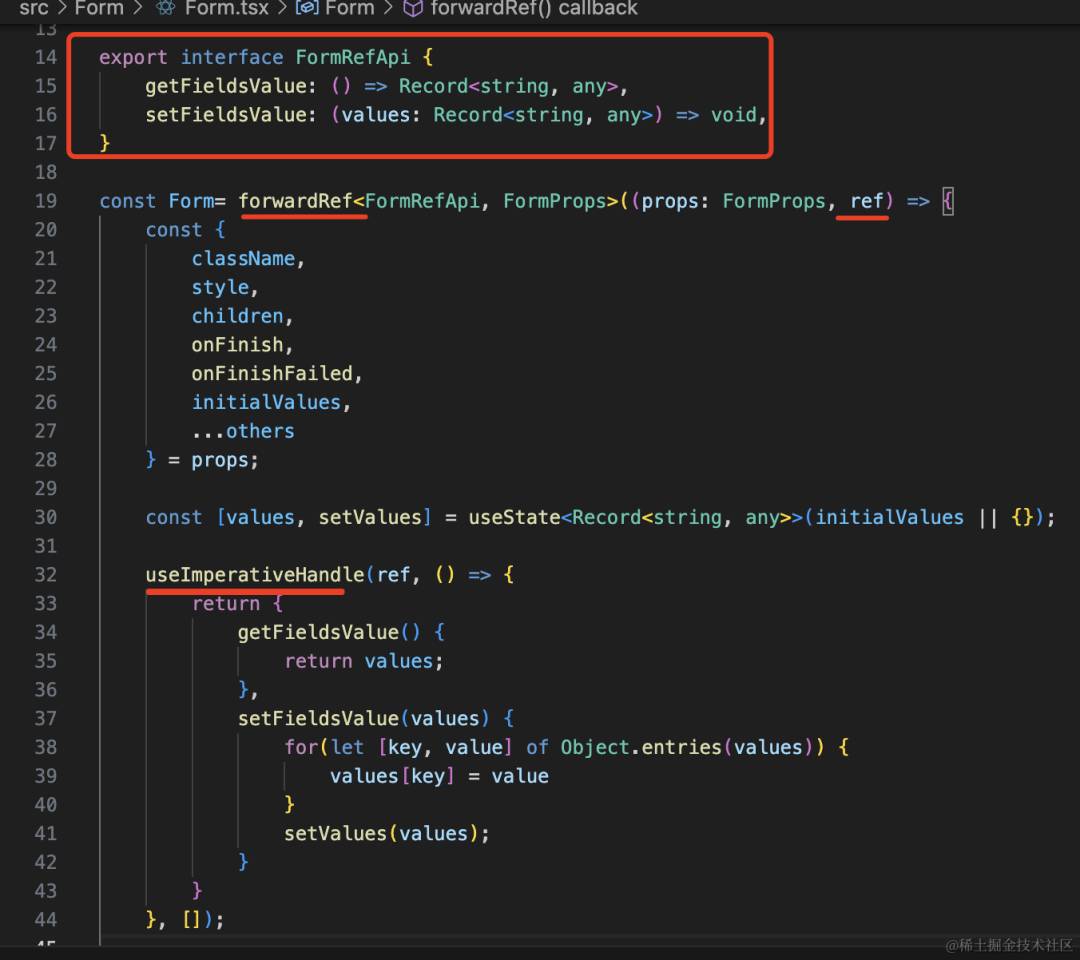
importReact,{CSSProperties,useState,useRef,FormEvent,ReactNode,ForwardRefRenderFunction,useImperativeHandle,forwardRef}from'react';
importclassNamesfrom'classnames';
importFormContextfrom'./FormContext';

exportinterfaceFormPropsextendsReact.HTMLAttributes<HTMLFormElement>{
className?:string;
style?:CSSProperties;
onFinish?:(values:Record<string,any>)=>void;
onFinishFailed?:(errors:Record<string,any>)=>void;
initialValues?:Record<string,any>;
children?:ReactNode
}

exportinterfaceFormRefApi{
getFieldsValue:()=>Record<string,any>,
setFieldsValue:(values:Record<string,any>)=>void,
}

constForm=forwardRef<FormRefApi,FormProps>((props:FormProps,ref)=>{
const{
className,
style,
children,
onFinish,
onFinishFailed,
initialValues,
...others
}=props;

const[values,setValues]=useState<Record<string,any>>(initialValues||{});

useImperativeHandle(ref,()=>{
return{
getFieldsValue(){
returnvalues;
},
setFieldsValue(values){
for(let[key,value]ofObject.entries(values)){
values[key]=value
}
setValues(values);
}
}
},[]);

constvalidatorMap=useRef(newMap<string,Function>());

consterrors=useRef<Record<string,any>>({});

constonValueChange=(key:string,value:any)=>{
values[key]=value;
}

consthandleSubmit=(e:FormEvent)=>{
e.preventDefault();

for(let[key,callbackFunc]ofvalidatorMap.current){
if(typeofcallbackFunc==='function'){
errors.current[key]=callbackFunc();
}
}

consterrorList=Object.keys(errors.current).map(key=>{
returnerrors.current[key]
}).filter(Boolean);

if(errorList.length){
onFinishFailed?.(errors.current);
}else{
onFinish?.(values);
}
}

consthandleValidateRegister=(name:string,cb:Function)=>{
validatorMap.current.set(name,cb);
}

constcls=classNames('ant-form',className);

return(
<FormContext.Provider
value={{
onValueChange,
values,
setValues:(v)=>setValues(v),
validateRegister:handleValidateRegister
}}
>
<form{...others}className={cls}style={style}onSubmit={handleSubmit}>{children}</form>
</FormContext.Provider>
);
})

exportdefaultForm;
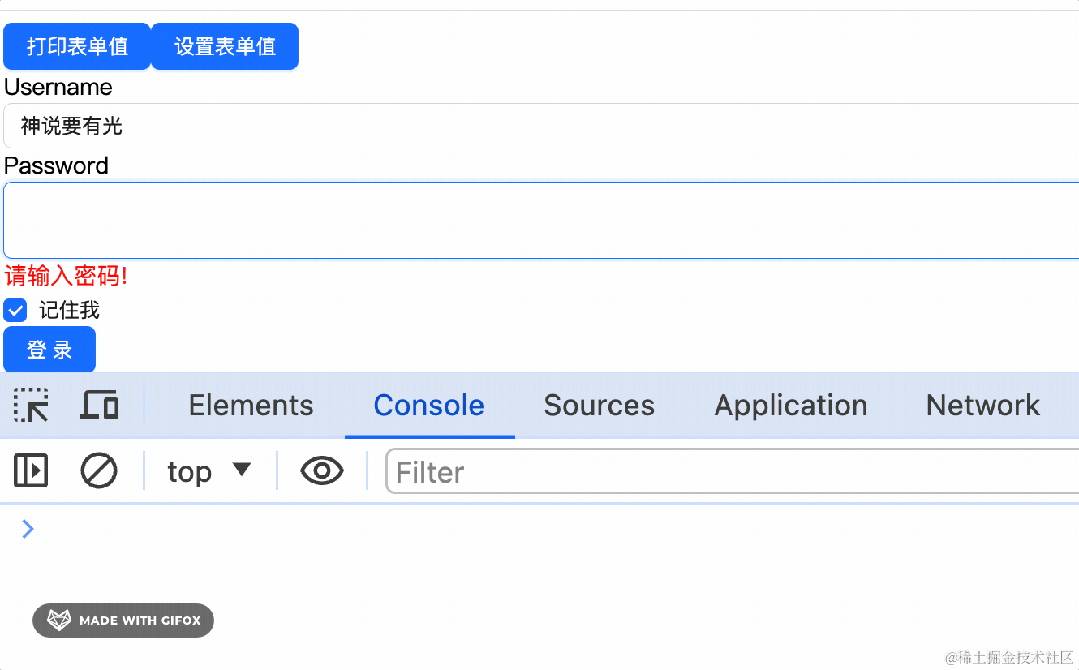
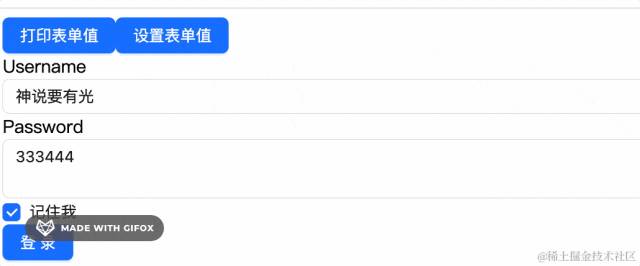
然后在 App.tsx 试试:
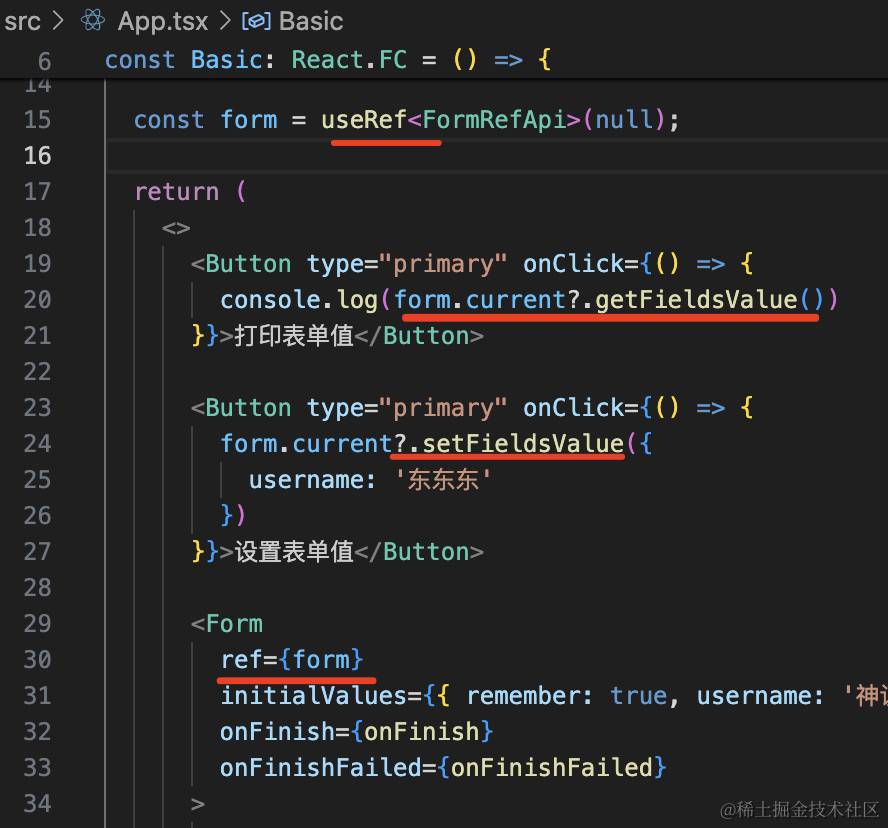
import{Button,Checkbox,Input}from"antd";
importFormfrom"./Form/index";
import{useEffect,useRef}from"react";
import{FormRefApi}from"./Form/Form";

constBasic:React.FC=()=>{
constonFinish=(values:any)=>{
console.log('Success:',values);
};

constonFinishFailed=(errorInfo:any)=>{
console.log('Failed:',errorInfo);
};

constform=useRef<FormRefApi>(null);

return(
<>
<Buttontype="primary"onClick={()=>{
console.log(form.current?.getFieldsValue())
}}>打印表单值</Button>

<Buttontype="primary"onClick={()=>{
form.current?.setFieldsValue({
username:'东东东'
})
}}>设置表单值</Button>

<Form
ref={form}
initialValues={{remember:true,username:'神说要有光'}}
onFinish={onFinish}
onFinishFailed={onFinishFailed}
>
<Form.Item
label="Username"
name="username"
rules={[
{required:true,message:'请输入用户名!'},
{max:6,message:'长度不能大于6'}
]}
>
<Input/>
</Form.Item>

<Form.Item
label="Password"
name="password"
rules={[{required:true,message:'请输入密码!'}]}
>
<Input.TextArea/>
</Form.Item>

<Form.Itemname="remember"valuePropName="checked">
<Checkbox>记住我</Checkbox>
</Form.Item>

<Form.Item>
<div>
<Buttontype="primary"htmlType="submit">
登录
</Button>
</div>
</Form.Item>
</Form>
</>
);
};

exportdefaultBasic;
当然,你也可以把 store 的 api 处理出来,然后封装个 useForm 的 hook 来传入 Form 组件。
这样,用法比 ref 的方式简单点。
至此,我们就实现了 antd 的 Form 的功能。
案例代码上传了 react 小册仓库:https://github.com/QuarkGluonPlasma/react-course-code/tree/main/form-component
总结
我们每天都在用 antd 的 Form 组件,今天自己实现了下。
其实原理不复杂,就是把 Form 的表单项的值存储到 Store 中。
在 Form 组件里把 Store 放到 Context,在 Item 组件里取出来。
用 Item 组件包裹表单项,传入 value、onChange 参数用来同步表单值到 Store。
这样,表单项的值变化或者 submit 的时候,就可以根据 rules 用 async-validator 来校验。
此外,我们还通过 ref 暴露出了 setFieldsValue、getFieldsValue 等 store 的 api。
当然,在 antd 的 Form 里是通过 useForm 这个 hook 来创建 store,然后把它传入 Form 组件来用的。
两种实现方式都可以。
每天都用 antd 的 Form 组件,不如自己手写一个吧!
更多内容可以看我的小册《React 通关秘籍》
