包阅导读总结
1. 关键词:
– `Nvidia NIM`、`RAG 应用`、`向量数据库`、`LLM`、`应用构建`
2. 总结:
本文介绍如何使用 Nvidia NIM APIs 和 Zilliz 向量数据库构建一个简单的 RAG 应用。使用了特定的 LLM 和文本嵌入模型,讲解了创建 API 密钥、实例化 Zilliz 集群、配置环境文件和创建应用的步骤,包括创建集合、嵌入数据、定义检索和生成回答的函数等,并提及后续会在本地 GPU 加速机器上运行该应用。
3. 主要内容:
– 介绍使用 Nvidia NIM 平台构建 RAG 应用
– 可在平台对生成式 AI 模型进行推理
– 应用构建准备
– 选择 meta/llama3-8b-instruct 作为 LLM
– 选用 nvidia/nv-embedqa-e5-v5 作为文本嵌入模型
– 采用 Zilliz 进行语义搜索
– 应用构建步骤
– 创建 NIM 的 API 密钥
– 创建免费 Zilliz 集群实例
– 创建环境配置文件
– 创建 RAG 应用
– 导入所需模块
– 初始化客户端
– 在 Zilliz 集群创建集合
– 嵌入数据并插入数据库
– 定义检索和生成回答的函数
– 后续计划
– 在本地 GPU 加速机器上运行相同的 LLM、嵌入模型和向量数据库
思维导图: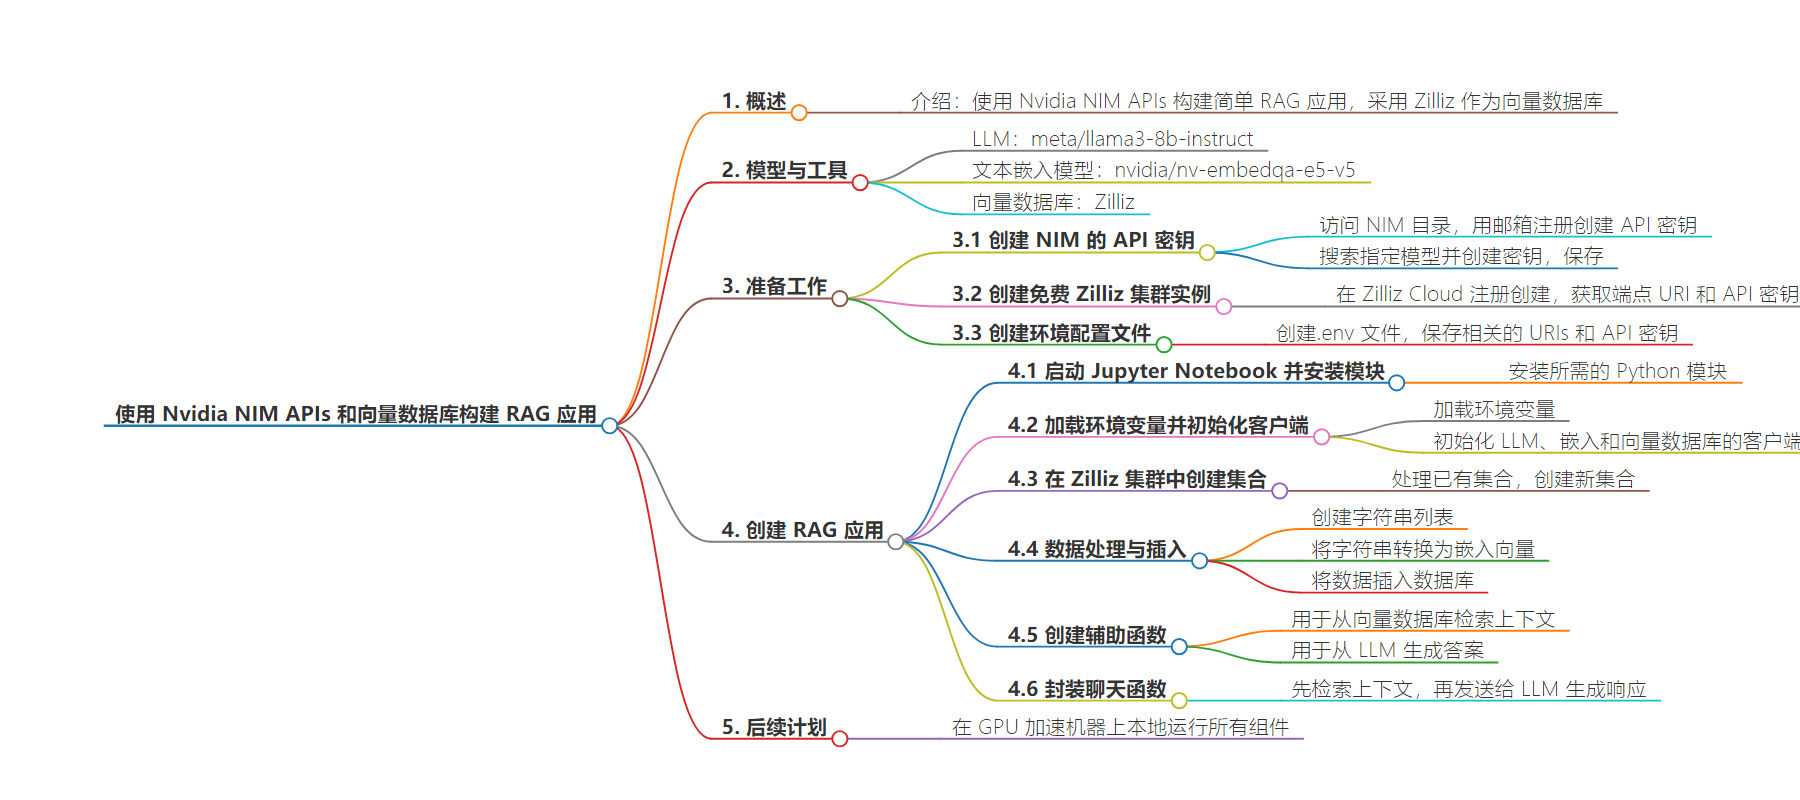
文章地址:https://thenewstack.io/build-a-rag-app-with-nvidia-nim-apis-and-a-vector-database/
文章来源:thenewstack.io
作者:Janakiram MSV
发布时间:2024/8/16 14:21
语言:英文
总字数:1478字
预计阅读时间:6分钟
评分:91分
标签:RAG 应用,Nvidia NIM API,向量检索数据库,Zilliz,生成式 AI
以下为原文内容
本内容来源于用户推荐转载,旨在分享知识与观点,如有侵权请联系删除 联系邮箱 media@ilingban.com
The Nvidia NIM platform allows developers to perform inference on generative AI models. In this article, we will explore how to consume the NIM APIs to build a simple RAG application. For the vector database, we will use Zilliz, the hosted, commercial version of the popular Milvus vector database.
We will use meta/llama3-8b-instruct as the LLM, nvidia/nv-embedqa-e5-v5 as the text embeddings model, and Zilliz to perform semantic search.
While this tutorial focuses on cloud-based APIs, the next part of this series will run the same LLM, embeddings model and vector database as containers.
The advantage of using NIM is that the APIs will be 100% compatible with the self-hosted containers running locally on a GPU machine. They also take advantage of the GPU acceleration when run locally.
Let’s get started building the application.
Step 1: Create an API Key for NIM
Visit the NIM catalog and sign up with your email address to create an API key.
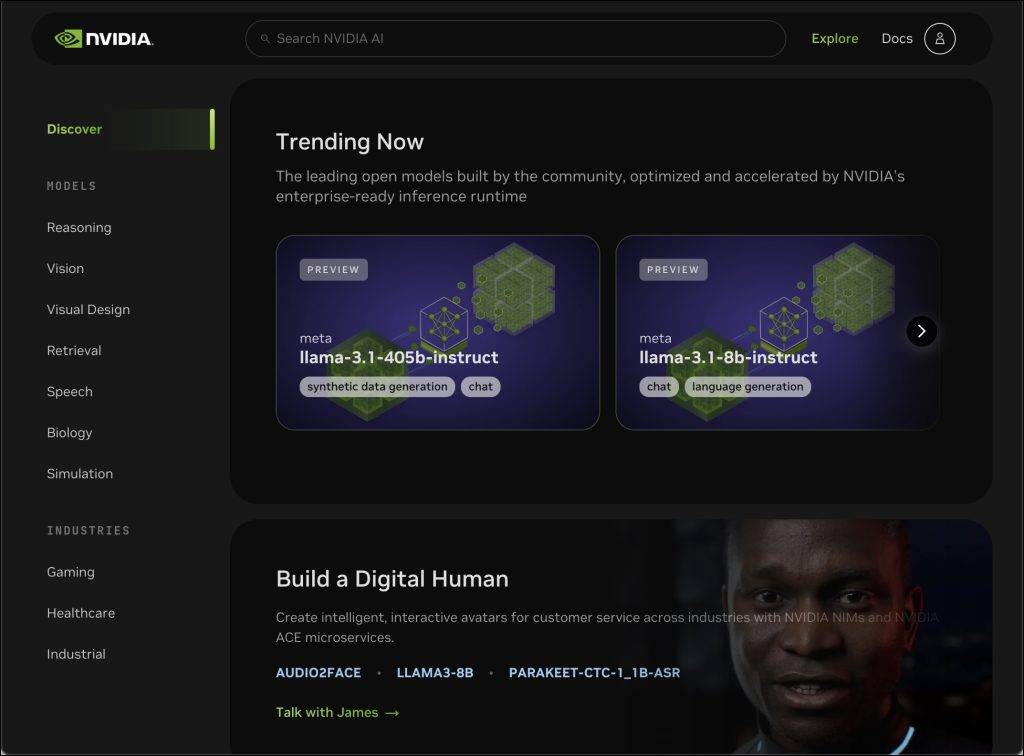
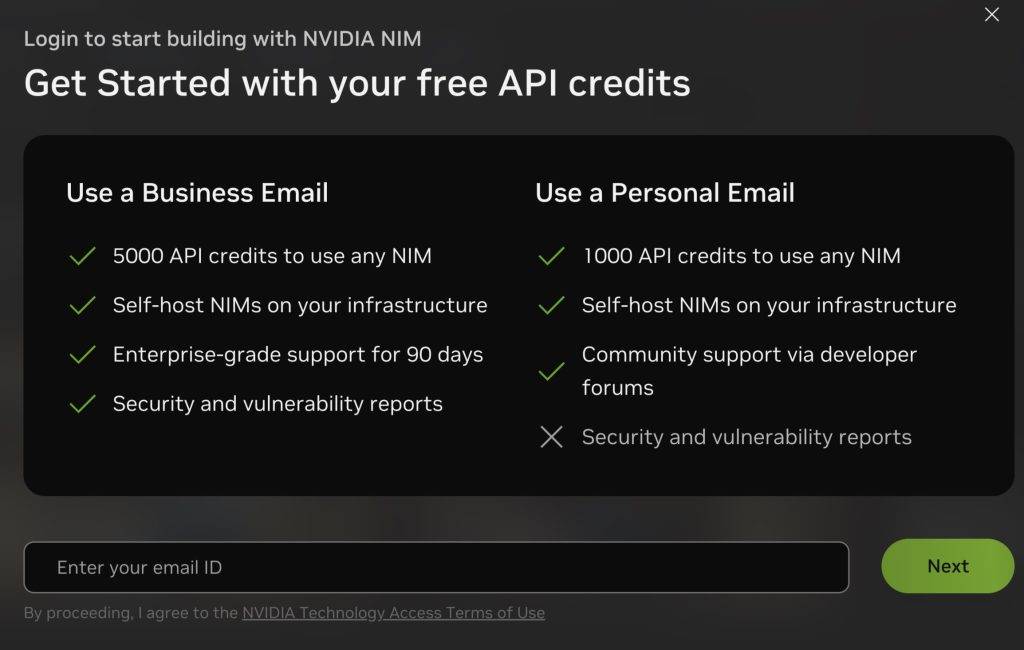
Search for meta/llama3-8b-instruct and click on “Build with this NIM” to create an API key.

Copy the API key and save it in a safe location.
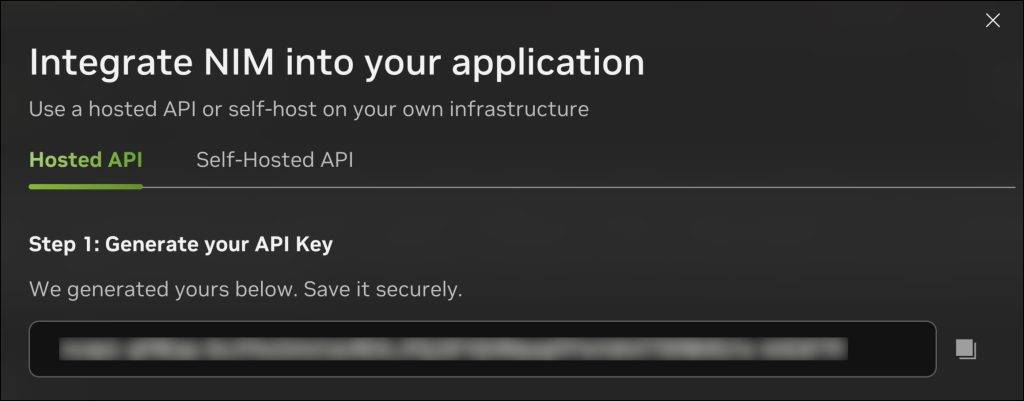
Step 2: Create an Instance of Free Zilliz Cluster
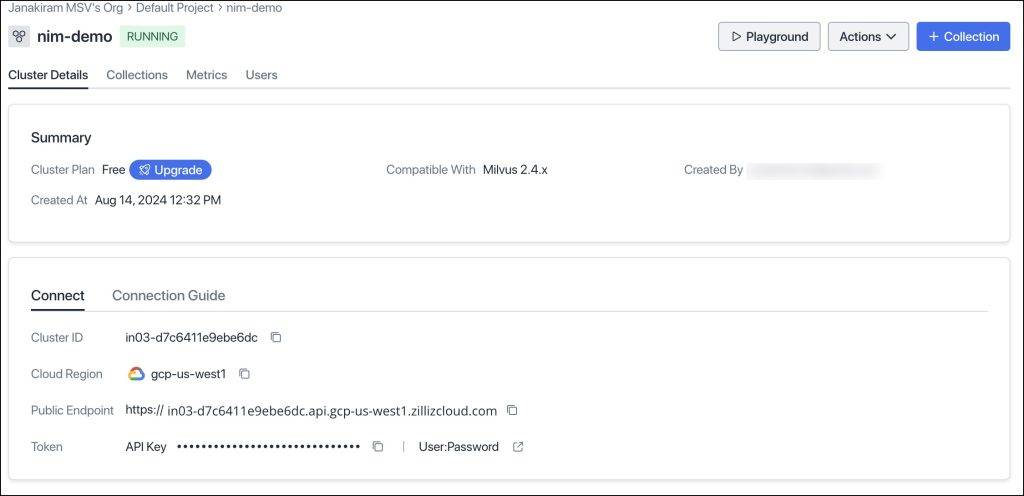
Sign up with Zilliz Cloud and create a cluster that comes with $100 credits, which is sufficient for experimenting with this tutorial.
Make sure that you copied the endpoint URI and the API key of your cluster.
Step 3: Create an Environment Configuration File
Create a .env file with the URIs and API keys. This comes in handy when we access the API. When we switch to local endpoints, we just need to update this file. Ensure that these match with the values you saved from the above two steps.
|
LLM_URI=“https://integrate.api.nvidia.com/v1” EMBED_URI=“https://integrate.api.nvidia.com/v1” VECTORDB_URI=“YOUR_ZILLIZ_CLUSTER_URI” NIM_API_KEY=“YOUR_NIM_API_KEY” ZILLIZ_API_KEY=“YOUR_ZILLIZ_API_KEY” |
Step 4: Create the RAG Application
Launch a Jupyter Notebook and install the required Python modules.
|
!pip install pymilvus !pip install openai pip install python–dotenv |
Let’s start by importing the modules.
|
from pymilvus import MilvusClient from pymilvus import connections from openai import OpenAI from dotenv import load_dotenv import os import ast |
Load the environment variables and initialize the clients for LLM, embeddings and the vector database.
|
1 2 3 4 5 6 7 8 9 10 11 12 13 14 15 16 17 18 19 20 21 22 |
load_dotenv()
LLM_URI=os.getenv(“LLM_URI”) EMBED_URI=os.getenv(“EMBED_URI”) VECTORDB_URI=os.getenv(“VECTORDB_URI”)
NIM_API_KEY=os.getenv(“NIM_API_KEY”) ZILLIZ_API_KEY=os.getenv(“ZILLIZ_API_KEY”) llm_client = OpenAI( api_key=NIM_API_KEY, base_url=LLM_URI )
embedding_client = OpenAI( api_key=NIM_API_KEY, base_url=EMBED_URI )
vectordb_client = MilvusClient( uri=VECTORDB_URI, token=ZILLIZ_API_KEY ) |
The next step is to create the collection in the Zilliz cluster.
|
if vectordb_client.has_collection(collection_name=“india_facts”): vectordb_client.drop_collection(collection_name=“india_facts”)
vectordb_client.create_collection( collection_name=“india_facts”, dimension=1024, ) |
We set the dimension to 1,024 based on the vector size returned by the embeddings model.
Let’s create a list of strings, convert them into embedding vectors and ingest them into the database.
|
1 2 3 4 5 6 7 8 9 10 11 12 13 14 15 16 17 18 19 20 21 22 23 24 25 26 27 28 29 30 31 |
docs = [ “India is the seventh-largest country by land area in the world.”, “The Indus Valley Civilization, one of the world’s oldest, originated in India around 3300 BCE.”, “The game of chess, originally called ‘Chaturanga,’ was invented in India during the Gupta Empire.”, “India is home to the world’s largest democracy, with over 900 million eligible voters.”, “The Indian mathematician Aryabhata was the first to explain the concept of zero in the 5th century.”, “India has the second-largest population in the world, with over 1.4 billion people.”, “The Kumbh Mela, held every 12 years, is the largest religious gathering in the world, attracting millions of devotees.”, “India is the birthplace of four major world religions: Hinduism, Buddhism, Jainism, and Sikhism.”, “The Indian Space Research Organisation (ISRO) successfully sent a spacecraft to Mars on its first attempt in 2014.”, “India’s Varanasi is considered one of the world’s oldest continuously inhabited cities, with a history dating back over 3,000 years.” ]
def embed(docs): response = embedding_client.embeddings.create( input=docs, model=“nvidia/nv-embedqa-e5-v5”, encoding_format=“float”, extra_body={“input_type”: “query”, “truncate”: “NONE”} ) vectors = [embedding_data.embedding for embedding_data in response.data] return vectors
vectors=embed(docs)
data = [ {“id”: i, “vector”: vectors[i], “text”: docs[i], “subject”: “history”} for i in range(len(vectors)) ]
vectordb_client.insert(collection_name=“india_facts”, data=data) |
We will then create a helper function to retrieve the context from the vector database.
|
1 2 3 4 5 6 7 8 9 10 11 12 13 14 15 16 17 18 19 20 21 22 23 |
def retrieve(query): query_vectors = embed([query])
search_results = vectordb_client.search( collection_name=“india_facts”, data=query_vectors, limit=3, output_fields=[“text”, “subject”] )
all_texts = [] for item in search_results: try: evaluated_item = ast.literal_eval(item) if isinstance(item, str) else item except: evaluated_item = item
if isinstance(evaluated_item, list): all_texts.extend(subitem[‘entity’][‘text’] for subitem in evaluated_item if isinstance(subitem, dict) and ‘entity’ in subitem and ‘text’ in subitem[‘entity’]) elif isinstance(evaluated_item, dict) and ‘entity’ in evaluated_item and ‘text’ in evaluated_item[‘entity’]: all_texts.append(evaluated_item[‘entity’][‘text’])
return ” “.join(all_texts) |
This retrieves the top three documents, appends the text from each document and returns a string.
With the retriever step in place, it’s time to create another helper function to generate the answer from the LLM.
|
1 2 3 4 5 6 7 8 9 10 11 12 13 14 15 16 17 18 19 20 21 22 |
def generate(context, question): prompt = f”’ Based on the context: {context}
Please answer the question: {question} ”’ system_prompt=”’ You are a helpful assistant that answers questions based on the given context.\n Don’t add anything to the response. \n If you cannot find the answer within the context, say I do not know. ”’ completion = llm_client.chat.completions.create( model=“meta/llama3-8b-instruct”, messages=[ {“role”: “system”, “content”: system_prompt}, {“role”: “user”, “content”: prompt} ], temperature=0, top_p=1, max_tokens=1024 ) return completion.choices[0].message.content |
We will finally wrap these two functions inside another function called chat, which first retrieves the context and then sends it to the LLM along with the original prompt sent by the user.
|
def chat(prompt): context=retrieve(prompt) response=generate(context,prompt) return response |
When we invoke the function, we will see the response from the LLM derived from the context.
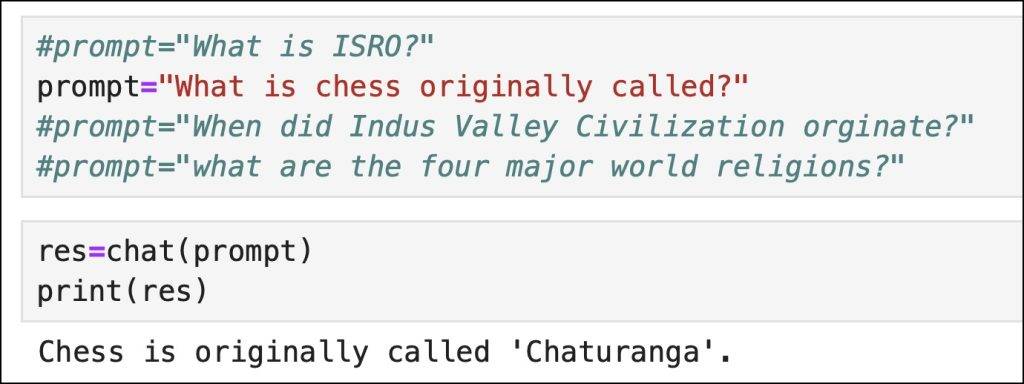
As you can see, the response is based on the context that the vector database has retrieved.
In the next part of this series, we will run all the components of this RAG application locally on a GPU-accelerated machine. Stay tuned.
YOUTUBE.COM/THENEWSTACK
Tech moves fast, don’t miss an episode. Subscribe to our YouTubechannel to stream all our podcasts, interviews, demos, and more.
