包阅导读总结
1. 关键词:Moshi、JSON、Android、Java、序列化
2. 总结:本文介绍了 Moshi 这一用于 Android 和 Java 的现代 JSON 库,包括其特点,并详细阐述了如何使用 Moshi 写 JSON 到文件以及从文件读 JSON 的步骤和示例代码,最后总结了其对数据处理的优势。
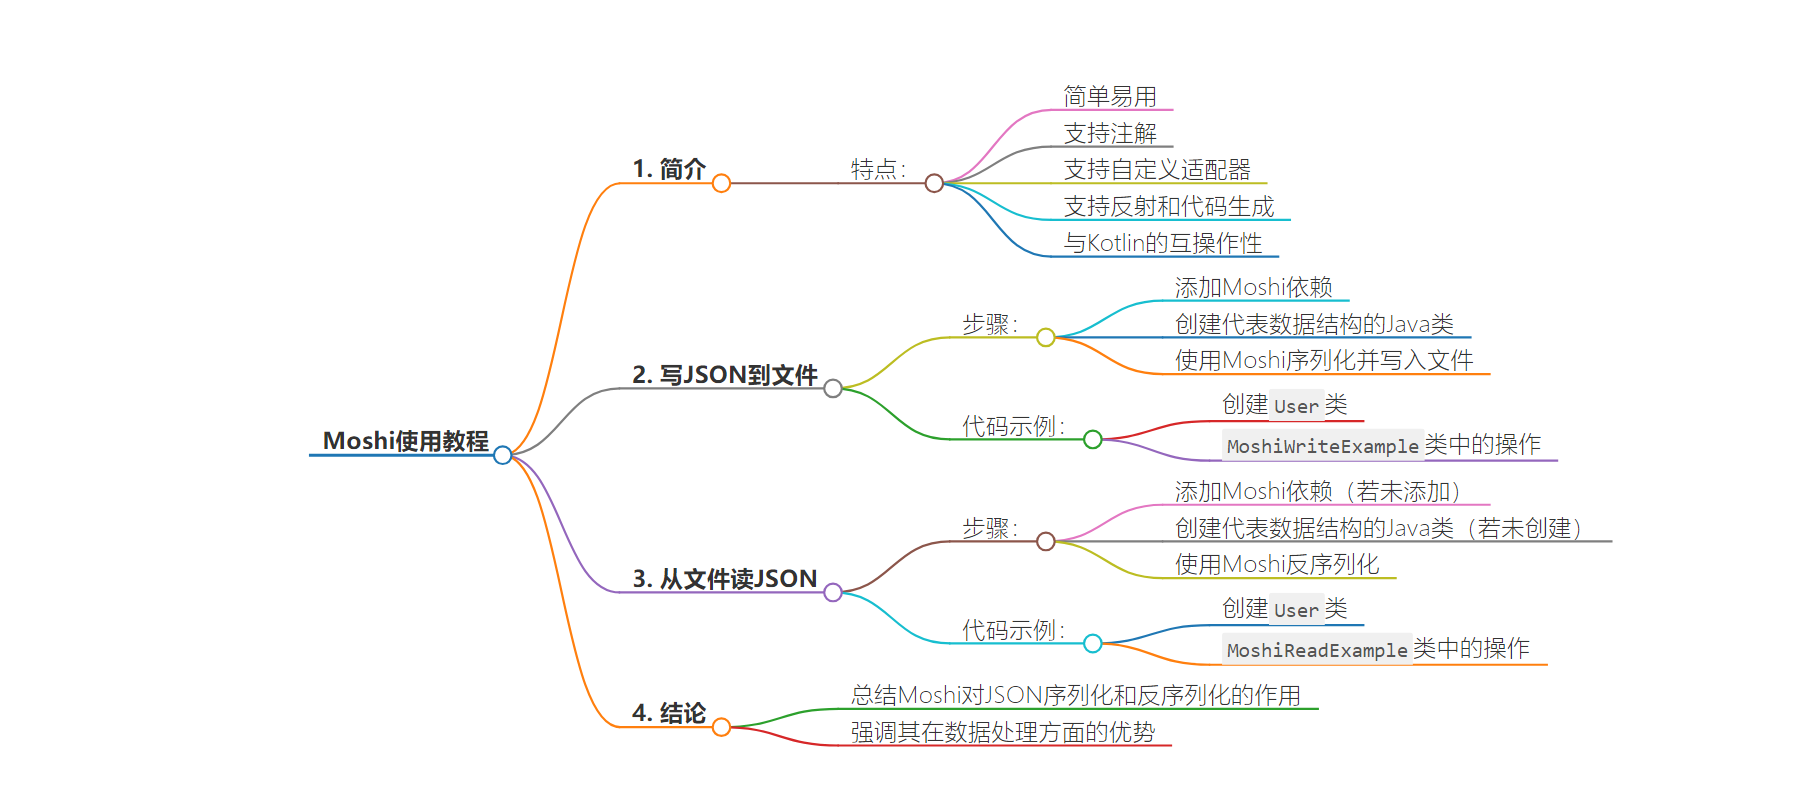
3. 主要内容:
– Moshi 简介
– 是用于 Android 和 Java 的 JSON 库,由 Square 开发
– 特点包括简单易用、支持注解、可自定义适配器、支持反射和代码生成、与 Kotlin 良好兼容
– 写 JSON 到文件
– 添加 Moshi 依赖
– 创建代表数据结构的 Java 类
– 使用 Moshi 序列化并写入文件
– 从文件读 JSON
– 添加依赖(若未添加)
– 创建数据结构的 Java 类
– 使用 Moshi 反序列化
– 结论
– 总结 Moshi 对 JSON 序列化和反序列化的作用,强调其对数据处理的优势和在项目中的作用
思维导图:
文章地址:https://www.javacodegeeks.com/how-to-write-json-to-a-file-using-moshi.html
文章来源:javacodegeeks.com
作者:Yatin Batra
发布时间:2024/6/20 11:38
语言:英文
总字数:912字
预计阅读时间:4分钟
评分:81分
标签:JSON,Moshi,Java,序列化,反序列化
以下为原文内容
本内容来源于用户推荐转载,旨在分享知识与观点,如有侵权请联系删除 联系邮箱 media@ilingban.com
Moshi is a modern JSON library for Android and Java, providing a simple API for parsing and serializing JSON. Let us delve into understanding how to write to a JSON file and read from a JSON file using Moshi.
1. Introduction
Moshi is a modern JSON library for Android and Java that makes it easy to parse JSON into Java objects and serialize Java objects into JSON. Developed by Square, Moshi is designed to be simple, efficient, and flexible, making it a popular choice for developers working on Android applications or any Java-based projects. Let us delve into understanding how to parse JSON using Moshi. Key Features of Moshi are:
- Easy to use: Moshi provides a simple API that makes it easy to parse and write JSON. The library leverages Java’s type system to ensure type safety.
- Annotations: Moshi supports annotations to customize the serialization and deserialization processes. For example, you can use
@Jsonto map JSON fields to Java fields with different names. - Adapters: Moshi allows you to create custom adapters to handle complex types or special serialization logic.
- Reflection and Code Generation: By default, Moshi uses reflection to inspect your classes at runtime, but it also supports code generation for better performance and smaller APK sizes.
- Interoperability with Kotlin: Moshi has excellent support for Kotlin, including Kotlin-specific features like data classes and default parameter values.
2. Write JSON to a File Using Moshi
To write JSON to a file using Moshi, follow these steps:
- Add Moshi to your project dependencies (
com.squareup.moshi:moshi:1.13.0andcom.squareup.moshi:moshi-kotlin:1.13.0). - Create a Java class to represent the data structure.
- Use Moshi to serialize the Java object to JSON and write it to a file.
// Create a Java class to represent the data structurepublic class User { public String name; public int age; public String email; public User(String name, int age, String email) { this.name = name; this.age = age; this.email = email; } // Getters and setters}// Use Moshi to serialize the Java object to JSON and write it to a fileimport com.squareup.moshi.JsonAdapter;import com.squareup.moshi.Moshi;import java.io.File;import java.io.FileWriter;import java.io.IOException;public class MoshiWriteExample { public static void main(String[] args) { // Create a Moshi instance Moshi moshi = new Moshi.Builder().build(); // Create a JsonAdapter for the User class JsonAdapter jsonAdapter = moshi.adapter(User.class); // Create a User object User user = new User("John Doe", 30, "john.doe@example.com"); // Serialize the User object to JSON String json = jsonAdapter.toJson(user); // Write the JSON to a file try (FileWriter fileWriter = new FileWriter("user.json")) { fileWriter.write(json); } catch (IOException e) { e.printStackTrace(); } }}
Here’s a code breakdown:
dependencies: Add Moshi dependencies in your build.gradle file.Userclass: A simple Java class with three fields:name,age, andemail.Moshi moshi = new Moshi.Builder().build();: Create a Moshi instance.JsonAdapter<User> jsonAdapter = moshi.adapter(User.class);: Create a JsonAdapter for theUserclass.User user = new User("John Doe", 30, "john.doe@example.com");: Create aUserobject.String json = jsonAdapter.toJson(user);: Serialize theUserobject to JSON.try (FileWriter fileWriter = new FileWriter("user.json")) { fileWriter.write(json); }: Write the JSON string to a file nameduser.json.
The above code creates a file named user.json with the following content:
{ "name": "John Doe", "age": 30, "email": "john.doe@example.com"}
3. Read JSON from a File Using Moshi
To read JSON from a file using Moshi, follow these steps:
- Add Moshi to your project dependencies (
com.squareup.moshi:moshi:1.13.0andcom.squareup.moshi:moshi-kotlin:1.13.0). Skip this step if these dependencies are already present in the project. - Create a Java class to represent the data structure (if not already created).
- Use Moshi to deserialize the JSON from the file into a Java object.
// Create a Java class to represent the data structurepublic class User { public String name; public int age; public String email; public User(String name, int age, String email) { this.name = name; this.age = age; this.email = email; } // Getters and setters}// Use Moshi to deserialize the JSON from the file into a Java objectimport com.squareup.moshi.JsonAdapter;import com.squareup.moshi.Moshi;import java.io.File;import java.io.FileReader;import java.io.IOException;public class MoshiReadExample { public static void main(String[] args) { // Create a Moshi instance Moshi moshi = new Moshi.Builder().build(); // Create a JsonAdapter for the User class JsonAdapter jsonAdapter = moshi.adapter(User.class); // Read the JSON from a file try (FileReader fileReader = new FileReader("user.json")) { User user = jsonAdapter.fromJson(fileReader); System.out.println("Name: " + user.name); System.out.println("Age: " + user.age); System.out.println("Email: " + user.email); } catch (IOException e) { e.printStackTrace(); } }}
Here’s a code breakdown:
Moshi moshi = new Moshi.Builder().build();: Create a Moshi instance.JsonAdapter<User> jsonAdapter = moshi.adapter(User.class);: Create a JsonAdapter for theUserclass.try (FileReader fileReader = new FileReader("user.json")) { User user = jsonAdapter.fromJson(fileReader); }: Read the JSON string from theuser.jsonfile and deserialize it into aUserobject.System.out.println("Name: " + user.name);: Print the user’s name.System.out.println("Age: " + user.age);: Print the user’s age.System.out.println("Email: " + user.email);: Print the user’s email.
The above code reads the content from the user.json file and outputs:
Name: John DoeAge: 30Email: john.doe@example.com
4. Conclusion
Here we explored Moshi and how to serialize and deserialize JSON data. By following the steps you can easily write JSON to a file and read JSON from a file using Moshi. This powerful library simplifies the process of handling JSON, making it more manageable and efficient. Whether you’re developing an Android application or a Java-based server, integrating Moshi into your project can significantly enhance your data handling capabilities.
