包阅导读总结
1. 关键词:
– `.NET`
– `Snapshot Testing`
– `Verify`
– `Testing Approaches`
– `Test Suites`
2. 总结:
本文介绍了在`.NET`中使用`Verify`进行快照测试,包括其概念、优势,如何开始使用,常见问题及解答,强调它是构建有价值测试套件的实用技术。
3. 主要内容:
– 软件测试的目标是提供有价值的测试
– 多种测试技术有独特价值,如单元测试、集成测试、手动测试
– 什么是快照测试
– 与传统测试不同,聚焦动作结果,需作者验证结果准确性
– 开始使用`Verify`
– 推荐安装插件
– 支持多种单元测试库
– 可设置全局配置
– 示例展示
– 关于快照测试的常见问题
– 与其他测试风格比较
– 是否提交快照到源代码控制
– 对源代码控制大小的影响
– 能否微调验证过程
– 能否验证非`JSON`对象
– 能否全局设置`Verify`设置
– 结论
– `Verify`是增强测试套件价值的优秀库,推荐安装相关插件,支持多种测试库和扩展
思维导图: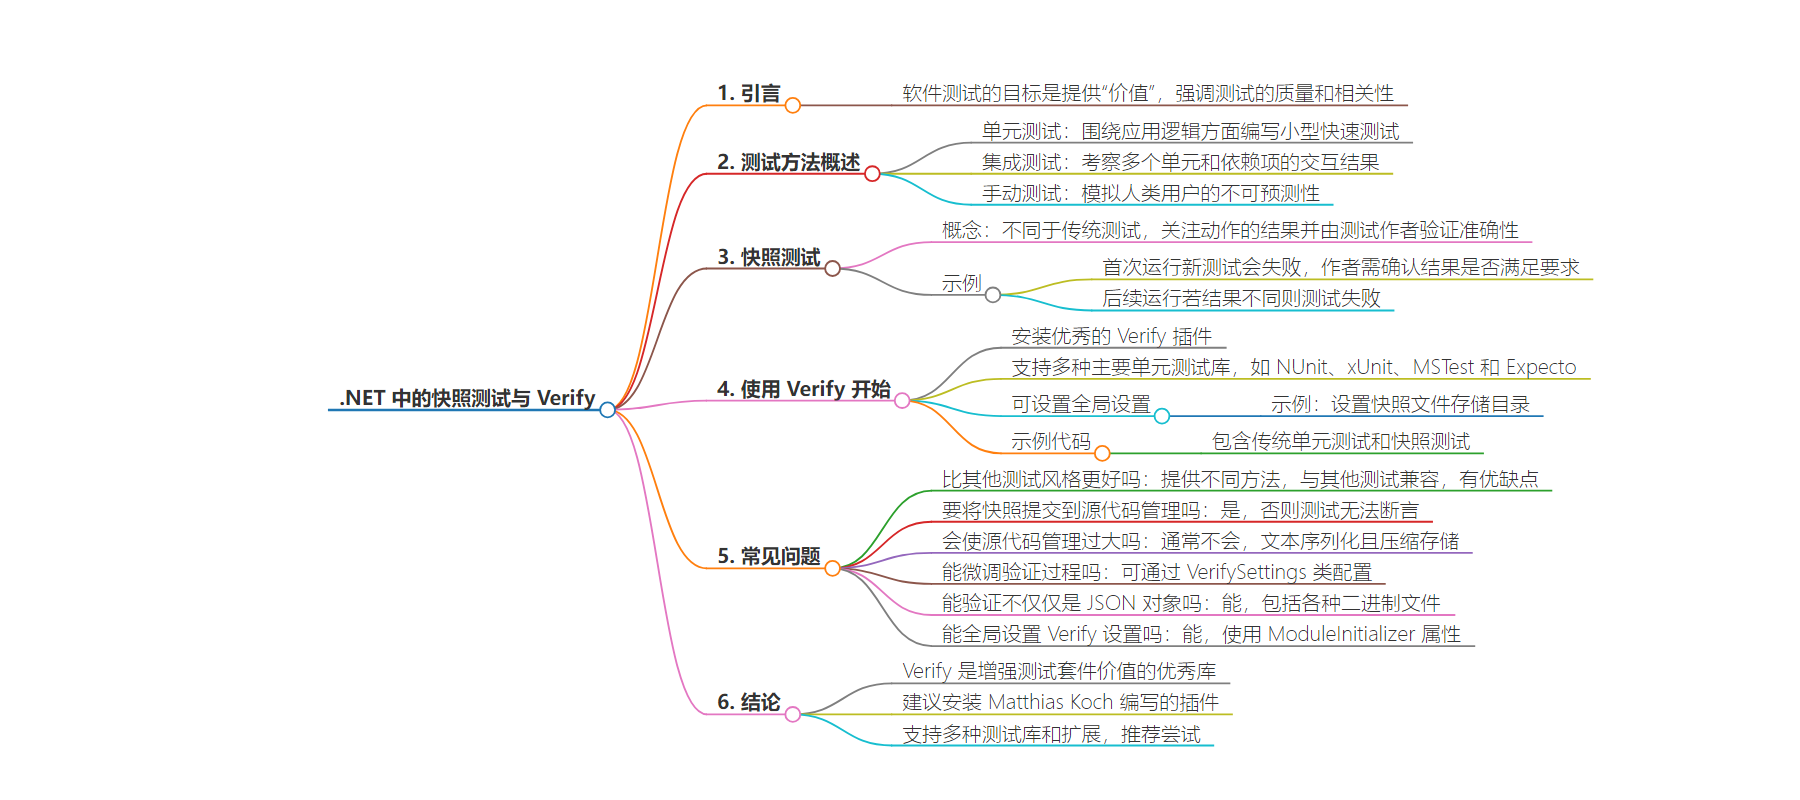
文章地址:https://blog.jetbrains.com/dotnet/2024/07/11/snapshot-testing-in-net-with-verify/
文章来源:blog.jetbrains.com
作者:Khalid Abuhakmeh
发布时间:2024/7/11 14:06
语言:英文
总字数:1453字
预计阅读时间:6分钟
评分:85分
标签:测试,快照测试,.NET,验证,JetBrains
以下为原文内容
本内容来源于用户推荐转载,旨在分享知识与观点,如有侵权请联系删除 联系邮箱 media@ilingban.com
Snapshot Testing in .NET with Verify
When writing tests, the ultimate goal should always be to deliver “value”. This value is not just about the number of tests written but about the quality and relevance of the tests. We aim to write, execute, and maintain valuable tests that instill confidence in our application’s ability to withstand the rigors of user production use. Throughout the history of software testing, several techniques have contributed their unique value proposition to the testing mythos.
For example, Unit tests help us focus on writing small and faster tests around the logical aspects of our application. Integration tests take several units and dependencies and attempt to see the outcome of their interactions. Manual tests take the unpredictability of a human user and help us see if our applications can handle the unexpected.
Each testing approach can have a distinct style. Today, we’ll delve into snapshot testing, a practical technique you can apply to code-driven tests. It combines a few previously mentioned approaches, offering a uniquely practical test. By the end of this post, you’ll have a comprehensive understanding of snapshot testing with Verify, how to integrate it into your test suites seamlessly, and why we believe it’s a valuable addition to your testing toolkit.
What is snapshot testing?
Logically, you typically center tests around asserting the state before and after a particular action occurs. If you’re familiar with unit testing, you’ve likely heard the phrase: “Arrange, Act, and Assert”. In terms of code, let’s look at a simple example to illustrate this construct.
[Test]public void Assert_apple_is_not_null(){ // arrange Apple apple; // act apple = new Apple("Honey Crisp", "Yellow & Red"); // assert Assert.That(apple, Is.Not.Null);}
If we look at this code, it sets out to accomplish the test’s intent: asserting that the target is not null. But as you look closer, you realize some data points are unused in this test, mainly the name and color of the apple.
Snapshot testing is different from a traditional test as it focuses on the result of an action and expects you, the test author, to verify the accuracy of the result. In the case of our apple example, we would run our test and verify that the entire apple is “correctly” created.
Let’s look at an example of a snapshot test and what steps you would take to get a passing.
The first step is to write a test similar to the one above.
[Test]public Task Verify_apple_is_granny_smith(){ // arrange var service = new AppleService(); // act var apple = service.GetApple(); // verify return Verify(apple);}
Note that the call to Verify takes the entire instance and has no assertions. The method call will produce a binary snapshot of the instance and write it to non-volatile storage, such as the file system.
{ Name: Granny Smith, Color: Green}
From here, the first test run of a newly created test will always fail. As the author, you will look at this serialized result and verify that it meets your success requirements. If it does, you accept the results, and the test now passes. We’ll get into how you verify results later, as this can vary depending on the serialization method of the snapshot. In future test runs, if our code produces a different result, then the test will fail and require reverifying the snapshot or investigating why the change occurred in the first place.
Snapshot testing is straightforward in concept yet a powerful approach to building valuable test suites. In the next section, we’ll see how to start with Verify, a .NET library focused on producing and maintaining snapshots.
Getting started with Verify
Before updating your test projects, we highly recommend installing the excellent Verify Plug-in, developed by .NET Developer Advocate Matthias Koch (check out the livestream below). The plug-in adds Verify support for both JetBrains Rider and ReSharper for Visual Studio. Great, let’s start adding Verify to your test project.
VIDEO
Verify supports most major unit testing libraries, including NUnit, xUnit, MSTest, and Expecto. You’ll need to install the matching Verify package in a test project of your choice. In my case, I’ll be using NUnit and will install Verify.NUnit.
For the sake of this demo, I’ll be testing an AppleService class.
public class AppleService{ public Apple GetApple() => new Apple("Granny Smith", "Green");}public record Apple(string Name, string Color);
Next, I’ll create a static method to set up some global settings for Verify. This step is optional but allows you to define some of the library’s many features. In my case, I’m putting snapshot artifacts under a snapshots directory.
public class Tests{ private static readonly VerifySettings Settings; static Tests() { Settings = new VerifySettings(); Settings.UseDirectory("snapshots"); }}
Next, let’s add our tests.
namespace SnapshotTests;public class Tests{ private static readonly VerifySettings Settings; static Tests() { Settings = new VerifySettings(); Settings.UseDirectory("snapshots"); } private readonly AppleService sut = new(); [Test] public void Assert_apple_is_granny_smith() { var apple = sut.GetApple(); Assert.That(apple.Name, Is.EquivalentTo("Granny Smith")); } [Test] public Task Verify_apple_is_granny_smith() { // arrange var service = new AppleService(); // act var apple = service.GetApple(); // verify return Verify(apple, Settings); }}
Note that we have a mixture of traditional unit tests and snapshot tests. These two methodologies are compatible, and we encourage you to think critically about which approach suits your goals.
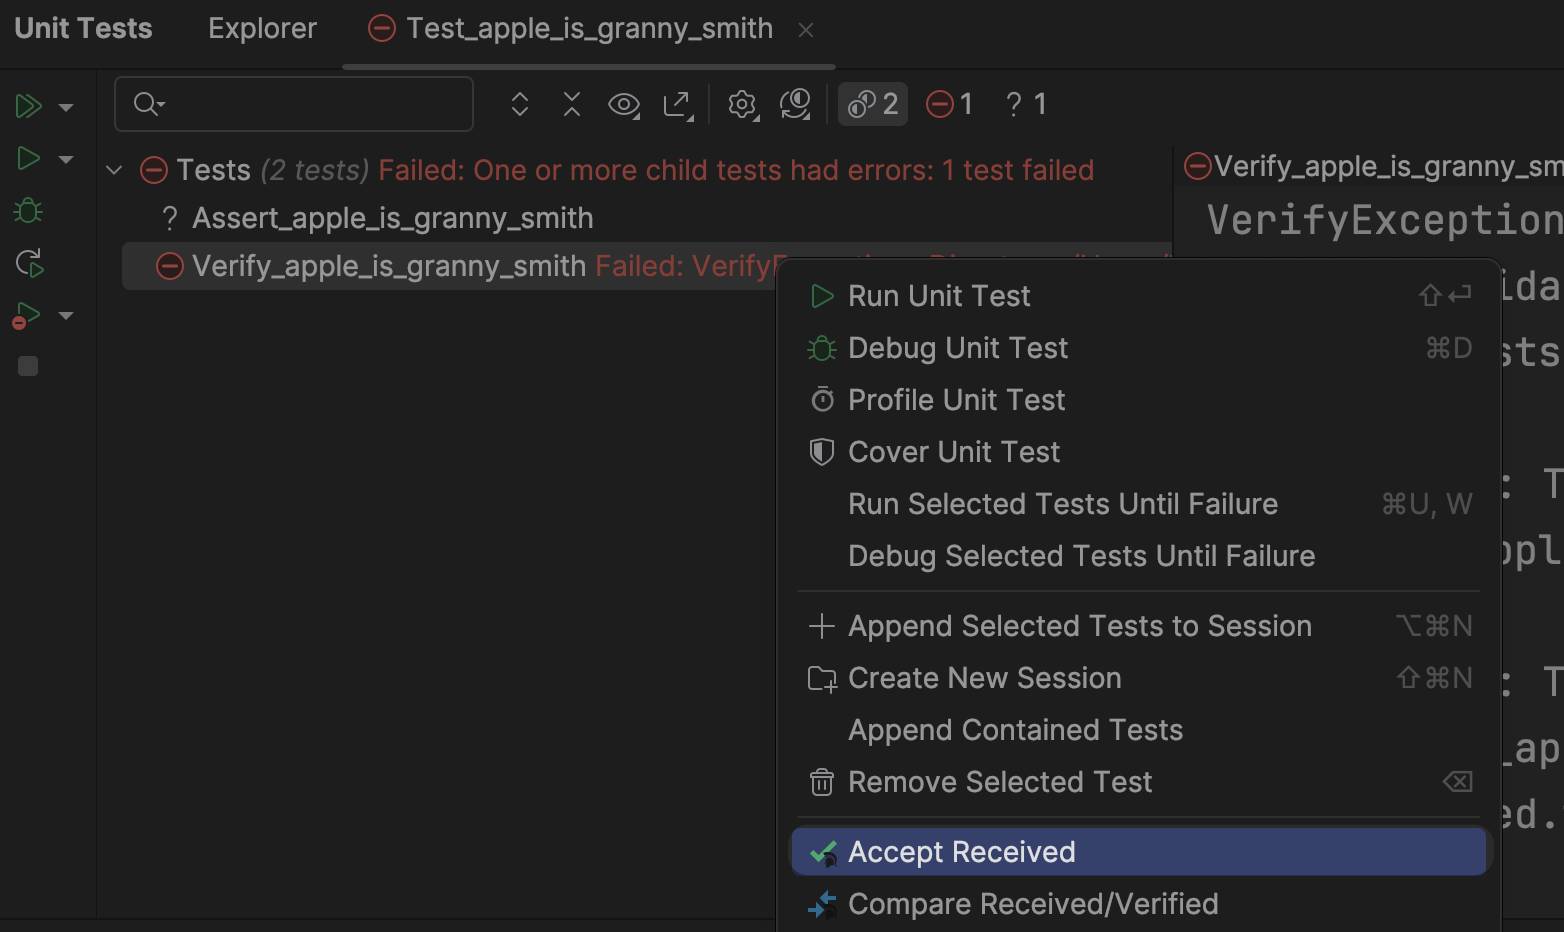
Running our test, you’ll see that it immediately fails with a VerifyException.
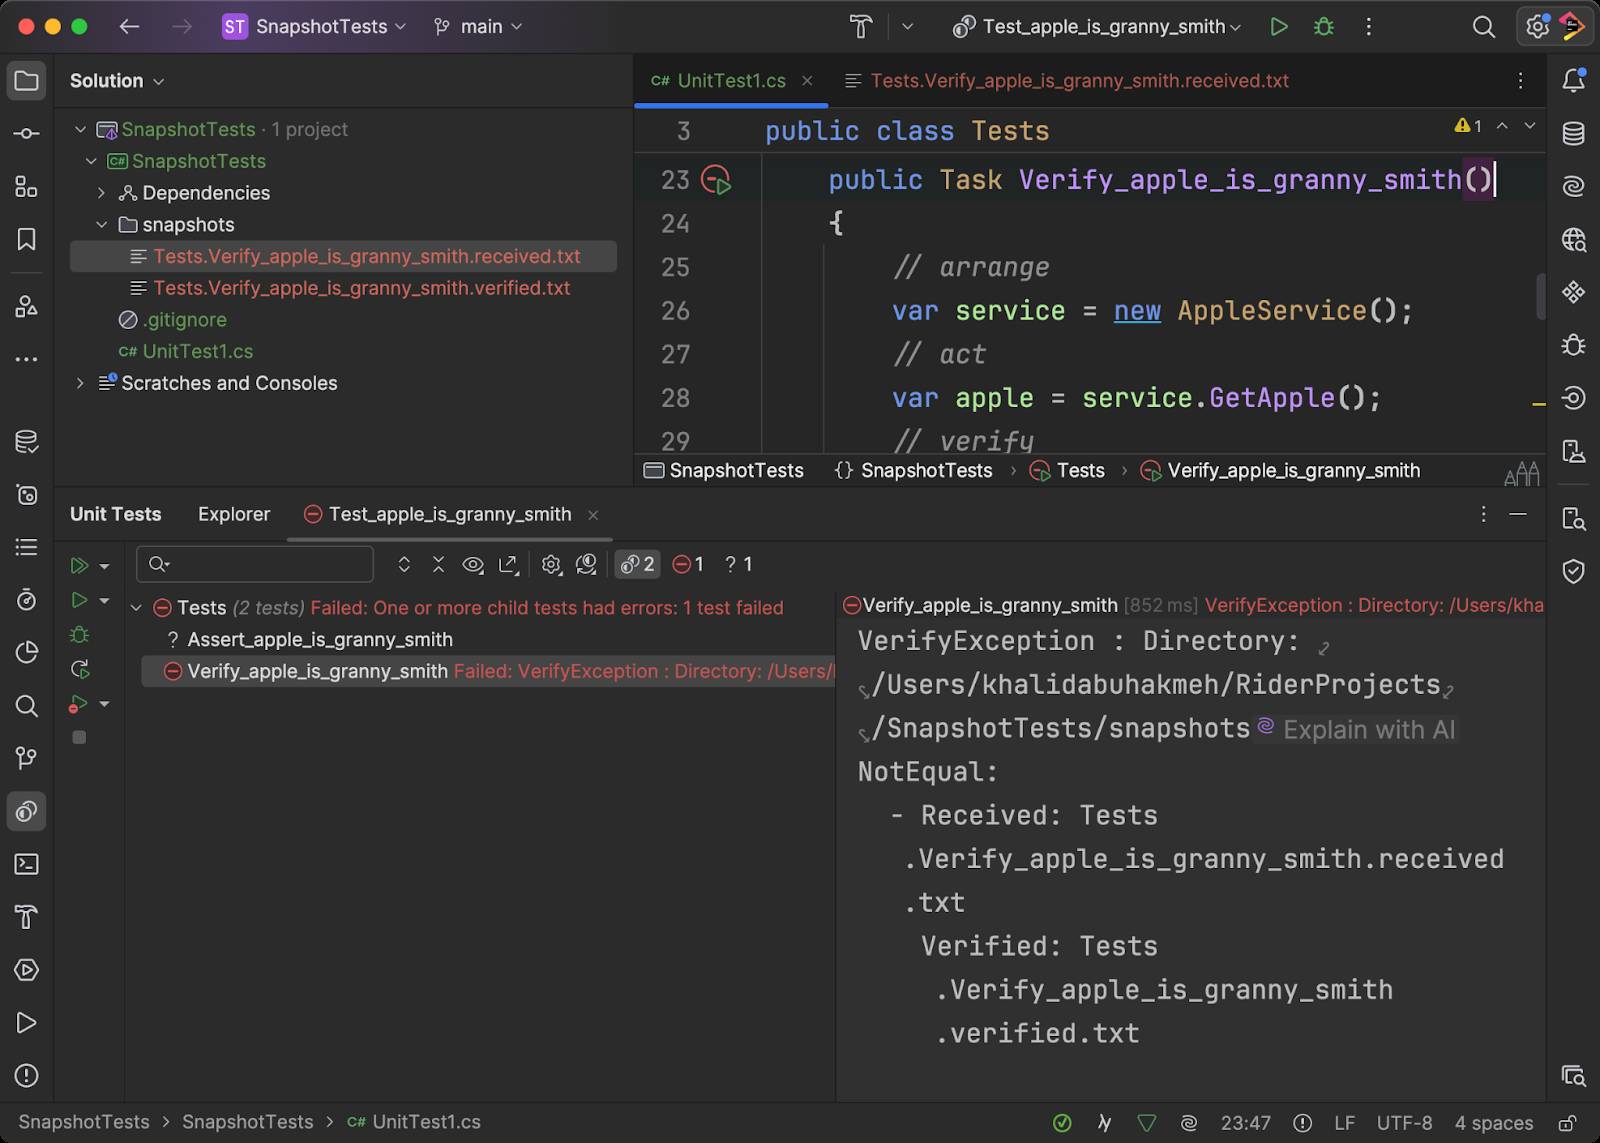
This result is as expected. Let’s use the Verify plug-in to see the received result compared with the verified result. In the test window, right-click the failed test and use the menu to find Compare Received/Verified.
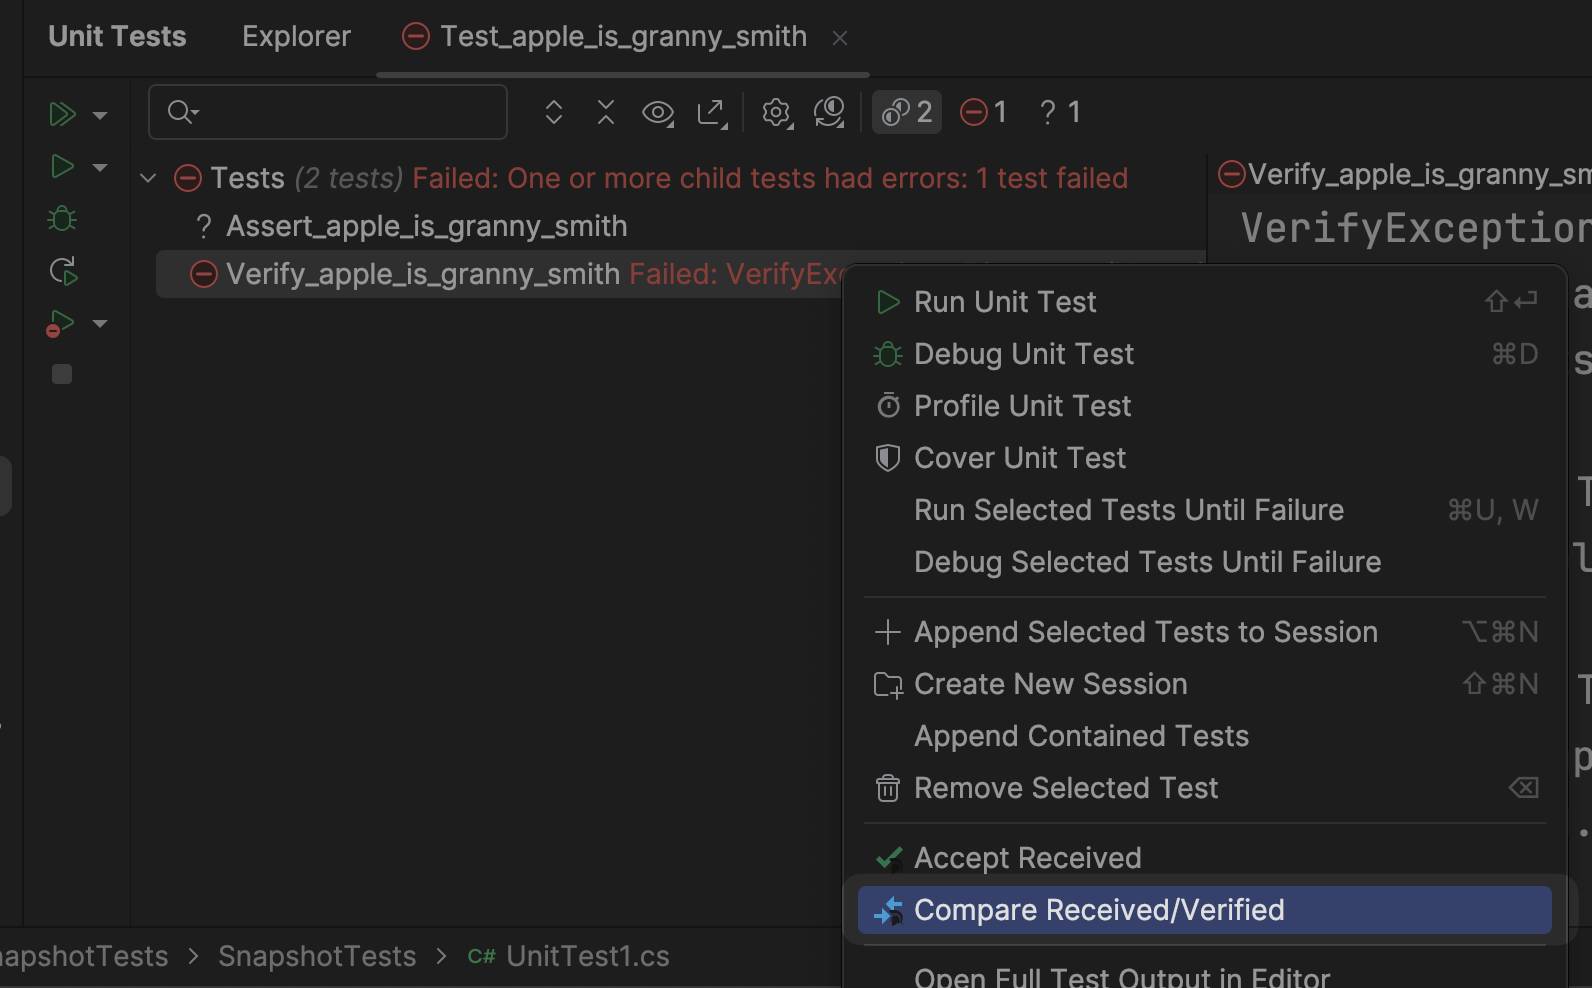
Once you’ve chosen Compare Received/Verified, your IDE’s comparison tool will launch, allowing you to see the variations between the received and verified results.
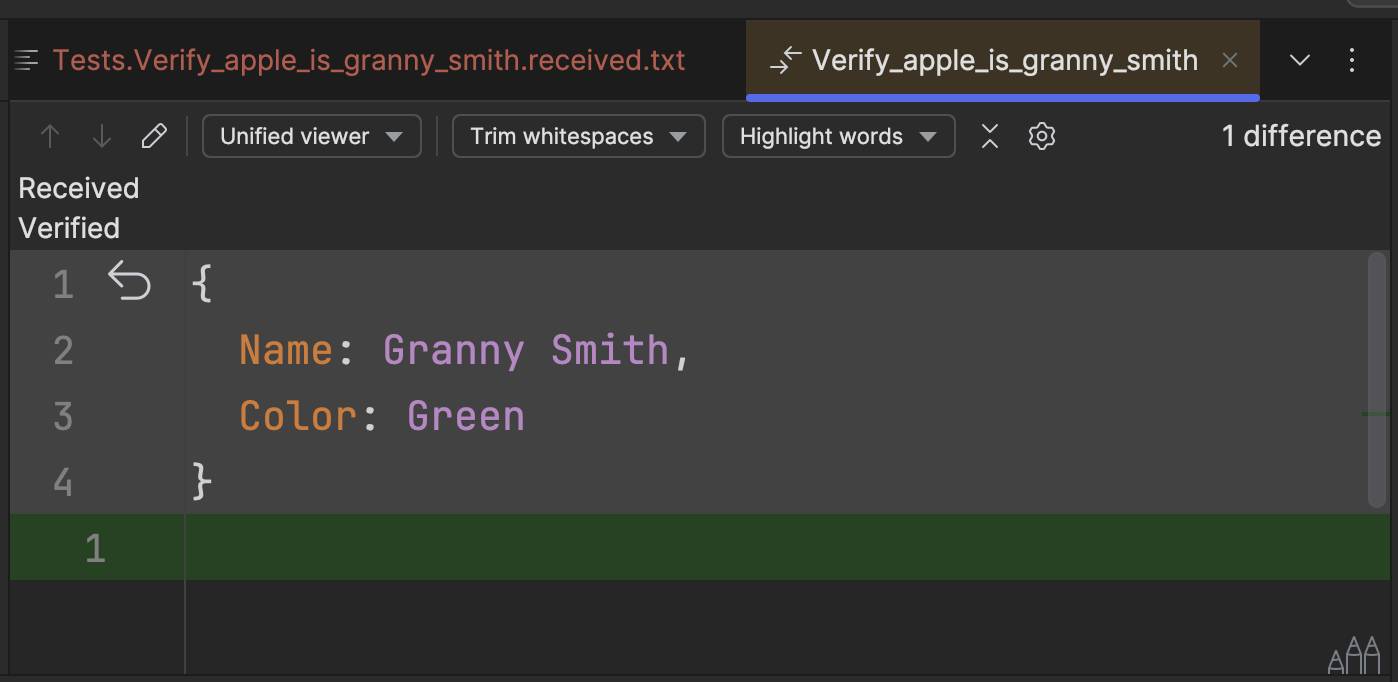
If it looks good to you, remember you’re the verifier of the snapshot, then you can right-click the failed test and choose Accept Received.
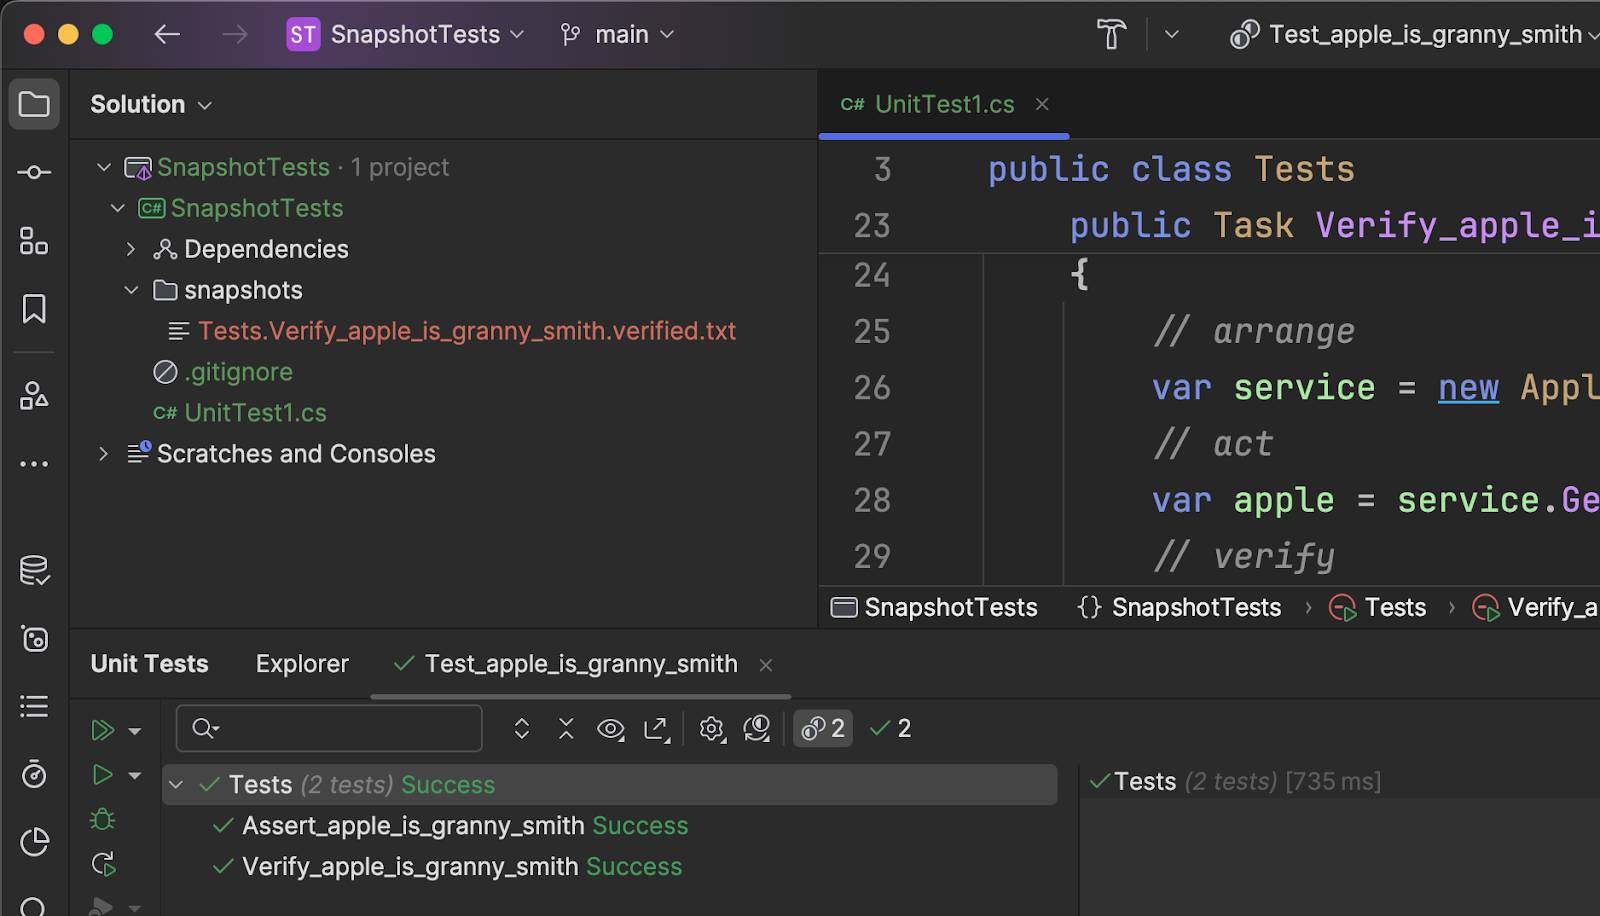
Rerunning the tests will lead to a passing test.
Congratulations. You’ve successfully written your first snapshot test. Now, let’s talk about some frequently asked questions and answer them.
Common questions about snapshot testing
When adopting snapshot tests, there are a few questions many developers commonly ask. We’ve gathered some of them here and will try to answer them.
Is this “really” better than other styles of testing?
Snapshot testing provides a different approach and, as mentioned earlier, is compatible with all testing approaches. Snapshots can offer more value over fewer tests and catch unintended changes you may miss when writing assertion-based tests. Like all things in life, snapshot testing has advantages and disadvantages.
Do I have to check in the snapshots to source control?
Yes. Snapshots are binary artifacts necessary to fulfill the verification test you’ve written. Without these files, your test has nothing to assert against and will fail.
Won’t that make my source control huge?
These snapshot files should not change so frequently that they cause significant binary changes in your source control. Text-based serialization is typically the default for Verify, so these files are compressed and efficiently stored.
Can I fine-tune the verification process?
As you’ve seen in the above example, a VerifySettings class allows you to configure how verification occurs. Settings changes could include where snapshot files are stored, what fields are part of verification, and how binary serialization occurs.
Can I verify more than just JSON objects?
Yes! Serializing anything is another strength of snapshot testing. The comparison can be between any two binary files, including PDFs, images, videos, or whatever your code can produce. Simon Cropp created an entire library of extensions for that purpose.
Can I set Verify settings globally?
Yes, but you’ll need to use the ModuleInitializer attribute, which allows you to execute code once the code runtime has loaded an assembly.
public class StaticSettings{ [Fact] public Task Test() => Verify("String to verify");}public static class StaticSettingsUsage{ [ModuleInitializer] public static void Initialize() => VerifierSettings.AddScrubber(_ => _.Replace("String to verify", "new value"));}
Conclusion
Verify by Simon Cropp is a fantastic library for folks looking to enhance the value of their test suites. Also, remember to install the plug-in written by Matthias Koch for both ReSharper and JetBrains Rider for an improved verification workflow. We also love that all major testing libraries are supported with a massive library of extensions to verify a variety of test artifacts. We highly recommend you take a look.
We hope you learned something about snapshot testing. Please let us know in the comments below if you try it in your solutions.
image credit: Alexander Wende
