包阅导读总结
1. `Optimistic UI`、`SWR`、`User Experience`、`Web Applications`、`Data Fetching`
2. 本文介绍了如何通过 Optimistic UI 和 SWR 提升用户体验,包括其原理、优势、实现方法及在任务应用中的使用,还提到了环境设置和可能的弊端与理想用例。
3.
– 什么是 Optimistic UI
– 核心是让应用快速响应,即使后台处理复杂也能即时反馈
– 示例如执行操作时立即显示变化,不等服务器确认
– 为何 Optimistic UI 重要
– 提升用户体验,提供即时反馈,避免等待和疑惑
– Optimistic UI 的其他好处
– 减少感知延迟
– 提高响应性
– 支持复杂交互
– 增加用户参与度
– 引入 SWR
– 是用于数据获取的轻量级 React Hook 库
– 平衡性能和数据新鲜度,支持多种特性
– 如何设置环境
– 提供 GitHub 仓库和相关依赖安装指导
– 如何构建任务应用 UI
– 先实现无 Optimistic UI 的 CRUD 应用,再对比实现有 Optimistic UI 的
– 展示相关代码和操作步骤
思维导图: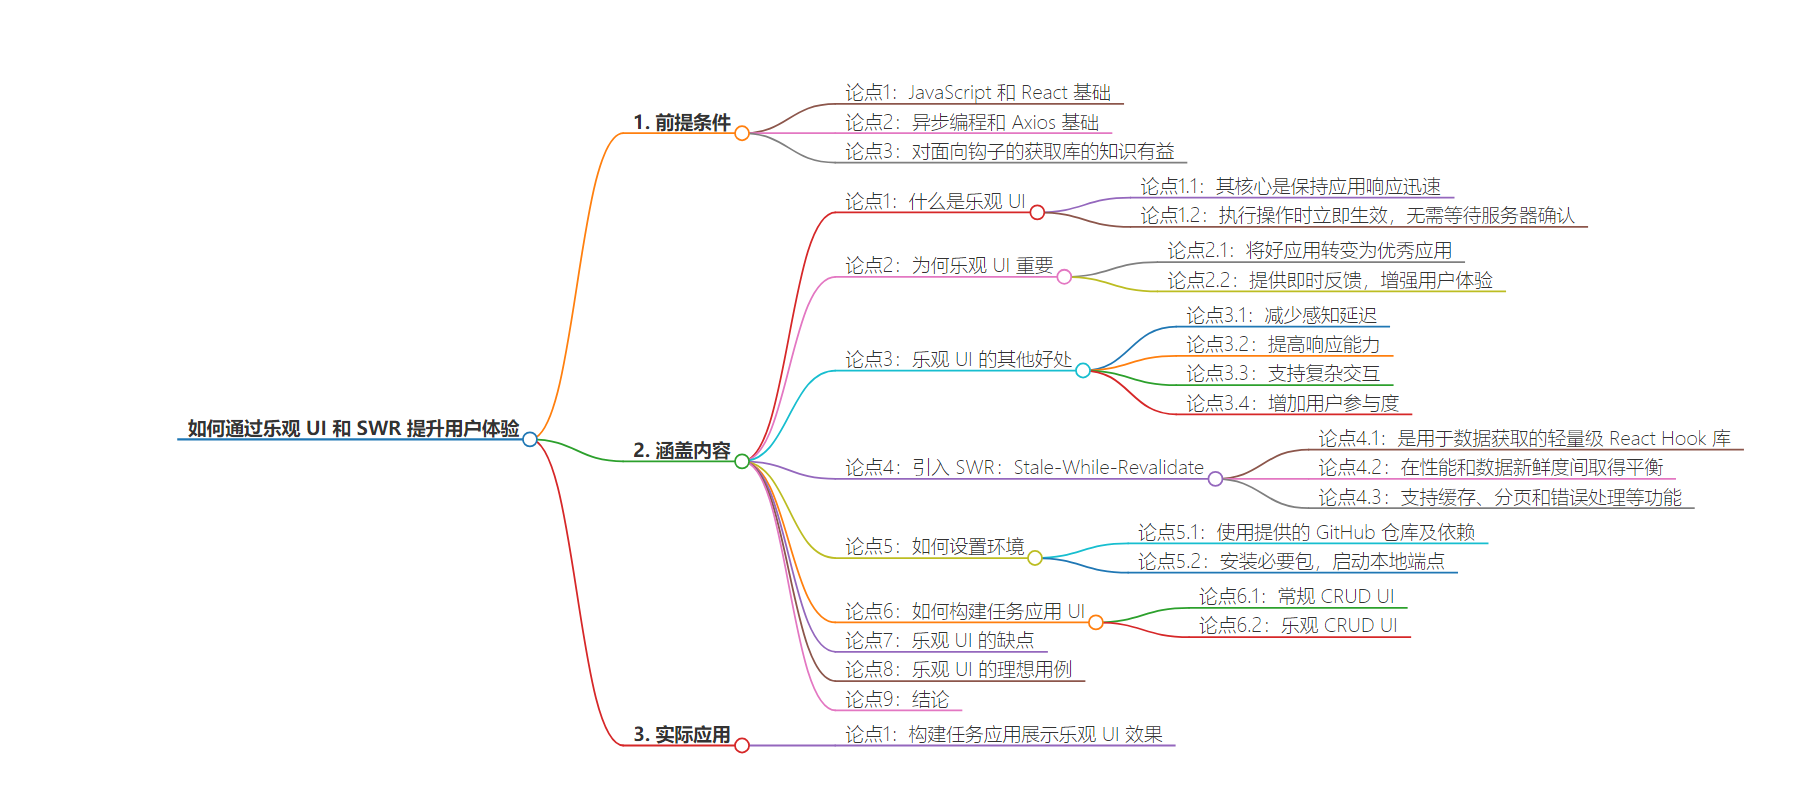
文章地址:https://www.freecodecamp.org/news/improve-user-experience-with-optimistic-ui-swr/
文章来源:freecodecamp.org
作者:David Jaja
发布时间:2024/7/9 22:33
语言:英文
总字数:4088字
预计阅读时间:17分钟
评分:89分
标签:前端开发,用户体验,React,乐观 UI,SWR
以下为原文内容
本内容来源于用户推荐转载,旨在分享知识与观点,如有侵权请联系删除 联系邮箱 media@ilingban.com
Have you ever noticed how some apps feel like they can read your mind? You click a button, and before you can even blink, it’s done – no loading screens, no waiting around. It’s like magic, right? Well, let me tell you a little secret: that’s the power of Optimistic UI.
In this article, we’ll dive into Optimistic UI and explore how it works and keeps your web experience smooth as butter. We’ll build a simple task app together that’ll show how Optimistic UI can help turn mundane tasks into lightning-fast interactions that leave your users feeling happy.
Prerequisites
- Fundamentals of JavaScript and React
- Fundamentals of Async programming and Axios
- Knowledge of hook-oriented fetch libraries would also be beneficial
What We’ll Cover:
- What is Optimistic UI?
- Why Does Optimistic UI Matter?
- Other Benefits of Optimistic UI
- Introducing SWR: Stale-While-Revalidate
- How to Set Up the Environment
- How to Build the Task App UI
– Regular CRUD UI
– Optimistic CRUD UI - Drawbacks of Optimistic UI
- Ideal Use Cases for Optimistic UI
- Conclusion
What is Optimistic UI?
At its core, Optimistic UI is all about keeping your app feeling snappy and responsive, even when a lot is happening behind the scenes. It’s like having a superpower that lets your app predict the future – well, sort of.
When you perform an action in your app – whether it’s adding a new item to a list or updating a profile – Optimistic UI kicks in to make it happen right away, without waiting for confirmation from the server. It’s the ultimate optimist, always assuming everything will work out just fine.
Why Does Optimistic UI Matter?
So why should you care about Optimistic UI? Simple: because it’s the secret sauce that turns good apps into great ones.
Think about it: when you click a button, you expect something to happen – and you expect it to happen fast. That’s where Optimistic UI shines. By giving your users instant feedback and keeping your app feeling snappy, Optimistic UI enhances the overall user experience.
No more staring at loading screens or wondering if your click actually did anything – with Optimistic UI, every action feels easy and effective.
Other Benefits of Optimistic UI
- Reduced Perceived Latency: Optimistic UI reduces the perceived latency of actions by displaying changes immediately without waiting for server confirmation. This creates a perception of faster response times, even if server communication takes longer.
- Improved Responsiveness: Optimistic UI allows users to interact with the app continuously without interruptions from loading spinners or waiting screens. This uninterrupted flow enhances the overall responsiveness of the application.
- Support for Complex Interactions: Optimistic UI helps complex interactions, such as drag-and-drop, multi-step processes, and real-time collaboration, feel fluid and intuitive. This flexibility opens up possibilities for innovative features and functionalities in the app.
- Increased User Engagement: The responsiveness and interactivity provided by Optimistic UI can lead to increased user engagement and retention. Users are more likely to return to an app that provides a smooth and enjoyable experience.
Introducing SWR: Stale-While-Revalidate
Before we dive into the implementation, let’s take a moment to talk about SWR. SWR is a lightweight React Hook library for data fetching. SWR stands for Stale-While-Revalidate, and it strikes the perfect balance between performance and freshness when fetching data in your React applications.
SWR also automatically revalidates data in the background while still serving stale data from the cache. This means your app stays fast and responsive, even when fetching fresh data from the server.
But that’s not all – SWR also supports key features like caching, pagination, and error handling, making it a powerful tool in your arsenal for building fast, reliable web applications as well as implementing Optimistic UI.
How to Set Up the Environment
I’ve prepared a GitHub repository with starter files to speed things up. Simply clone this repo and install the dependencies.
The starter code consists of the basic JSX components required, as well as some basic Axios functions for performing CRUD operations. After installing all the necessary packages with npm i, open your terminal and start up your local endpoint using json-server.
npx json-server data/db.json -p 3500To see all your data present, head over to that route:
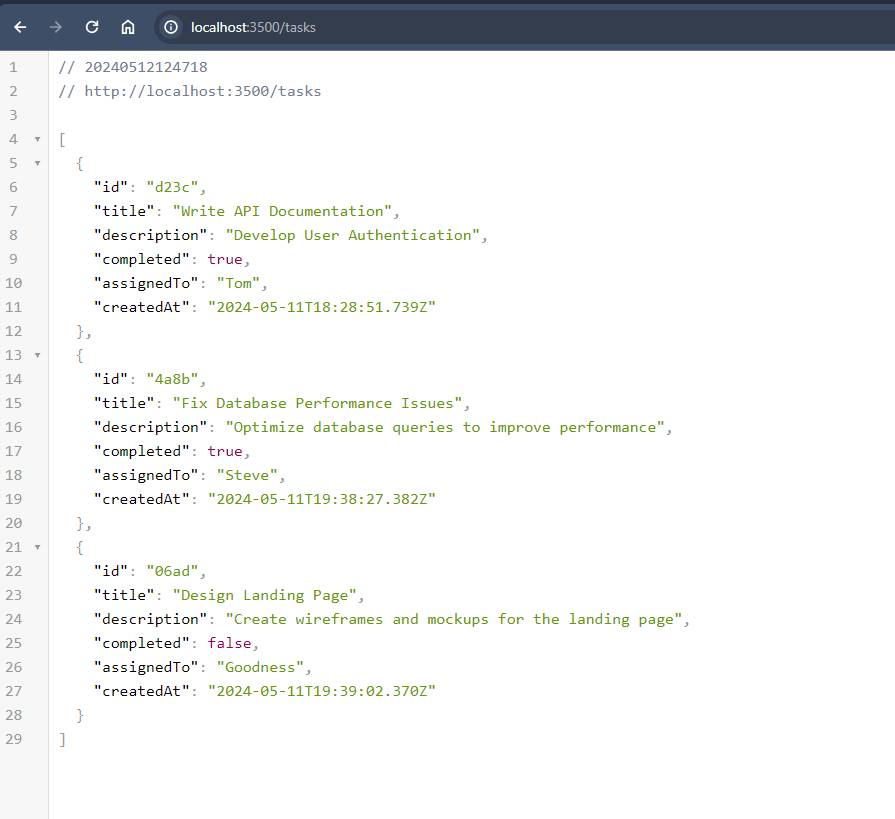 Showing initial data
How to Build the Task App UI
In this section, we’ll first implement CRUD applications without Optimistic UI and then with Optimistic UI to show the differences between them.
Regular CRUD UI
Start by heading over to your TaskContainer component, then use the useSWR hook to call your fetch function.
const { isLoading, error, data: tasks, mutate, } = useSWR(cacheKey, fetchTasks, { onSuccess: (data) => data.sort((a, b) => new Date(b.createdAt) - new Date(a.createdAt)), });SWR uses a similar data fetching hook and pattern to other libraries such as React Query (TanStack Query) and Redux Toolkit Query. This hook fetching pattern often returns a loading state, an error state, your fetched data (if any) and a mutation function (but more about that later).
Note: The cacheKey is a unique key used to notify SWR when and where to re-call your function. The onSuccess function is a method used to trigger another action when the fetch is successful – in this case, sorting the data in descending order.
With your data back, you can now create the JSX markup.
return ( <div className="flex flex-col gap-8 p-4"> <div className="p-4 shadow-lg "> <div className="flex flex-col gap-4 "> {tasks && tasks.map((task, index) => { return ( <div key={task.id} className="flex gap-4 items-center py-2 px-6 rounded-md bg-[#74a0a6]"> <div> <label htmlFor={`task-${task.id}`} key={task.id} className={`flex gap-4 text-[14px] items-center font-bold list-none p-4 rounded bg-[#88adb3] cursor-pointer hover:bg-[#609299]`}> <div className="inline-flex items-center"> <label className="relative flex items-center p-3 rounded-full cursor-pointer" htmlFor="checkbox"> <input type="checkbox" name={`task-${task.id}`} id={`task-${task.id}`} className="before:content[''] peer relative h-5 w-5 cursor-pointer appearance-none rounded-md border border-[#edebd9] transition-all before:absolute before:top-2/4 before:left-2/4 before:block before:h-12 before:w-12 before:-translate-y-2/4 before:-translate-x-2/4 before:rounded-full before:bg-blue-gray-500 before:opacity-0 before:transition-opacity checked:border-lines checked:bg-[#545240] checked:before:bg-[#edebd9] hover:before:opacity-10 before:checked:hover:before:opacity-10 " checked={task.completed} /> <span className="absolute transition-opacity opacity-0 pointer-events-none text-stone-100 top-2/4 left-2/4 -translate-y-2/4 -translate-x-2/4 peer-checked:opacity-100"> <svg xmlns="http://www.w3.org/2000/svg" className="h-3.5 w-3.5" viewBox="0 0 20 20" fill="currentColor" stroke="currentColor" strokeWidth="1"> <path fillRule="evenodd" d="M16.707 5.293a1 1 0 010 1.414l-8 8a1 1 0 01-1.414 0l-4-4a1 1 0 011.414-1.414L8 12.586l7.293-7.293a1 1 0 011.414 0z" clipRule="evenodd"></path> </svg> </span> </label> </div> </label> </div> <div> <h2 className="text-xl font-bold text-[#161515] "> {task.title} </h2> <p className="text-sm font-semibold text-[#42403f] "> {task.description} </p> <div className="flex gap-2 mt-2 text-xs font-bold"> <div className="flex items-center "> <img src={userImages[index]} alt="" className="w-10 h-10 rounded-full " /> <span> {task.assignedTo}</span> </div> </div> </div> <div className="p-2 ml-auto rounded-full cursor-pointer hover:bg-red-300" > <FaTrash color="#545240" /> </div> </div> ); })} </div> </div> </div> );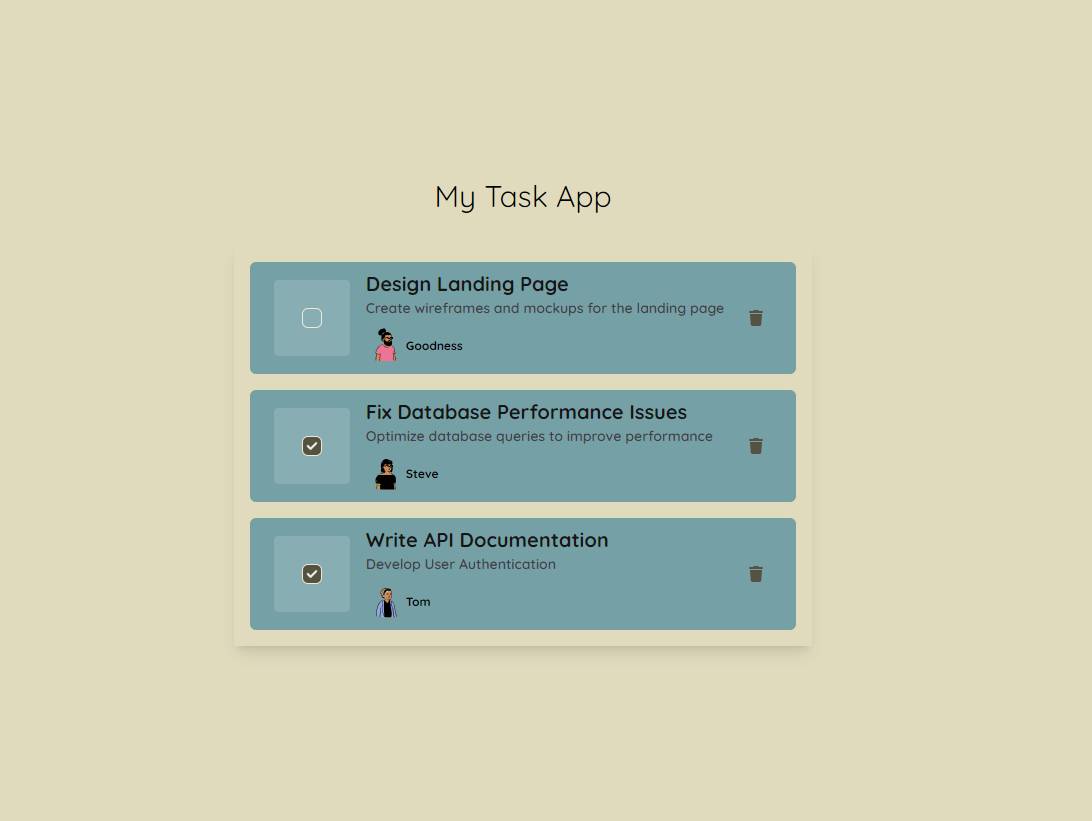 UI after data fetching
After that, head into your Taskform component and create a form UI for creating new tasks.
import { addSingleTask } from "./services/api";import toast from "react-hot-toast";import { useState } from "react";export default function Taskform() { const [title, setTitle] = useState(""); const [description, setDescription] = useState(""); const [assignedTo, setAssignedTo] = useState(""); return ( <div className="bg-[#74a0a6] p-4 rounded-md"> <form className="flex flex-col w-full gap-2 "> <label htmlFor="title"> <p className="font-bold ">Title</p> <input type="text" className="w-full font-medium focus:outline-[#74a0a6] focus-within:outline-[#74a0a6] p-1 bg-transparent border rounded-md" value={title} onChange={(e) => setTitle(e.target.value)} /> </label> <label htmlFor="description"> <p className="font-bold ">Description</p> <input type="text" className="w-full font-medium focus:outline-[#74a0a6] focus-within:outline-[#74a0a6] p-1 bg-transparent border rounded-md" value={description} onChange={(e) => setDescription(e.target.value)} /> </label> <label htmlFor="assignedTo"> <p className="font-bold ">Assigned To</p> <input type="text" className="w-full font-medium focus:outline-[#74a0a6] focus-within:outline-[#74a0a6] p-1 bg-transparent border rounded-md" value={assignedTo} onChange={(e) => setAssignedTo(e.target.value)} /> </label> <button className="p-2 mt-3 border text-white rounded-md w-max hover:bg-white hover:text-[#74a0a6]"> Add </button> </form> </div> );}After that, import it into your TaskContainer component.
return ( <div className="flex flex-col gap-8 p-4"> <Taskform /> <div className="p-4 shadow-lg "> <div className="flex flex-col gap-4 "> {tasks && tasks.map((task, index) => {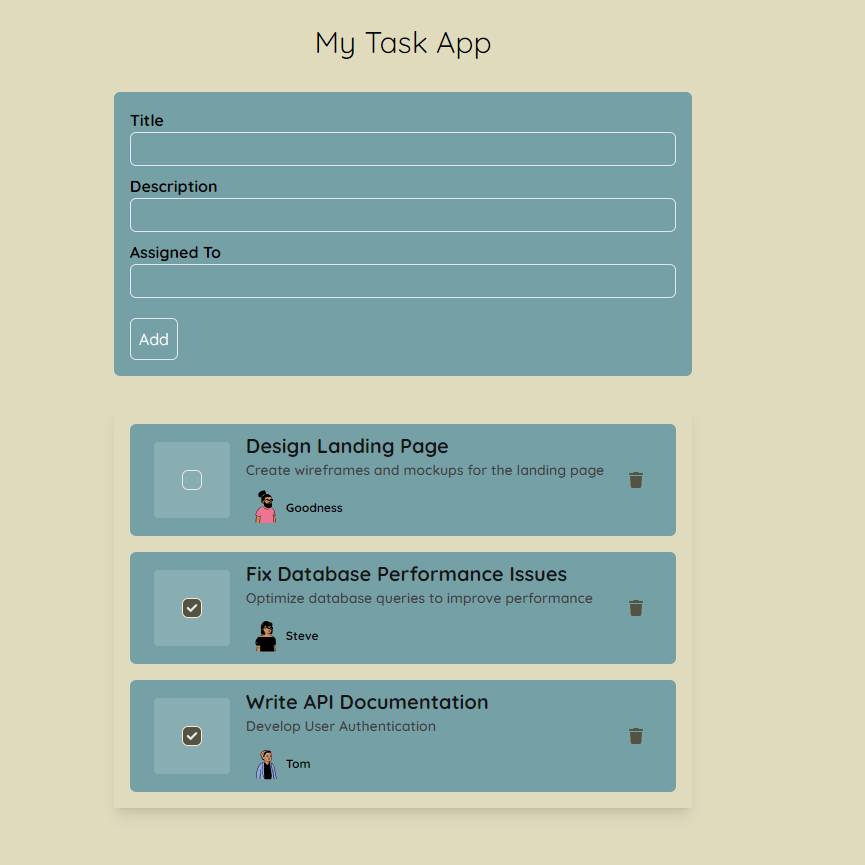 UI with Form added
To add a new task, create a handler function in the Taskform, then import your POST function from your API file.
const addTaskMutation = async (e) => { e.preventDefault(); const createdAt = new Date().toISOString(); try { await addSingleTask({ title, description, assignedTo, completed: false, createdAt, }); toast.success("Task added succesfully."); setTitle(""); setDescription(""); setAssignedTo(""); } catch (err) { toast.error("Failed to add the new task."); } };Finally, call the mutate function after your POST function call to enable SWR to invalidate your current data and make a new request. You can get this mutate function from the useSWR hook in the TaskContainer, then pass it through props to the form.
const { isLoading, error, data: tasks, mutate, } = useSWR(cacheKey, fetchTasks, { onSuccess: (data) => data.sort((a, b) => new Date(b.createdAt) - new Date(a.createdAt)), }); return ( <div className="flex flex-col gap-8 p-4"> <Taskform mutate={mutate} />Then call it in the TaskForm.
import { addSingleTask } from "./services/api";import toast from "react-hot-toast";import { useState } from "react";export default function Taskform({ mutate }) { const [title, setTitle] = useState(""); const [description, setDescription] = useState(""); const [assignedTo, setAssignedTo] = useState(""); const addTaskMutation = async (e) => { e.preventDefault(); const createdAt = new Date().toISOString(); try { await addSingleTask({ title, description, assignedTo, completed: false, createdAt, }); mutate(); toast.success("Task added succesfully."); setTitle(""); setDescription(""); setAssignedTo(""); } catch (err) { toast.error("Failed to add the new task."); } }; return ( <div className="bg-[#74a0a6] p-4 rounded-md"> <form className="flex flex-col w-full gap-2 " onSubmit={(e) => addTaskMutation(e)}> <label htmlFor="title"> <p className="font-bold ">Title</p> <input type="text" className="w-full font-medium focus:outline-[#74a0a6] focus-within:outline-[#74a0a6] p-1 bg-transparent border rounded-md" value={title} onChange={(e) => setTitle(e.target.value)} /> </label> <label htmlFor="description"> <p className="font-bold ">Description</p> <input type="text" className="w-full font-medium focus:outline-[#74a0a6] focus-within:outline-[#74a0a6] p-1 bg-transparent border rounded-md" value={description} onChange={(e) => setDescription(e.target.value)} /> </label> <label htmlFor="assignedTo"> <p className="font-bold ">Assigned To</p> <input type="text" className="w-full font-medium focus:outline-[#74a0a6] focus-within:outline-[#74a0a6] p-1 bg-transparent border rounded-md" value={assignedTo} onChange={(e) => setAssignedTo(e.target.value)} /> </label> <button className="p-2 mt-3 border text-white rounded-md w-max hover:bg-white hover:text-[#74a0a6]"> Add </button> </form> </div> );}Testing your component now gives the following result:
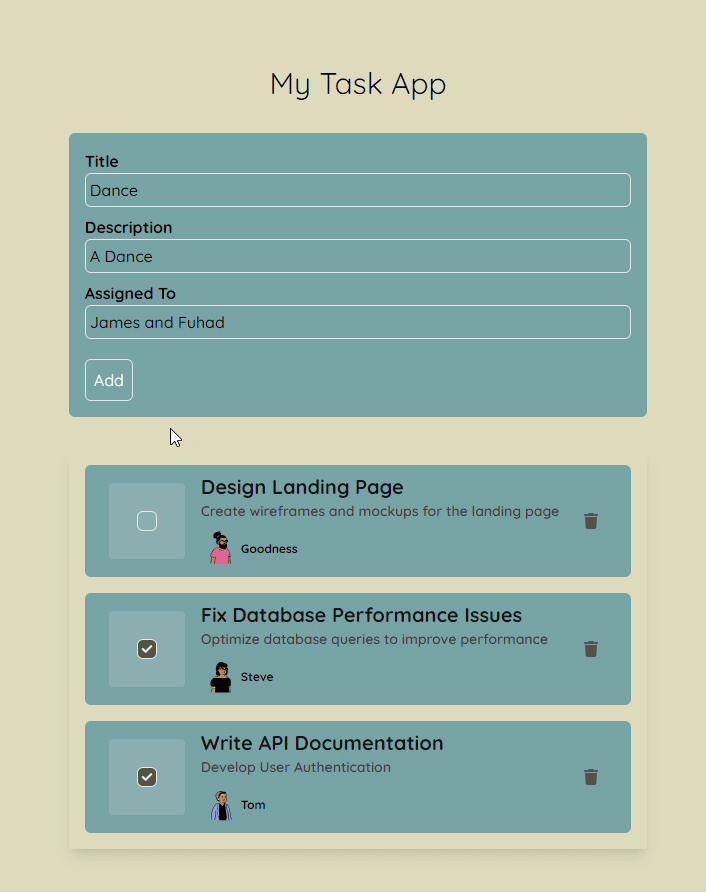 Regular Create Operation
As you can see, the list is updated after each form submission. But this still doesn’t highlight our need for optimistic UI. You’re probably thinking, if the operation happened that fast, why bother with Optimistic UI?
 What’s the point gif
Well, for starters, no real-world application is ever going to beat the speed of your local JSON server, as the data is readily available to you and users often have unstable network connections.
Let’s slow down the fetch to illustrate a real-world data request better. This better simulates a real-world scenario as users often come from different locations that have varying internet speeds.
Start by creating a delay function that runs before each of your function calls.
import axios from "axios";const tasksApi = axios.create({ baseURL: "http://localhost:3500",});export const tasksUrlEndpoint = "/tasks";const delay = () => new Promise((res) => setTimeout(() => res(), 1200));export const fetchTasks = async () => { await delay(); const response = await tasksApi.get(tasksUrlEndpoint); return response.data;};export const addSingleTask = async ({ title, description, completed, assignedTo, createdAt,}) => { await delay(); const response = await tasksApi.post(tasksUrlEndpoint, { title, description, completed, assignedTo, createdAt, }); return response.data;};export const updateSingleTask = async (task) => { await delay(); const response = await tasksApi.patch(`${tasksUrlEndpoint}/${task.id}`, task); return response.data;};export const deleteSingleTask = async ({ id }) => { await delay(); return await tasksApi.delete(`${tasksUrlEndpoint}/${id}`, id);};Then attempt your create operation again.
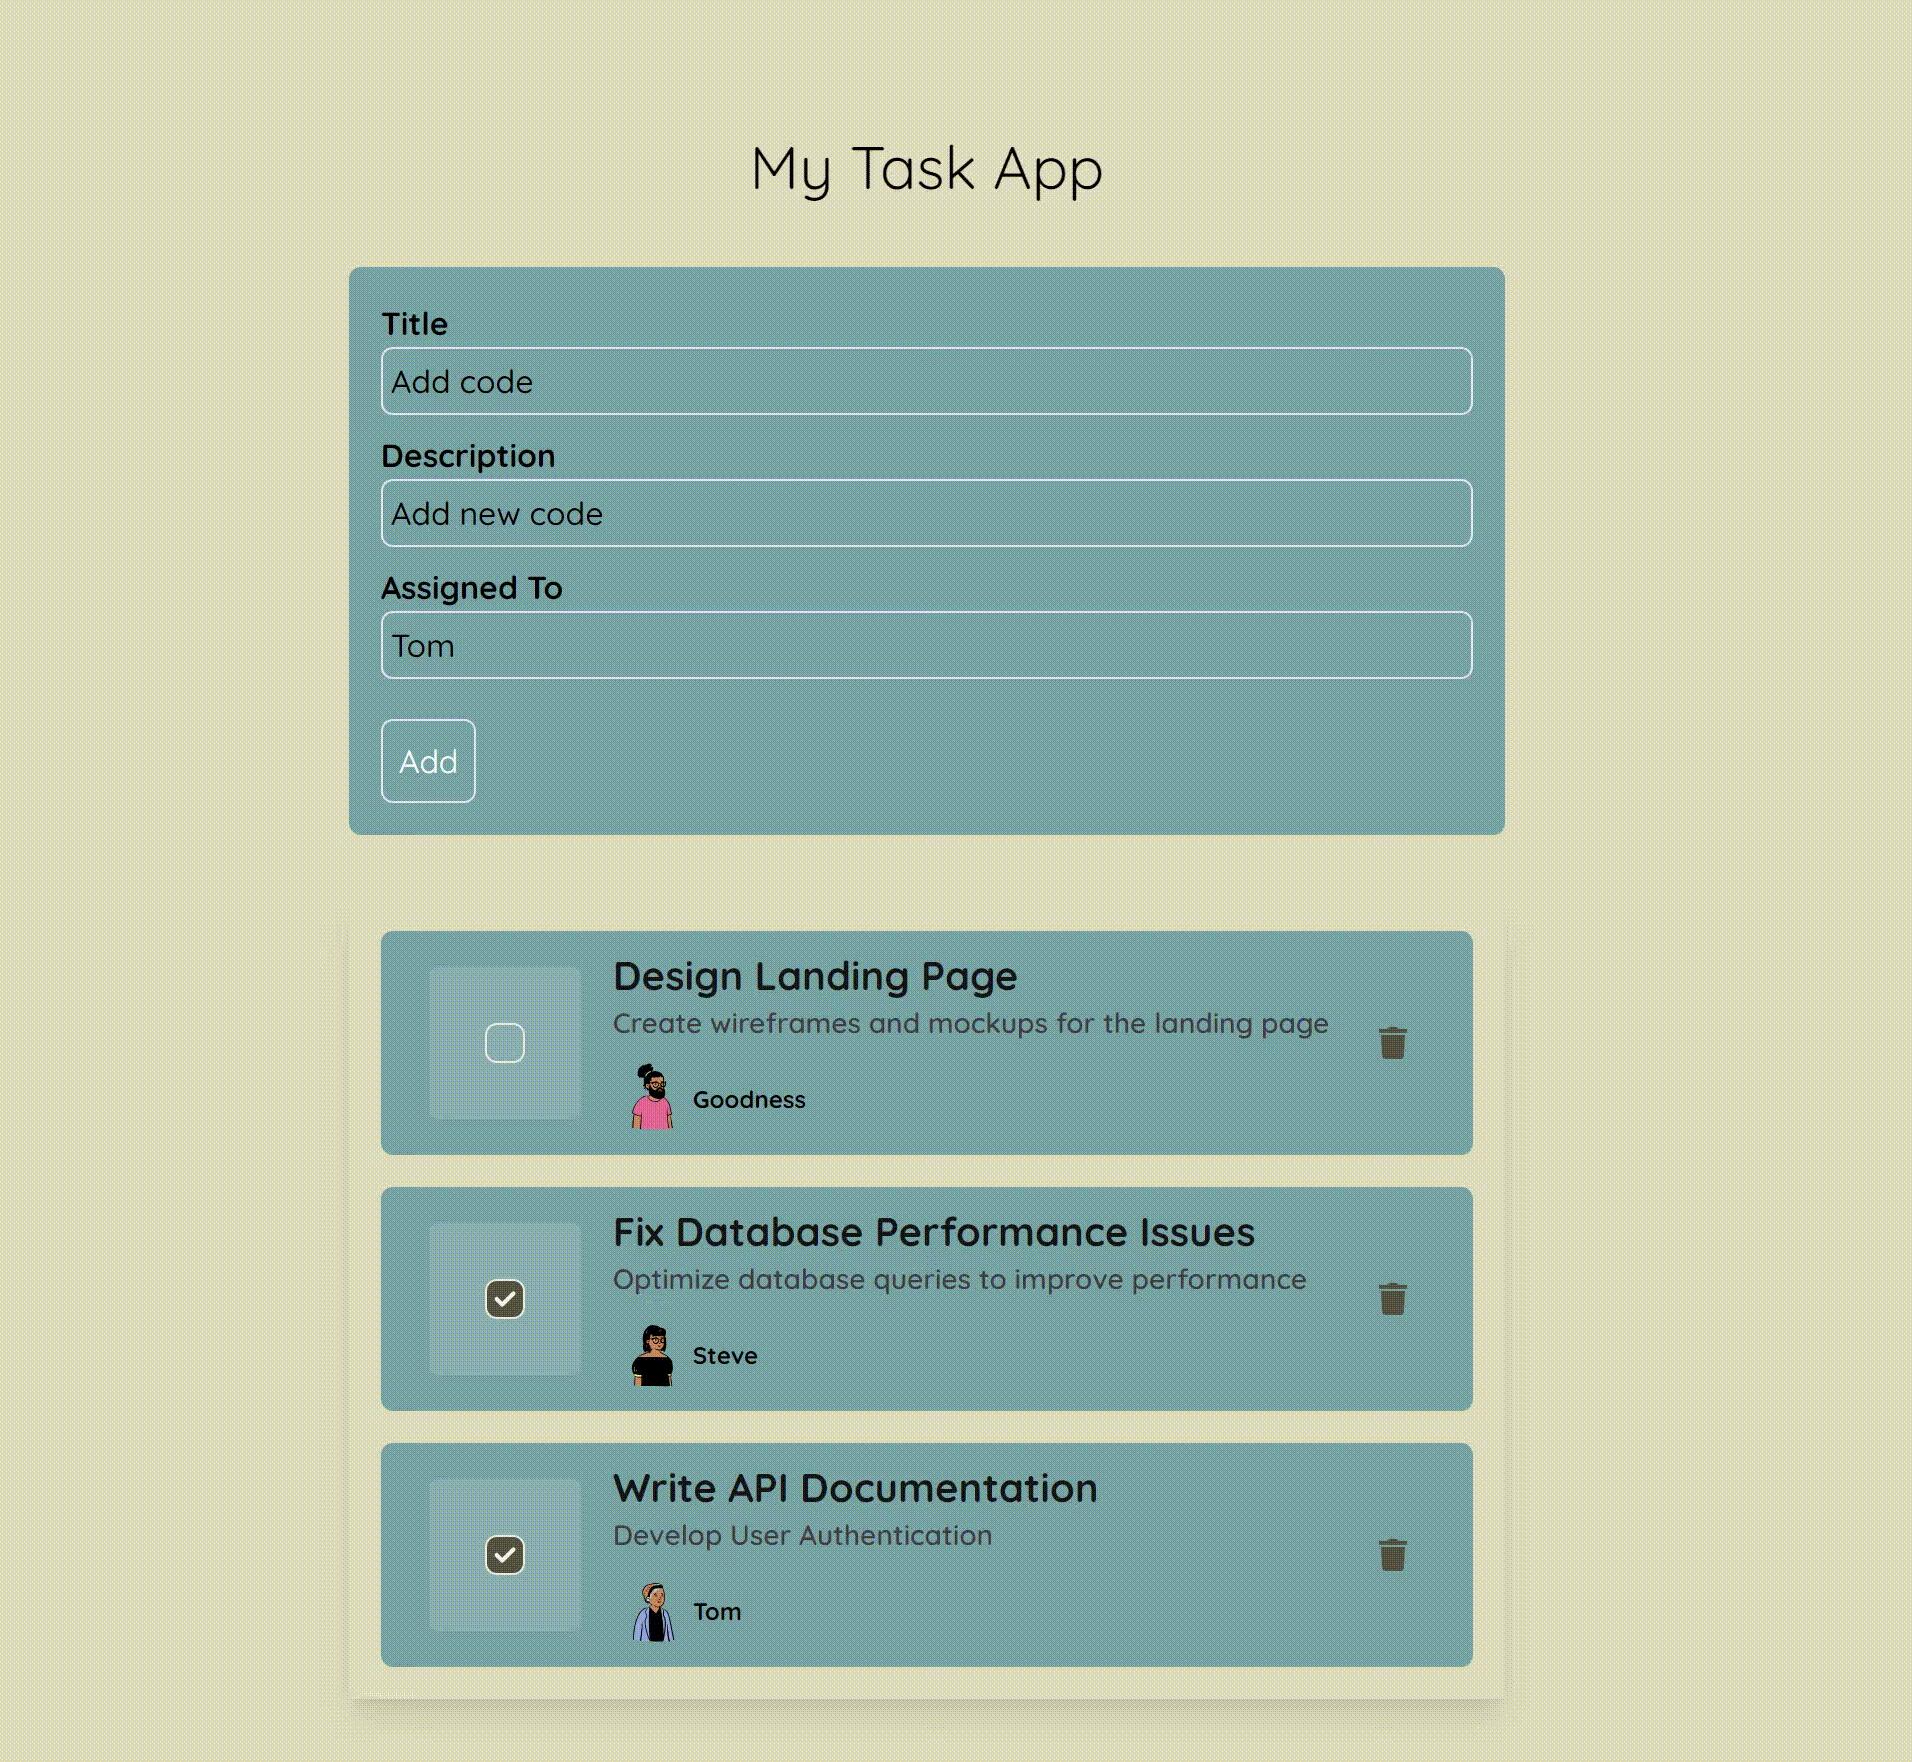 Create operation after delay
As you may have noticed, the create operation was only fired after the delay function (spanning 1.2 seconds) finished running, which caused a brief spell of inactivity on the screen.
The usual way to handle those periods between loading is usually a loading spinner or indicator telling you that some background activity is running. But this often disrupts your flow when working in the application, and quite frankly is disappointing.
The same static effect can be seen in the update operation, where users have to wait for server confirmation to see fresh data.
const updateTaskMutation = async (updatedTask) => { try { await updateSingleTask(updatedTask); mutate(); toast.success("Successfully updated task"); } catch (err) { toast.error("Failed to update the task."); } }; return ( <div className="flex flex-col gap-8 p-4"> <Taskform mutate={mutate} /> <div className="p-4 shadow-lg "> <div className="flex flex-col gap-4 "> {tasks && tasks.map((task, index) => { return ( <div key={task.id} className="flex gap-4 items-center py-2 px-6 rounded-md bg-[#74a0a6]"> <div> <label htmlFor={`task-${task.id}`} key={task.id} className={`flex gap-4 text-[14px] items-center font-bold list-none p-4 rounded bg-[#88adb3] cursor-pointer hover:bg-[#609299]`}> <div className="inline-flex items-center"> <label className="relative flex items-center p-3 rounded-full cursor-pointer" htmlFor="checkbox"> <input type="checkbox" name={`task-${task.id}`} id={`task-${task.id}`} className="before:content[''] peer relative h-5 w-5 cursor-pointer appearance-none rounded-md border border-[#edebd9] transition-all before:absolute before:top-2/4 before:left-2/4 before:block before:h-12 before:w-12 before:-translate-y-2/4 before:-translate-x-2/4 before:rounded-full before:bg-blue-gray-500 before:opacity-0 before:transition-opacity checked:border-lines checked:bg-[#545240] checked:before:bg-[#edebd9] hover:before:opacity-10 before:checked:hover:before:opacity-10 " checked={task.completed === true} onChange={() => updateTaskMutation({ ...task, completed: !task.completed, }) } /> <span className="absolute transition-opacity opacity-0 pointer-events-none text-stone-100 top-2/4 left-2/4 -translate-y-2/4 -translate-x-2/4 peer-checked:opacity-100"> <svg xmlns="http://www.w3.org/2000/svg" className="h-3.5 w-3.5" viewBox="0 0 20 20" fill="currentColor" stroke="currentColor" strokeWidth="1"> <path fillRule="evenodd" d="M16.707 5.293a1 1 0 010 1.414l-8 8a1 1 0 01-1.414 0l-4-4a1 1 0 011.414-1.414L8 12.586l7.293-7.293a1 1 0 011.414 0z" clipRule="evenodd"></path> </svg> </span> </label> </div> </label> </div> <div> <h2 className="text-xl font-bold text-[#161515] "> {task.title} </h2> <p className="text-sm font-semibold text-[#42403f] "> {task.description} </p> <div className="flex gap-2 mt-2 text-xs font-bold"> <div className="flex items-center "> <img src={userImages[index]} alt="" className="w-10 h-10 rounded-full " /> <span> {task.assignedTo}</span> </div> </div> </div> <div className="p-2 ml-auto rounded-full cursor-pointer hover:bg-red-300" > <FaTrash color="#545240" /> </div> </div> ); })} </div> </div> </div> );}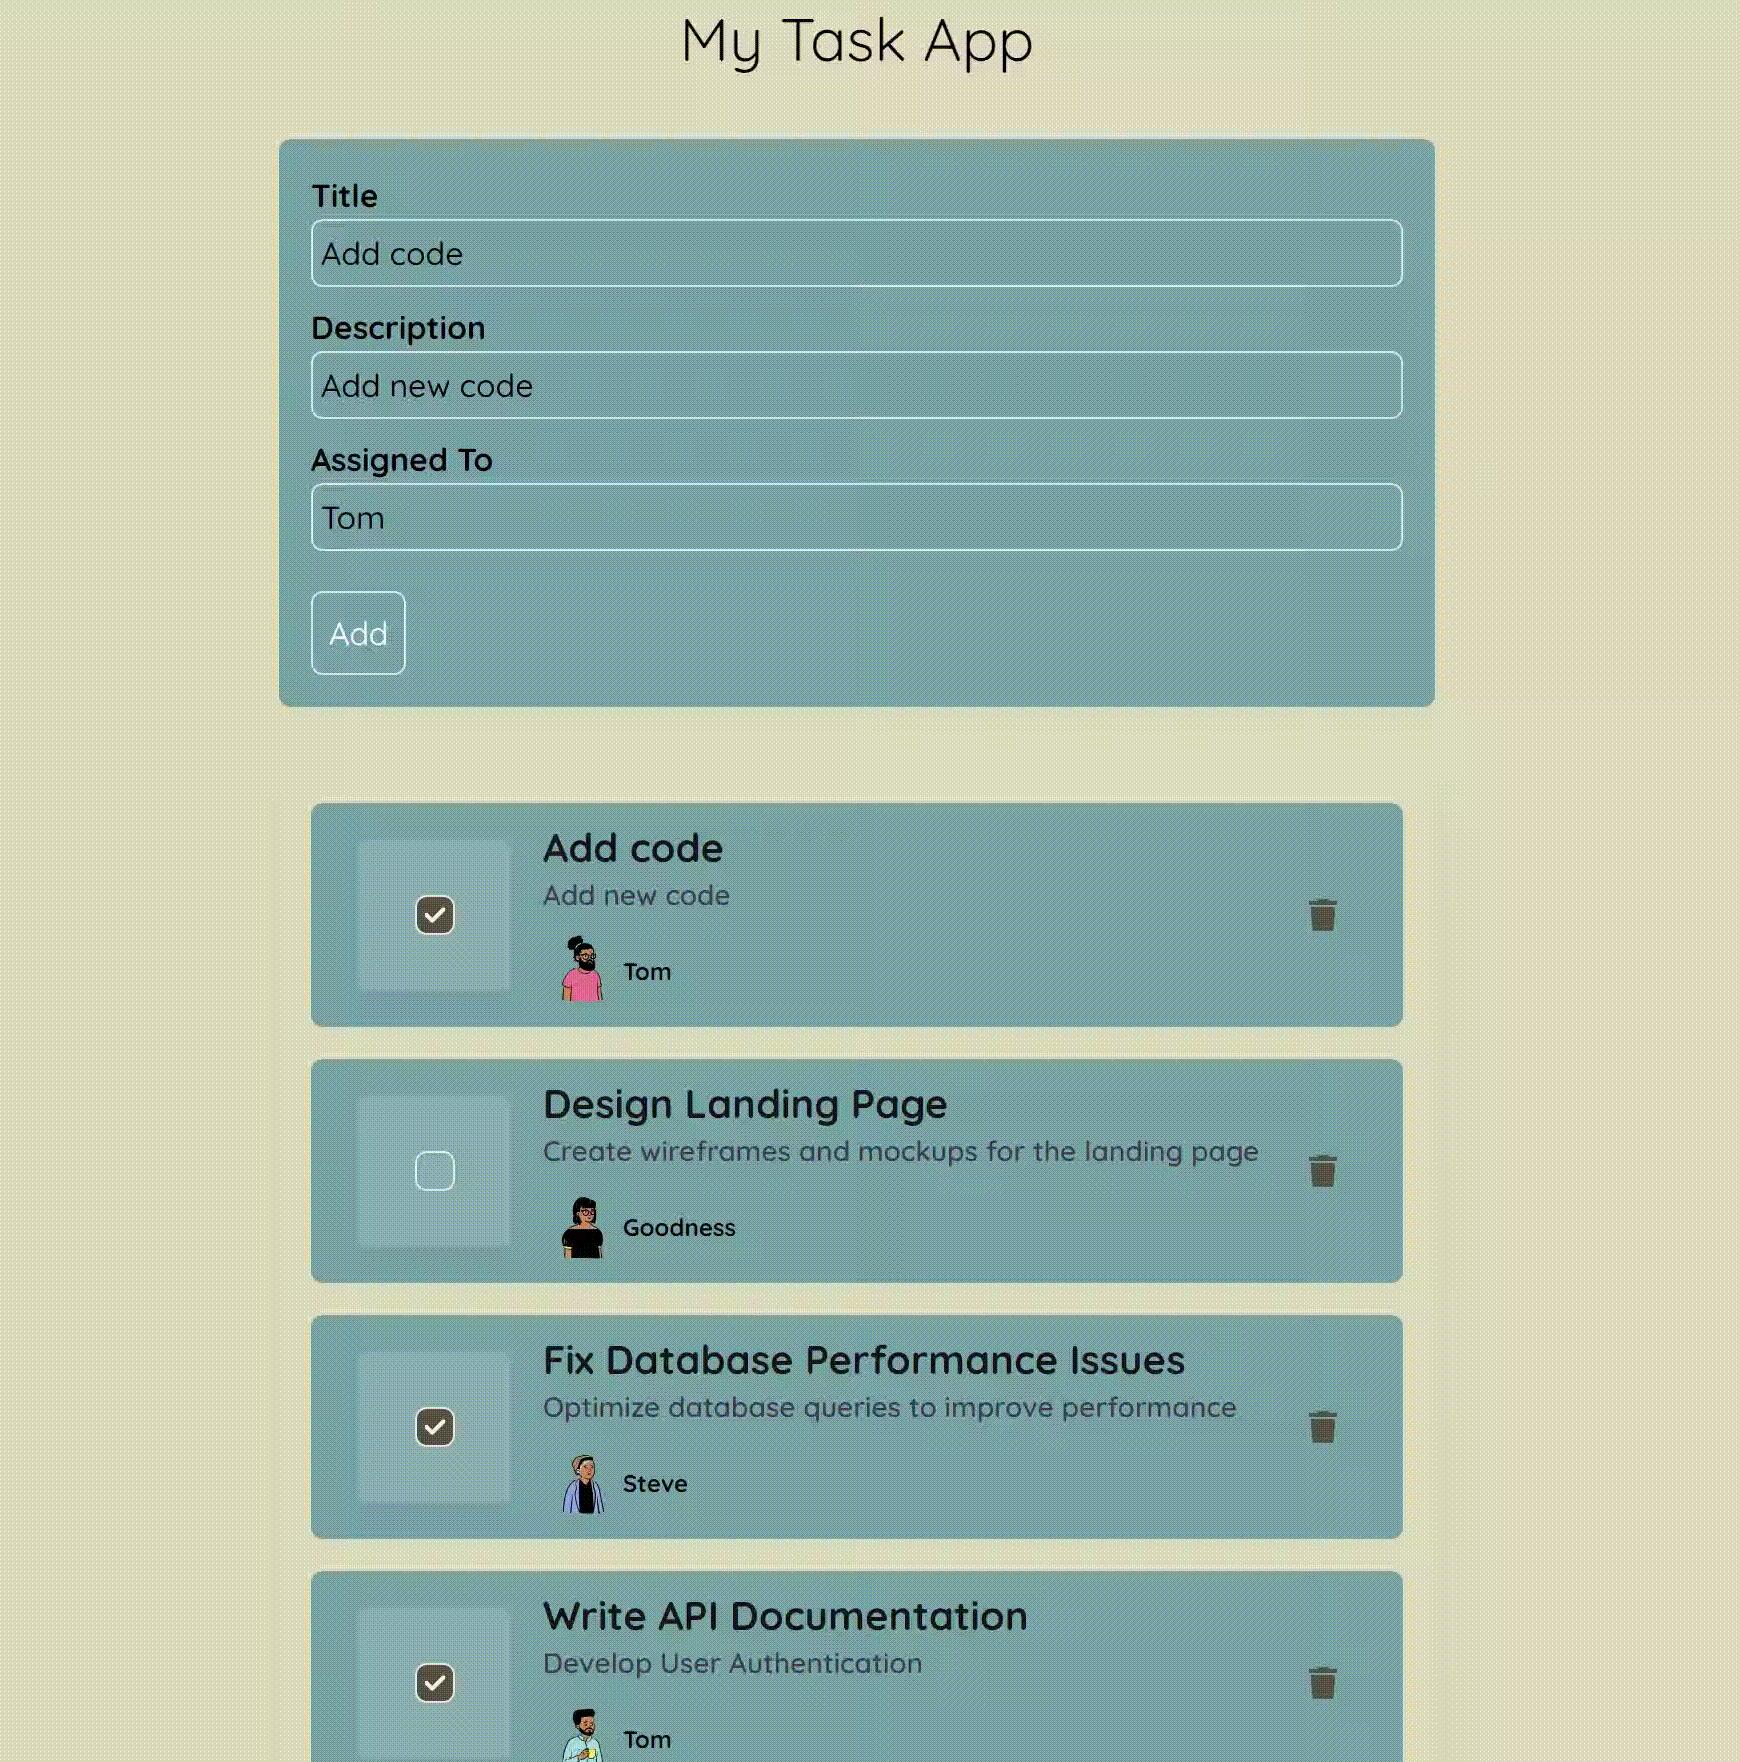 Update operation after delay
And in the delete operation, which also waits for server conformation to rehydrate the page.
const deleteTaskMutation = async ({ id }) => { try { await deleteSingleTask({ id }); mutate(); toast.success("Successfully deleted task"); } catch (err) { toast.error("Failed to delete the task."); } }; return ( <div className="flex flex-col gap-8 p-4"> <Taskform mutate={mutate} /> <div className="p-4 shadow-lg "> <div className="flex flex-col gap-4 "> {tasks && tasks.map((task, index) => { return ( <div key={task.id} className="flex gap-4 items-center py-2 px-6 rounded-md bg-[#74a0a6]"> <div> <label htmlFor={`task-${task.id}`} key={task.id} className={`flex gap-4 text-[14px] items-center font-bold list-none p-4 rounded bg-[#88adb3] cursor-pointer hover:bg-[#609299]`}> <div className="inline-flex items-center"> <label className="relative flex items-center p-3 rounded-full cursor-pointer" htmlFor="checkbox"> <input type="checkbox" name={`task-${task.id}`} id={`task-${task.id}`} className="before:content[''] peer relative h-5 w-5 cursor-pointer appearance-none rounded-md border border-[#edebd9] transition-all before:absolute before:top-2/4 before:left-2/4 before:block before:h-12 before:w-12 before:-translate-y-2/4 before:-translate-x-2/4 before:rounded-full before:bg-blue-gray-500 before:opacity-0 before:transition-opacity checked:border-lines checked:bg-[#545240] checked:before:bg-[#edebd9] hover:before:opacity-10 before:checked:hover:before:opacity-10 " checked={task.completed === true} onChange={() => updateTaskMutation({ ...task, completed: !task.completed, }) } /> <span className="absolute transition-opacity opacity-0 pointer-events-none text-stone-100 top-2/4 left-2/4 -translate-y-2/4 -translate-x-2/4 peer-checked:opacity-100"> <svg xmlns="http://www.w3.org/2000/svg" className="h-3.5 w-3.5" viewBox="0 0 20 20" fill="currentColor" stroke="currentColor" strokeWidth="1"> <path fillRule="evenodd" d="M16.707 5.293a1 1 0 010 1.414l-8 8a1 1 0 01-1.414 0l-4-4a1 1 0 011.414-1.414L8 12.586l7.293-7.293a1 1 0 011.414 0z" clipRule="evenodd"></path> </svg> </span> </label> </div> </label> </div> <div> <h2 className="text-xl font-bold text-[#161515] "> {task.title} </h2> <p className="text-sm font-semibold text-[#42403f] "> {task.description} </p> <div className="flex gap-2 mt-2 text-xs font-bold"> <div className="flex items-center "> <img src={userImages[index]} alt="" className="w-10 h-10 rounded-full " /> <span> {task.assignedTo}</span> </div> </div> </div> <div className="p-2 ml-auto rounded-full cursor-pointer hover:bg-red-300" onClick={() => deleteTaskMutation({ id: task.id })}> <FaTrash color="#545240" /> </div> </div> ); })} </div> </div> </div> );}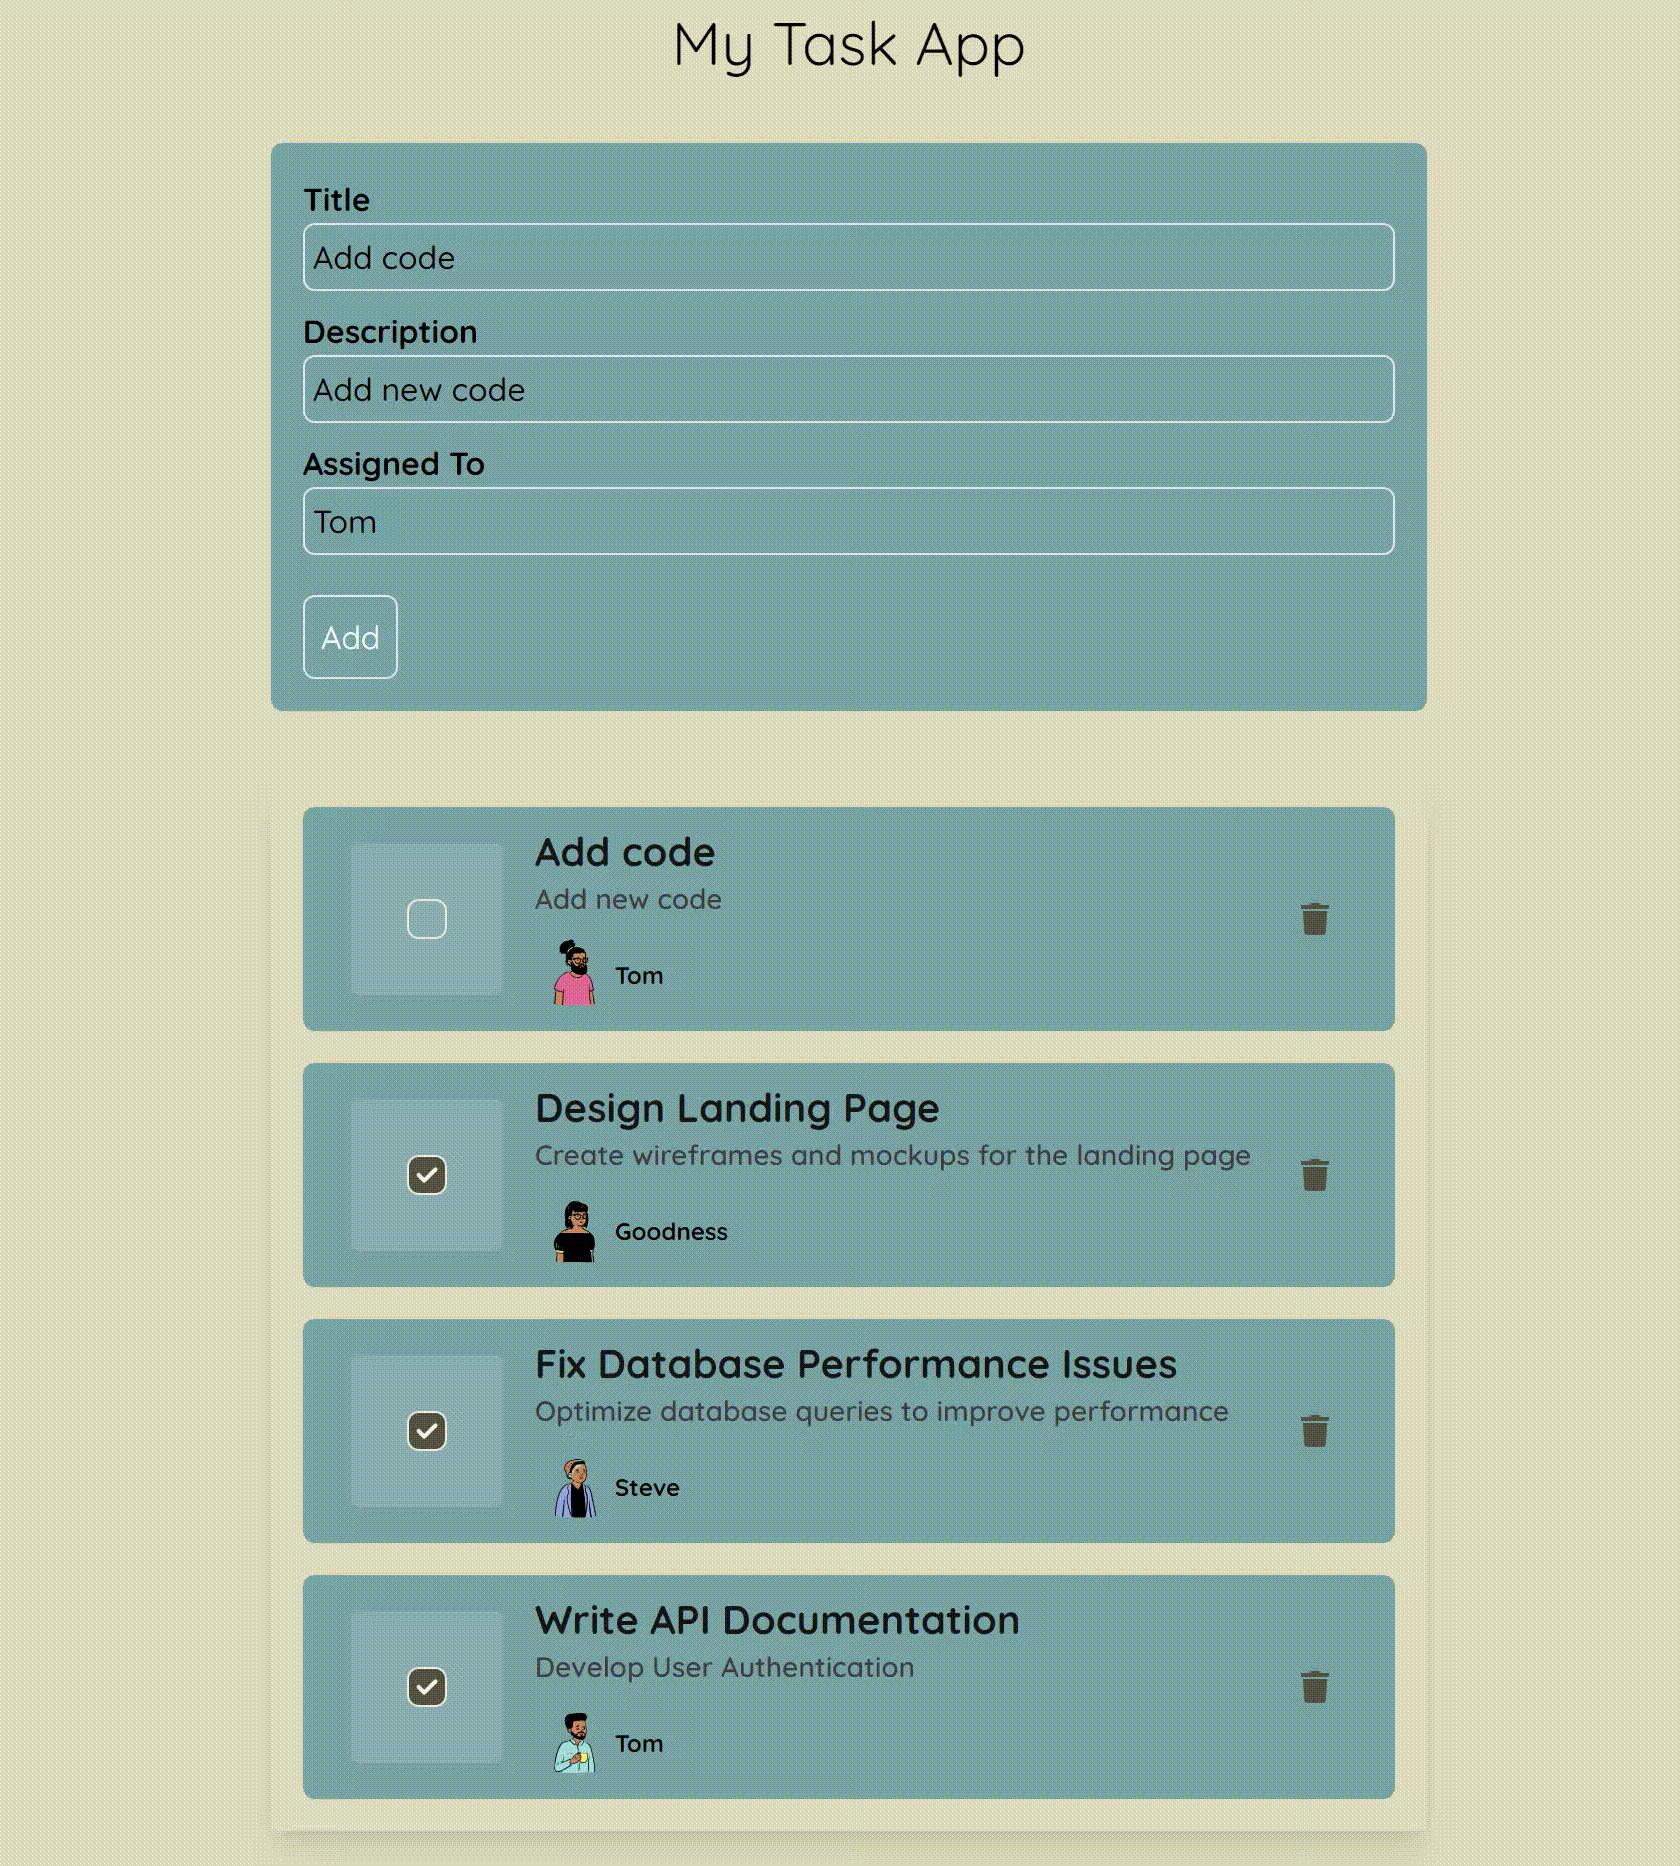 Delete operation after delay
These few seconds of inactivity or loading can impact the level of satisfaction users get from your application, which is why we’re going to use Optimistic UI to fix it.
Optimistic CRUD UI
The way this works in practical terms is that, when you perform an action, it immediately adds to your UI state (cache) while the async operation is running in the background.
If the operation is successful, nothing on the UI changes and everything acts like it worked on the first try. But if it fails, the UI state reverts to its previous state and an error is displayed via your toast.
An optimistic UI approach offers a much better user experience than traditional loading messages or spinners. When you see an immediate response after clicking a button, the app feels faster and more responsive, keeping you engaged and satisfied. You can continue interacting with the app seamlessly, without waiting for server confirmations, making the experience smoother and more intuitive.
This immediate feedback reduces your perceived wait time and keeps the interface visually stable, avoiding annoying flickers or sudden changes. Plus, when the app feels this responsive, you’re more likely to keep using it and have a positive experience.
On the flip side, loading messages or spinners can interrupt your flow, making the app feel slower and potentially frustrating you.
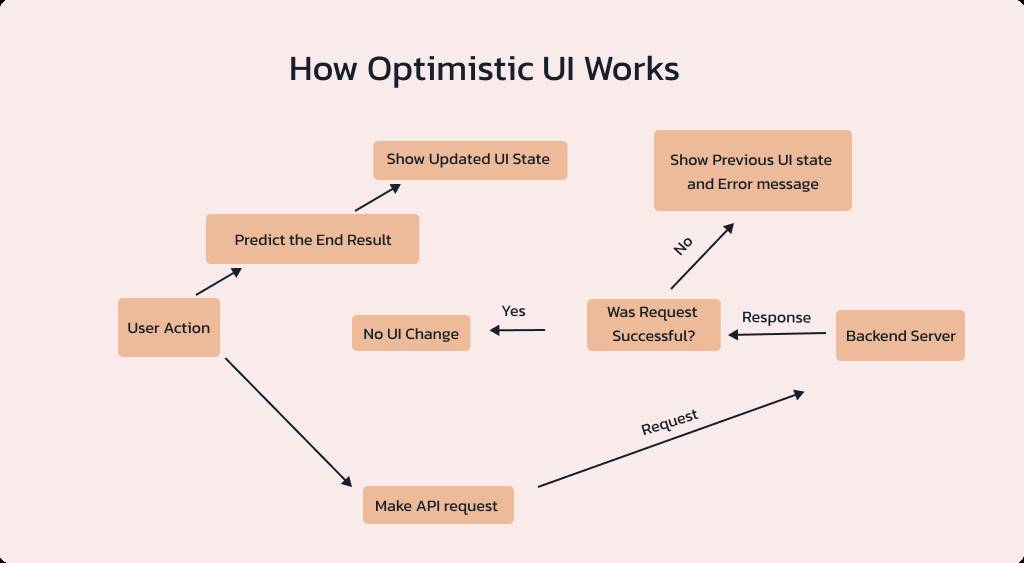 Optimistic UI diagram
It still sounds a little like gibberish, eh? Well, let’s learn as we go!
In your swrAPI file, create another mutation function. This function takes in two parameters: the new task you want to add and the list of already existing tasks.
export const addTaskMutation = async (newTask, tasks) => { };Then it uses your already existing create function to attempt to create a new task. After this, you store the result and return that result in a new array, together with the already existing tasks.
export const addTaskMutation = async (newTask, tasks) => { const addedTask = await addSingleTask(newTask); return [...tasks, addedTask].sort( (a, b) => new Date(b.createdAt) - new Date(a.createdAt) );};As you would suspect, this function does the same as the previous create function we wrote, but it’s what comes next that we’re after.
Next, create an options function which is responsible for treating the async operation as a synchronous operation and immediately yields a response.
This function also takes some parameters such as:
optimisticData: which is the new data you want to display immediately.rollbackOnError: which sets the state to the previous one if the request fails.populateCache: which immediately sets this optimistic data in our UI state.revalidate: which lets us enable or disable another fetch after this function runs.
export const addTaskOptions = (newTask, tasks) => { return { optimisticData: [...tasks, newTask].sort( (a, b) => new Date(b.createdAt) - new Date(a.createdAt) ), rollbackOnError: true, populateCache: true, revalidate: false, };};To use this optimistic UI method with a create operation, import both functions into your TaskForm. Both functions need to be wrapped in the mutate function since they’re both attempting to mutate the data.
import { addTaskMutation as addSingleTask, addTaskOptions,} from "./services/swrAPI";import toast from "react-hot-toast";import { useState } from "react";export default function Taskform({ mutate, tasks }) { const [title, setTitle] = useState(""); const [description, setDescription] = useState(""); const [assignedTo, setAssignedTo] = useState(""); const addTaskMutation = async (e) => { e.preventDefault(); const createdAt = new Date().toISOString(); try { await mutate( addSingleTask( { title, description, assignedTo, completed: false, createdAt, }, tasks ), addTaskOptions( { title, description, assignedTo, completed: false, createdAt, }, tasks ) ); toast.success("Task added succesfully."); } catch (err) { toast.error("Failed to add the new task."); } };Note: The tasks array is passed into the TaskForm via props for this functionality to work.
To see instances where there might be an error, give your functions a 50/50 chance of success or failure, by adding a random condition.
export const addSingleTask = async ({ title, description, completed, assignedTo, createdAt,}) => { await delay(); if (Math.random() < 0.5) throw new Error("Failed to add new task"); const response = await tasksApi.post(tasksUrlEndpoint, { title, description, completed, assignedTo, createdAt, }); return response.data;};export const updateSingleTask = async (task) => { await delay(); if (Math.random() < 0.5) throw new Error("Failed to update task"); const response = await tasksApi.patch(`${tasksUrlEndpoint}/${task.id}`, task); return response.data;};export const deleteSingleTask = async ({ id }) => { await delay(); if (Math.random() < 0.5) throw new Error("Failed to update task"); return await tasksApi.delete(`${tasksUrlEndpoint}/${id}`, id);};Testing your create endpoint now gives the following result:
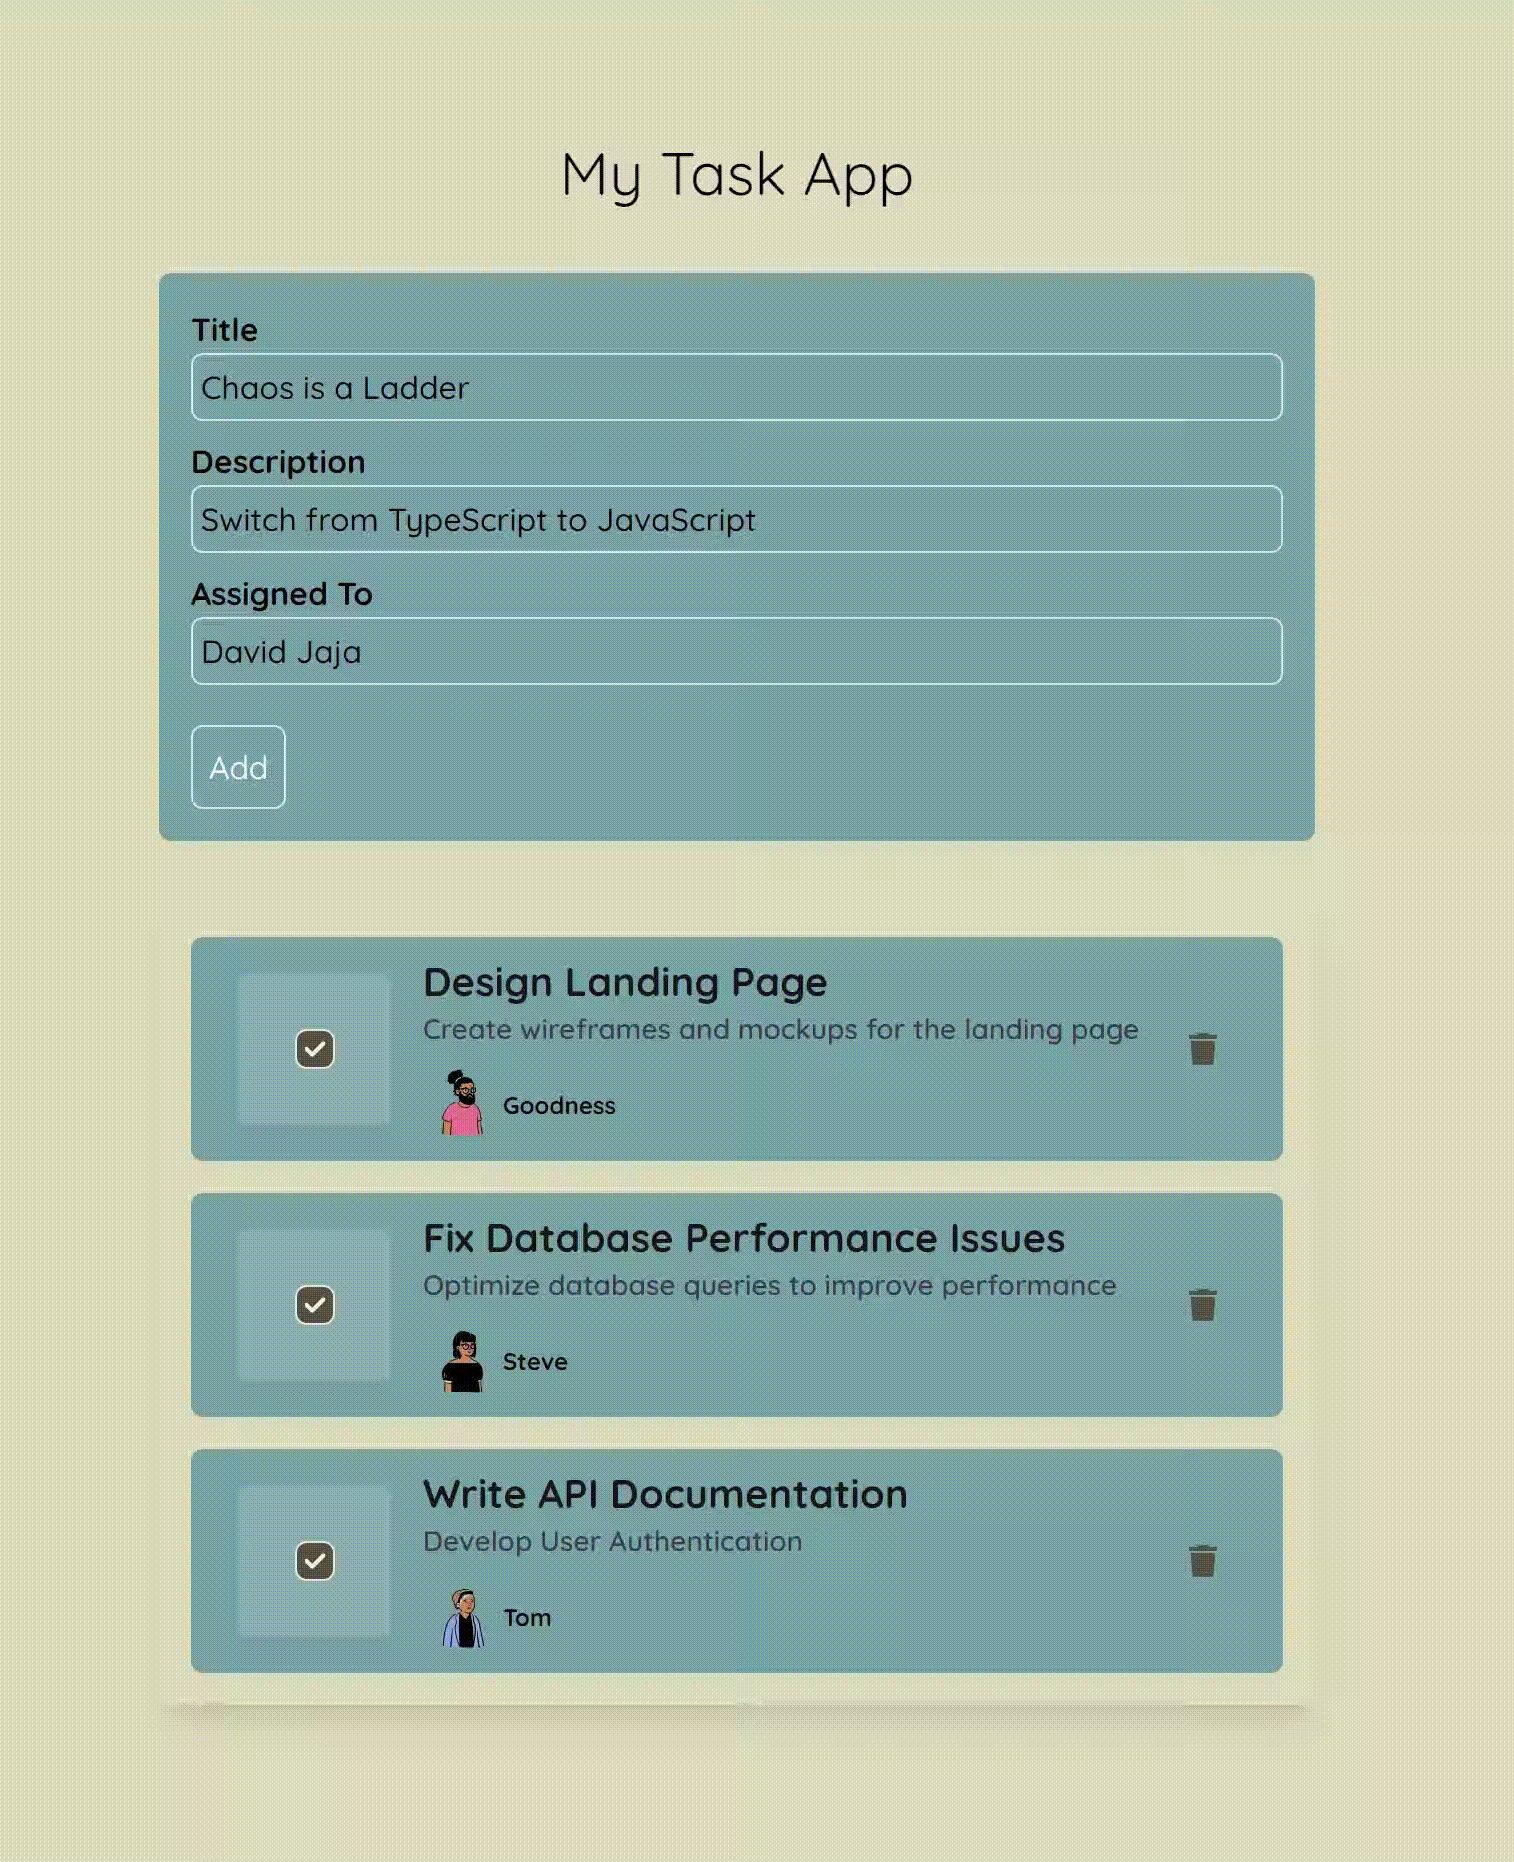 Optimistic UI with Create operation
And voilà! Your app is officially optimistic. It attempts to immediately add the new task to the list even if it fails and gracefully rolls back in the case of an error.
This works similarly for the update operation – starting with the updated update function:
export const updateTaskMutation = async (updatedTask, tasks) => { const updatedTaskResponse = await updateSingleTask(updatedTask); return tasks.map((task) => task.id === updatedTask.id ? updatedTaskResponse : task );};Then its corresponding options function:
export const updateTaskOptions = (updatedTask, tasks) => { return { optimisticData: tasks.map((task) => task.id === updatedTask.id ? updatedTask : task ), rollbackOnError: true, populateCache: true, revalidate: false, };};To test this out, import the new updateSingleTask and updateOptions function in your TaskConatiner, and update the handler function.
const updateTaskMutation = async (updatedTask) => { try { await mutate( updateSingleTask(updatedTask, tasks), updateTaskOptions(updatedTask, tasks) ); toast.success("Successfully updated task"); } catch (err) { toast.error("Failed to update the task."); } };Which gives the following result:
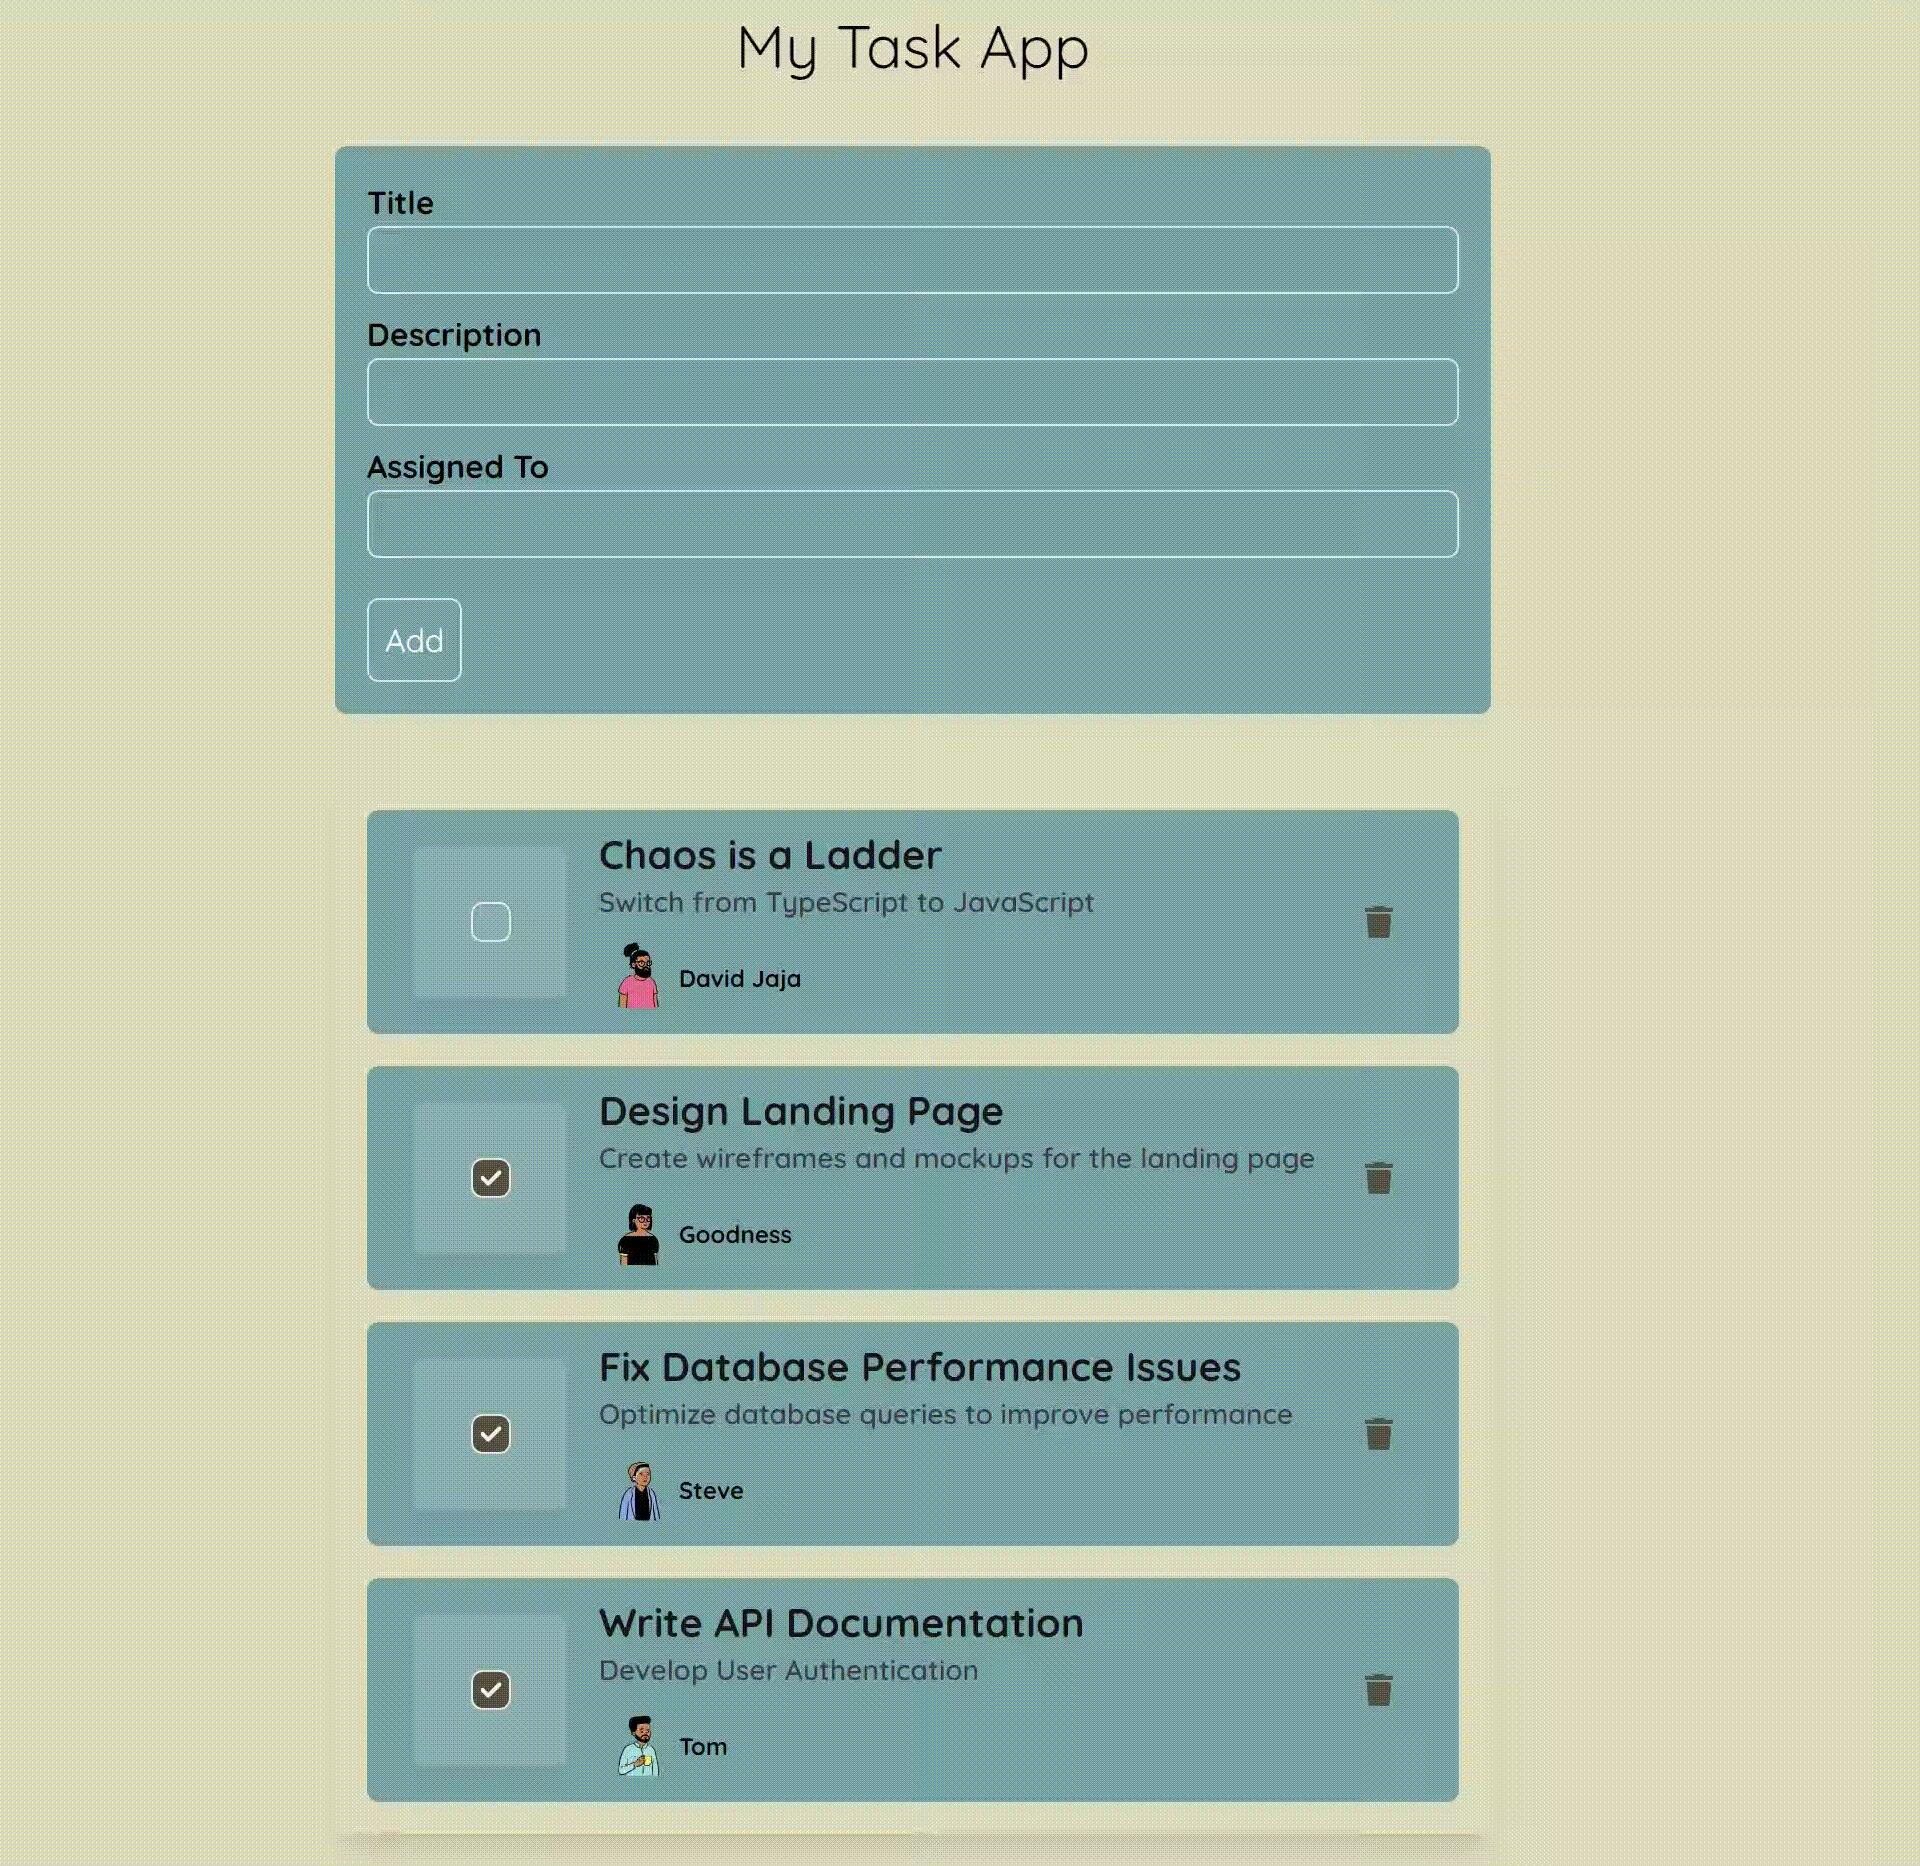 Optimistic UI with Update operation
And finally for the delete action:
export const deleteTaskMutation = async (taskToDelete, tasks) => { await deleteSingleTask(taskToDelete); return tasks.filter((task) => task.id !== taskToDelete.id);};export const deleteTaskOptions = (taskToDelete, tasks) => { return { optimisticData: tasks.filter((task) => task.id !== taskToDelete.id), rollbackOnError: true, populateCache: true, revalidate: false, };};Which can be used in the TaskContainer delete handler like so:
const deleteTaskMutation = async ({ id }) => { try { await mutate( deleteSingleTask({ id }, tasks), deleteTaskOptions({ id }, tasks) ); toast.success("Successfully deleted task"); } catch (err) { toast.error("Failed to delete the task."); } };Which gives this:
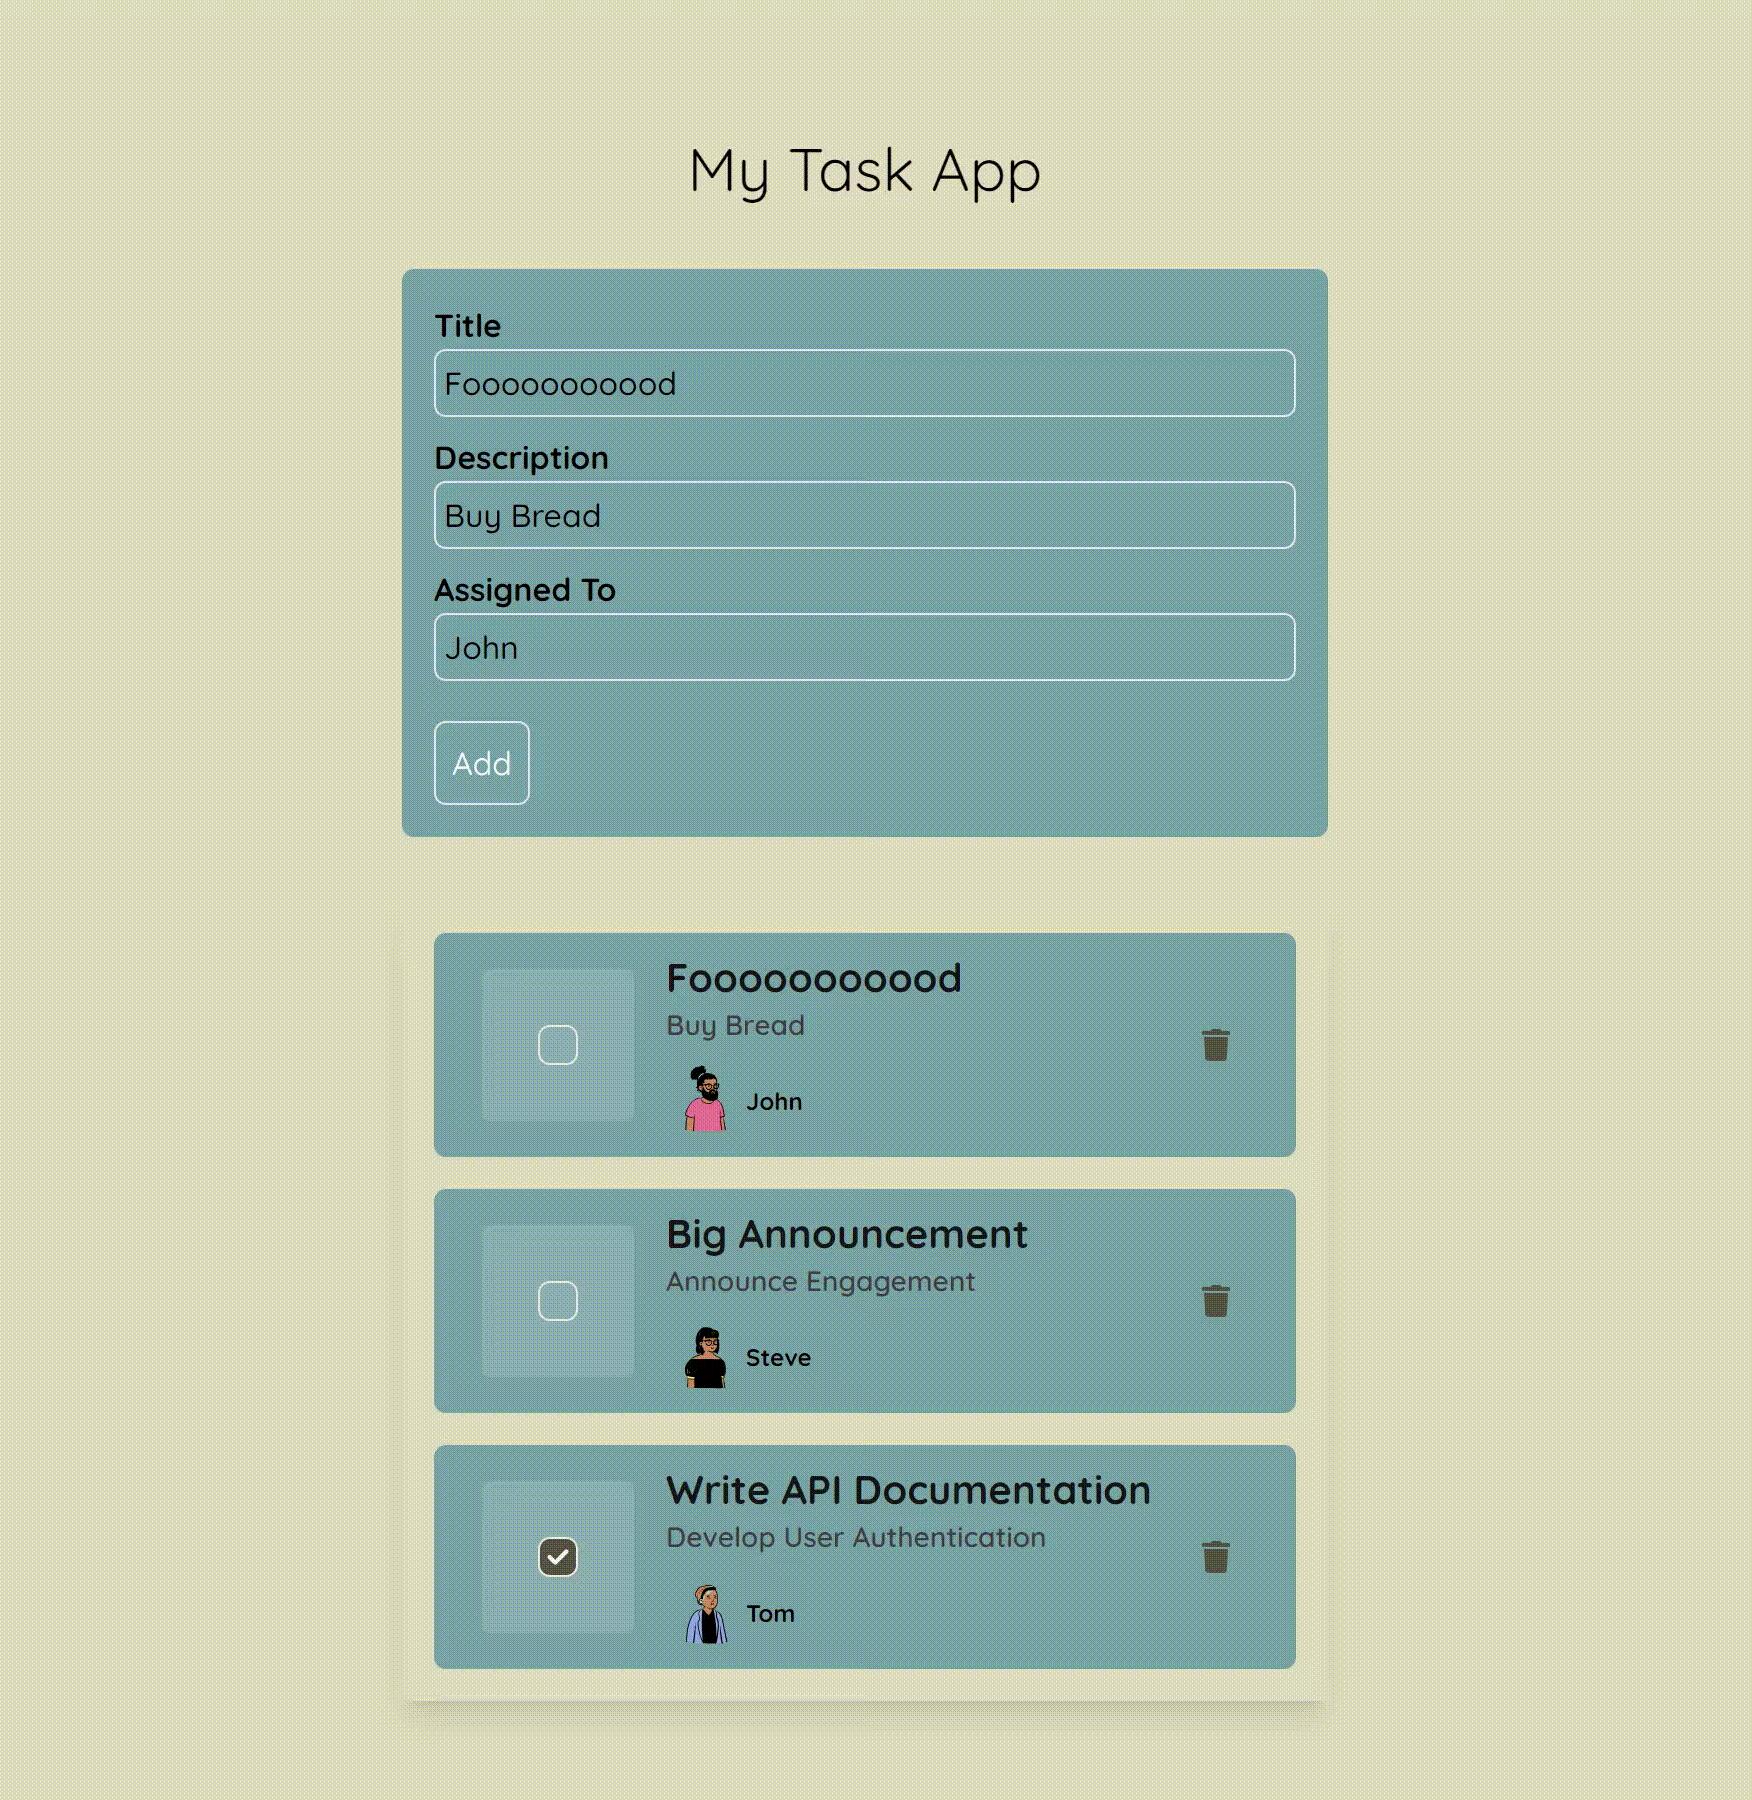 Optimistic UI with Delete operation
Drawbacks of Optimistic UI
Now you must be thinking, if optimistic UI is so great, why not use it everywhere?
 lighter hairspray gif
Well, like everything, that action turns chaotic without moderation. Here are some reasons why you should use optimistic UI in moderation.
- Excessive Updates: Optimistic UI might get a bit carried away with updates, especially if your app’s moving faster than your internet connection. Too many updates can slow things down, so it’s essential to strike a balance.
- Exposing server-side logic: While offloading all the smarts to your app (like generating unique IDs or checking if that username is already taken) is tempting, remember that your server plays a crucial role too. Letting the front end of your app handle everything can lead to security risks and messy code, so be mindful of where you’re putting your logic.
- Managing Mishaps: While Optimistic UI typically expects smooth sailing, life has a way of throwing curveballs. From a sudden internet hiccup to the server taking an unexpected coffee break, glitches can be quite a headache to manage gracefully.
- Avoid Rapid Changes: Imagine adding an item to your shopping cart, and then deciding to remove it before the “add” request even reaches the server. It’s like changing your mind at the checkout counter – a bit confusing, right? Rapid changes like these can leave your app disoriented, so it’s best to proceed cautiously.
Ideal Use Cases for Optimistic UI
While optimistic UI may not be the holy grail of state management you were hoping to discover, it does have some good use cases such as:
- Instant Messaging Apps: Almost all instant messaging platforms currently use this pattern. Your messages appear instantly in the chat window, even before they’re confirmed by the server. This creates a seamless and responsive chatting experience, keeping the conversation flowing effortlessly.
- Collaborative Editing Tools: Whether you’re working on a document with colleagues or collaborating on a project with teammates, Optimistic UI ensures that changes are reflected in real time. As you type, edit, or make updates, your changes are immediately visible to others, fostering collaboration and productivity.
- Social Media Feeds: Scroll through your social media feed, and you’ll see posts, likes, and comments popping up like magic. Optimistic UI ensures that interactions, such as liking a post or leaving a comment, are reflected instantly, providing a more engaging browsing experience.
- E-commerce Websites: Adding items to your shopping cart, updating quantities, and checking out should feel like a breeze. Optimistic UI speeds up the shopping process by immediately updating your cart and displaying feedback, such as item availability or pricing changes, without delay.
For convenience, here are some resources you may need:
I’d like to acknowledge Dave Gray. It was his YouTube video that inspired this article.
Conclusion
As we wrap up our dive into Optimistic UI, it’s clear that this technique can be a user experience game-changer. It’s the rush of your message popping up instantly or your shopping cart updating in real-time.
Optimistic UI is about speed as well as how it makes users feel – connected, empowered, and delighted. So, next time you click and see the magic unfold, remember: it’s not just code…it’s the pulse of user happiness (not a Coca-Cola ad 😂). Keep that magic alive in your apps!
Happy coding, and have an optimistic day!
Like my articles?
Feel free to buy me a coffee here, to keep my brain chugging and provide more articles like this.
 Coffee Tom
Want to connect or contact me? Feel free to hit me up on the following:
