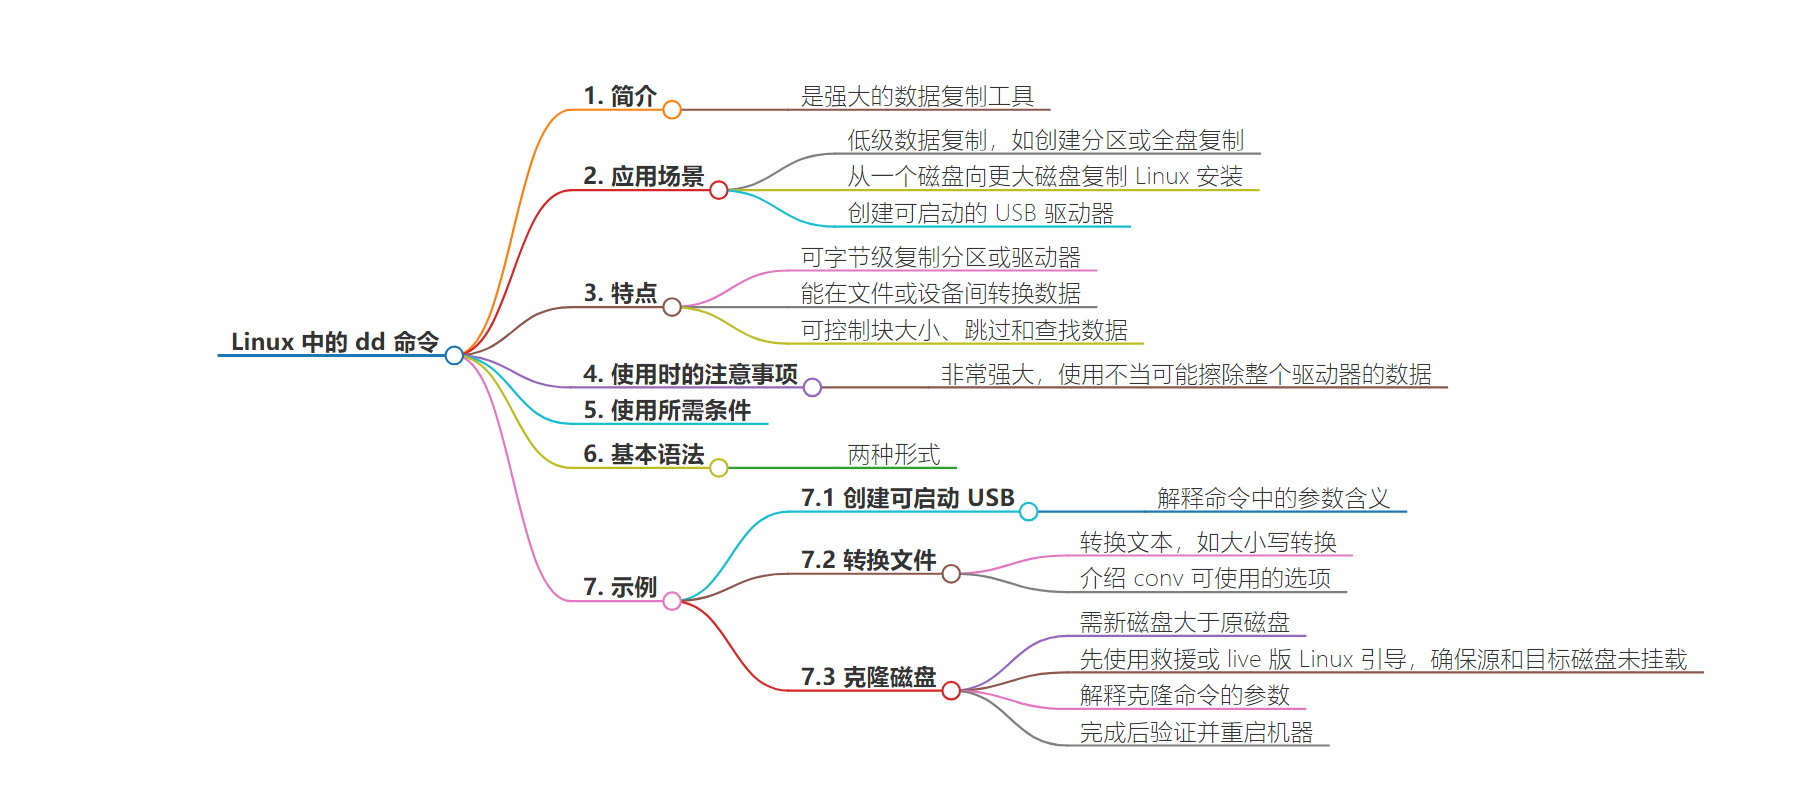
包阅导读总结
1.
关键词:Linux、dd 命令、数据复制、磁盘克隆、文件转换
2.
总结:本文介绍了 Linux 系统中的 dd 命令,其功能强大,可用于低级别数据复制,如创建分区或磁盘副本、转换文件、制作启动盘、克隆磁盘等,但使用时需谨慎。文中还列举了相关示例和语法。
3.
主要内容:
– dd 命令概述
– 是用于低级别数据复制的强大工具,如分区或全磁盘复制。
– dd 命令的用途
– 可将 Linux 安装从一个磁盘复制到更大磁盘。
– 能从 ISO 创建可启动 USB 驱动器。
– 可以转换文件,如大小写转换。
– 能够进行磁盘克隆,需新磁盘大于原磁盘。
– 使用 dd 命令的准备和注意事项
– 明确所需条件。
– 操作时需谨慎,以防误删数据,建议先在非生产机器上测试。
– 举例说明了各种用途的具体命令和参数含义。
思维导图:
文章地址:https://thenewstack.io/linux-low-level-data-copying-with-dd/
文章来源:thenewstack.io
作者:Jack Wallen
发布时间:2024/8/16 13:36
语言:英文
总字数:1014字
预计阅读时间:5分钟
评分:85分
标签:Linux,数据复制,备份解决方案,命令行工具,磁盘克隆
以下为原文内容
本内容来源于用户推荐转载,旨在分享知识与观点,如有侵权请联系删除 联系邮箱 media@ilingban.com
When you use Linux, you know there are always multiple ways to solve a problem.
Take, for instance, the need to create backups. Yes, you could opt to use one of the many backup solutions (such as Bacula, rsync, Deja Dup, Fwbackups, Backupninja, Simple Backup Suite, Kbackup, BackupPC … the list goes on and on). You’ll find command line tools, GUI tools, and even some web-based backup solutions.
But when you need low-level data copying (such as to create a partition or full disk copies), one tool never fails to rise above the rest. That tool is the ddcommand, which stands for data duplicator.
With dd, you can create a byte-for-byte copy of a partition or a drive and even convert data between files or devices. The dd command allows you to control block size, and skip and seek data.
Needless to say, dd is very powerful. In fact, this command is so powerful that you really need to exercise caution when using it. Run the command improperly and you could wipe out an entire drive of data.
One thing dd is good for is copying a Linux installation from one disk to a larger disk. This is a good option when you have a server or desktop with a drive that’s full. You can even create a bootable USB drive from an ISO, thereby avoiding having to use third-party software for the task.
Let’s take a look at some examples of how the dd command is used. Remember, this command is very powerful, so I would highly recommend you test it on a non-production machine before you take on the important task of migrating an installation from one drive to another.
What You’ll Need
To make use of dd, you’ll need the following:
That’s it. Let’s get to work.
dd: The Basic Syntax
The basic syntax of the dd command can be in one of two forms:
With that in mind, let’s take a look at some examples.
Create a Bootable USB
Because it’s less likely you’ll do damage by creating a bootable USB device, we’ll take a look at that example first. Let’s say your ISO image is AlmaLinux-9.3-x86_64-dvd.iso and the USB drive you want to use is located at /dev/sdg.
It’s very important that you know the exact path of your USB drive. If you’re not sure, you can locate it with the lsblk command.
To create this bootable USB drive, the command would look something like this:
|
sudo dd if=/home/jack/Downloads/AlmaLinux–9.3–x86_64–dvd.iso of=/dev/sdg bs=4M status=progress && sync |
A bit of an explanation for the above:
if=This is the input file or the ISO file you want to use for the bootable USB device.of=This is the output file or the location of the USB drive.bs=4MThis defines how many bytes will be read and written to (the default is 512).status=This is the level of information to print to the output. In this case, progress shows periodic transfer statistics.syncThis makes certain all data is written to the USB device before the process finishes.
Converting Files
Before we continue, there’s a really cool feature found with dd that allows you to convert text. For example, you might have a file comprised of all lowercase text and you want to convert it to all uppercase. Say the file in question is called “testing” and you want to create a new file called “testing2” that is the uppercase version of the original. To do that, the command would be:
|
dd if=testing of=testing2 conv=ucase |
The possible options you can use with conv include:
asciiConvert from EBCDIC to ASCII.ebcdicConvert from ASCII to EBCDIC.ibmConvert from ASCII to alternate EBCDIC.blockPads newline-terminated records with spaces to cbs-size.unblockReplaces trailing spaces in cbs-size records with newline.lcaseConverts upper case to lowercase.ucaseConverts lower case to uppercase.sparseTries to seek rather than write all-NUL output blocks.swabSwaps every pair of input bytes.syncPads every input block with NULs to ibs-size; when used with block or unblock, pad with spaces rather than NULs.exclFails if the output file already exists.
Cloning Disks with dd
Finally, we’re going to take on the meat and potatoes of the dd command … disk cloning. Remember, you’ll need a drive that’s bigger than the one you’re cloning. Cloning with dd creates an exact, byte-for-byte copy of a drive or partition, such that the new drive is identical to the source. This is great when you suspect a drive is failing and you want to salvage it before it’s too late.
To do this, you’ll want to connect the new drive to the system that contains the drive to be cloned. Let’s say, for example, the source drive is /dev/sda and the destination is /dev/sdb.
What you first need to do is boot the machine using either a rescue distribution or any live version of a Linux distribution. The reason you must do this is that both source and destination must be unmounted (and you can’t unmount a drive that’s in use).
Once you’ve booted the live distribution, connect the destination drive and clone the source with the command:
|
sudo dd if=/dev/sda of=/dev/sdb bs=4M status=progress |
The process will take some time, so exercise your patience here. When the process completes, reboot the machine, making sure to remove the USB device.
To verify everything works, you should open the boot menu of the machine and select the destination drive as the boot source. If everything works out fine, you could then remove the source drive, and insert the designation drive, and all should be good to go.
YOUTUBE.COM/THENEWSTACK
Tech moves fast, don’t miss an episode. Subscribe to our YouTubechannel to stream all our podcasts, interviews, demos, and more.
