
包阅导读总结
1.
关键词:Rocket.chat、Ubuntu、内部聊天服务器、安装配置、团队协作
2.
总结:文章介绍了在 Ubuntu 上部署 Rocket.chat 内部聊天服务器,指出其开源、功能丰富、易安装,适用于担心价格和隐私的公司,还说明了安装、访问、配置的方法。
3.
主要内容:
– 团队沟通方式选择
– 介绍 Slack 存在价格和隐私问题
– 引出 Rocket.chat 作为替代方案
– Rocket.chat 特点
– 开源,可查看代码
– 功能丰富
– 安装 Rocket.chat
– 可在 Ubuntu Server 安装过程中添加
– 已安装 Ubuntu Server 可通过命令行安装
– 若启用 UFW 需打开相关端口
– 访问 Rocket.chat
– 通过本地局域网浏览器访问特定网址
– 完成管理员用户创建及工作区创建
– 配置 Rocket.chat
– 创建频道和邀请用户,步骤简单
思维导图: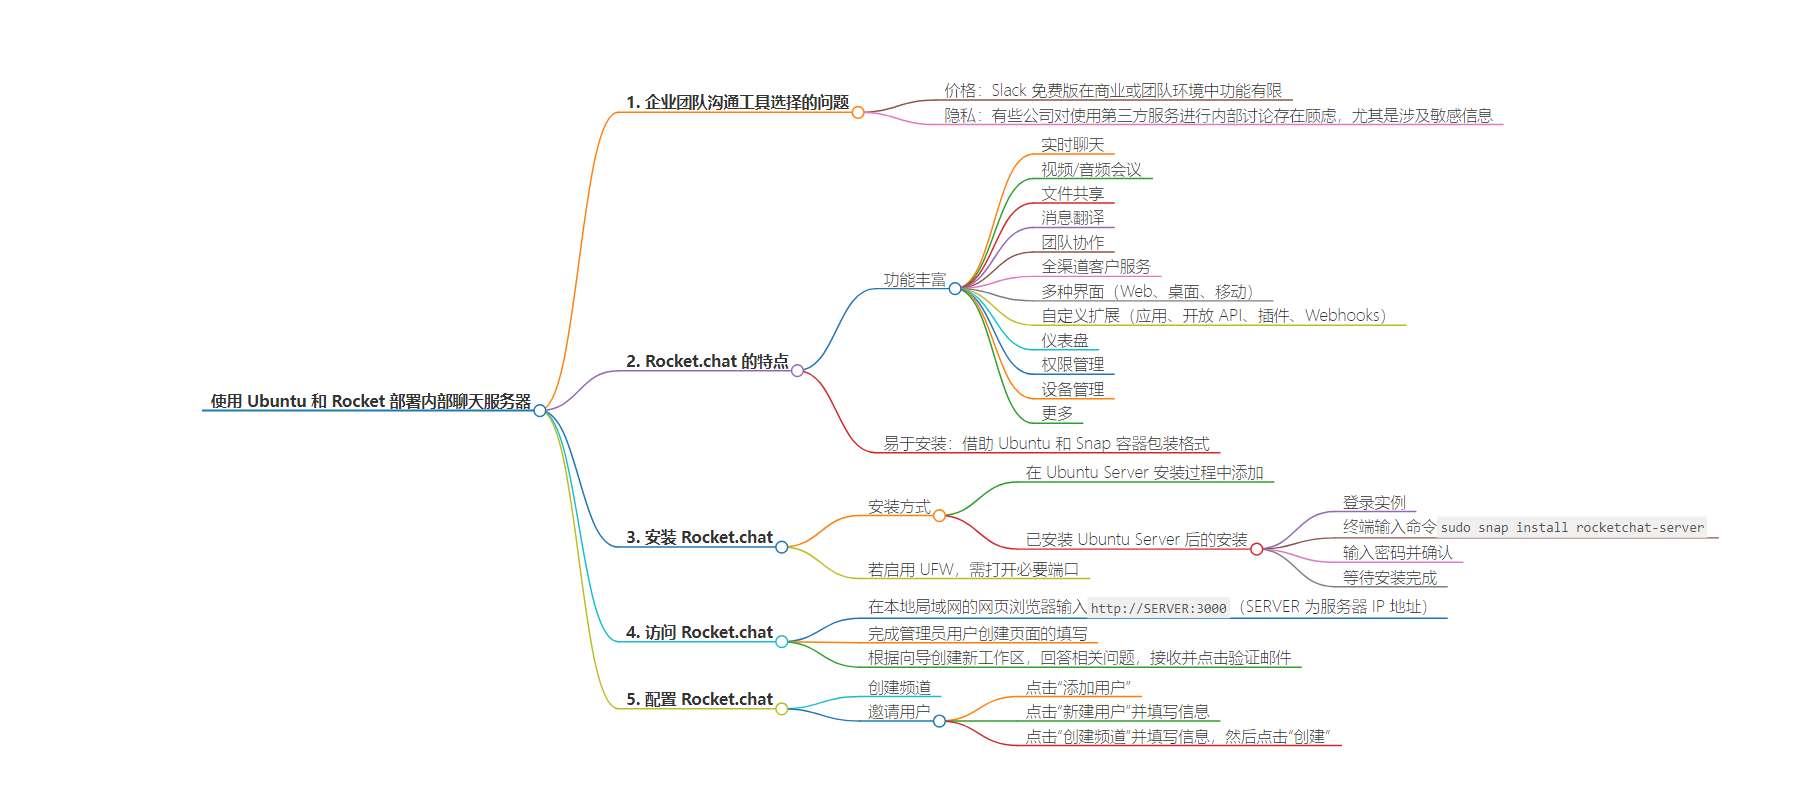
文章地址:https://thenewstack.io/deploy-an-in-house-chat-server-with-ubuntu-and-rocket/
文章来源:thenewstack.io
作者:Jack Wallen
发布时间:2024/7/9 14:20
语言:英文
总字数:839字
预计阅读时间:4分钟
评分:84分
标签:聊天服务器,Ubuntu,Rocket.chat,开源,Snap包
以下为原文内容
本内容来源于用户推荐转载,旨在分享知识与观点,如有侵权请联系删除 联系邮箱 media@ilingban.com
How do your teams communicate? Your company might employ Slack, which is a solid choice. But for some companies, there are two issues that might prevent them from adopting such a service: price and privacy.
Although you can use Slack for free, in a business or team environment, the free version won’t get you very far. On top of that, some companies can be a bit cautious about using a third-party service for internal discussions… especially when sensitive information is being shared (such as code and ideas for brilliant new apps).
If that sounds like you or your company, where do you turn? With the help of Linux, there are plenty of options, such as Rocket.chat. Rocket.chat is an open source tool and you can check out the code from the official GitHub repository.
Rocket.chat offers plenty of features, including:
- Live chat.
- Video/audio conferences.
- File sharing.
- message translation.
- Team collaboration.
- Omnichannel customer service.
- Web, desktop, and mobile interfaces.
- Feature expansion with custom apps, open APIs, plugins, and webhooks.
- Dashboards.
- Permissions.
- Device management.
- And much more.
What’s better, Rocket.chat is very easy to install, thanks to Ubuntu and its Snap container-based packaging format. Yes, there are other ways of installing Rocket.chat but when you want to deploy the service quickly, you cannot beat Snap.
One thing to keep in mind is that I’m going to demonstrate how to set this up such that it’s internal only. If you want to set this up such that it can be reached from outside your LAN, you’ll need to configure your networking hardware such that it points from a domain to the IP address of the hosting server. As well, I’ll be demonstrating with the community edition, which is limited to 25 free users.
If you need more than that, you will have to purchase a Rocket.chat license. With the Pro license ($4/user/month), you can get up to 500 users. Find out more about pricing here.
Speaking of which, I’ll demonstrate this on Ubuntu Server 22.04 but you can do the same on any machine that supports Snap packages. To make this work, you’ll need a running instance of the OS and a user with sudo privileges.
With that said, let’s get to the installation.
Installing Rocket.chat
Before I get to the Snap version of the installation, know that you can install Rocket.chat during the Ubuntu Server installation process. This is possible during the featured server snaps stages (Figure 1).
-
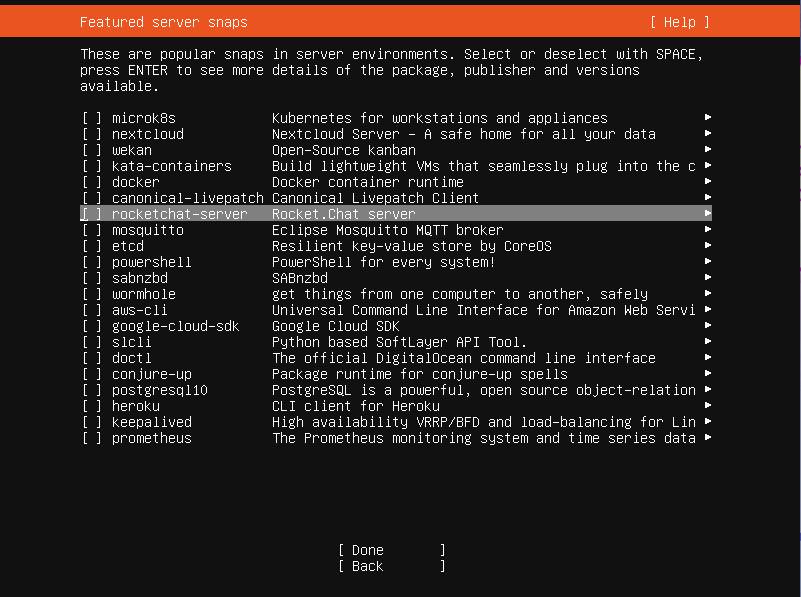
Figure 1: Adding Rocket.chat during the OS installation.
Keep in mind, this is essentially the same thing as installing Rocket.chat with Snap (post OS installation). To add Rocket.chat during the OS installation, use your cursor to navigate to Rocket.chat listing, hit your space bar to select it, move down to Done, and hit Enter on your keyboard.
If you’ve already installed Ubuntu Server (without adding Rocket.chat), here’s how to install it.
- Log into your Ubuntu Server instance.
- From the terminal window, issue the command sudo snap install rocketchat-server.
- When prompted type your sudo password and hit Enter on your keyboard.
- Allow the installation to complete.
If you have UFW (Uncomplicated Firewall) enabled, you’ll need to open the necessary port for Rocket.chat, which is done with:
Accessing Rocket.chat
Open a web browser with access to your local LAN and point it to http://SERVER:3000 (where SERVER is the IP address of the hosting server). You’ll be greeted by the admin user creation page (Figure 2).
-
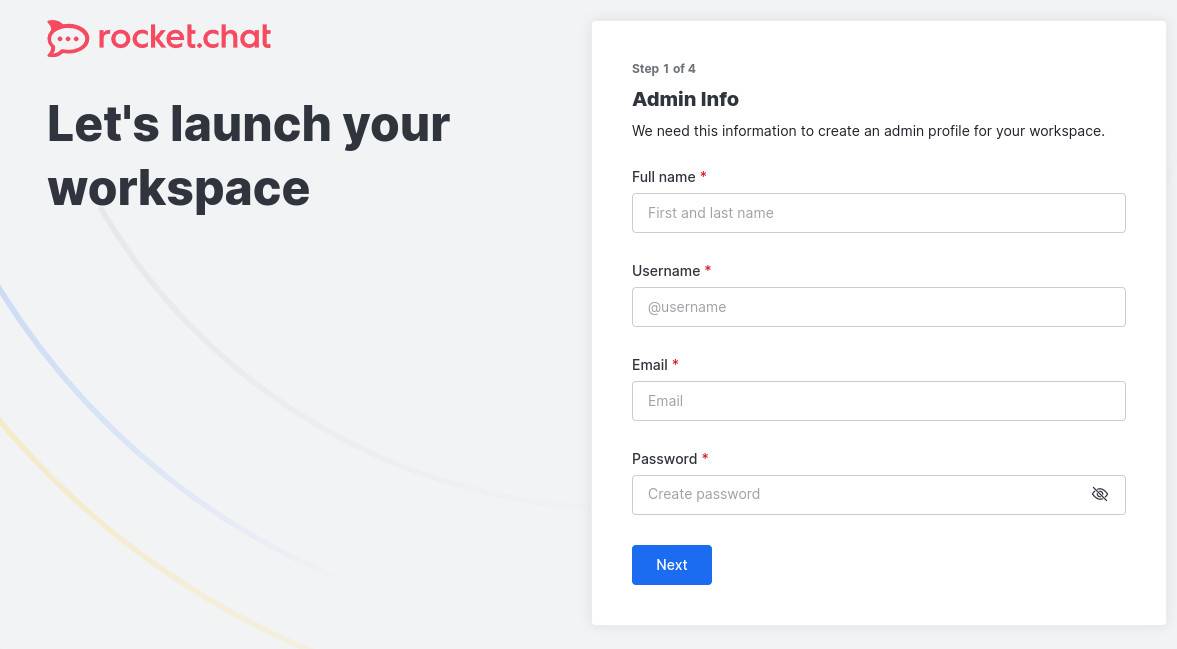
Figure 2: The Rocket.chat admin creation page.
On this page, fill out the necessary details and click Next. Once you’ve done that, you’ll be presented with a wizard for creating a new workspace. You’ll be asked questions like what industry you serve, how many users you have, etc. You’ll then be sent an email (to the address you configured for the admin user) for verification. After clicking on the link within the verification email, your Rocket.chat instance is ready for you (Figure 3).
-
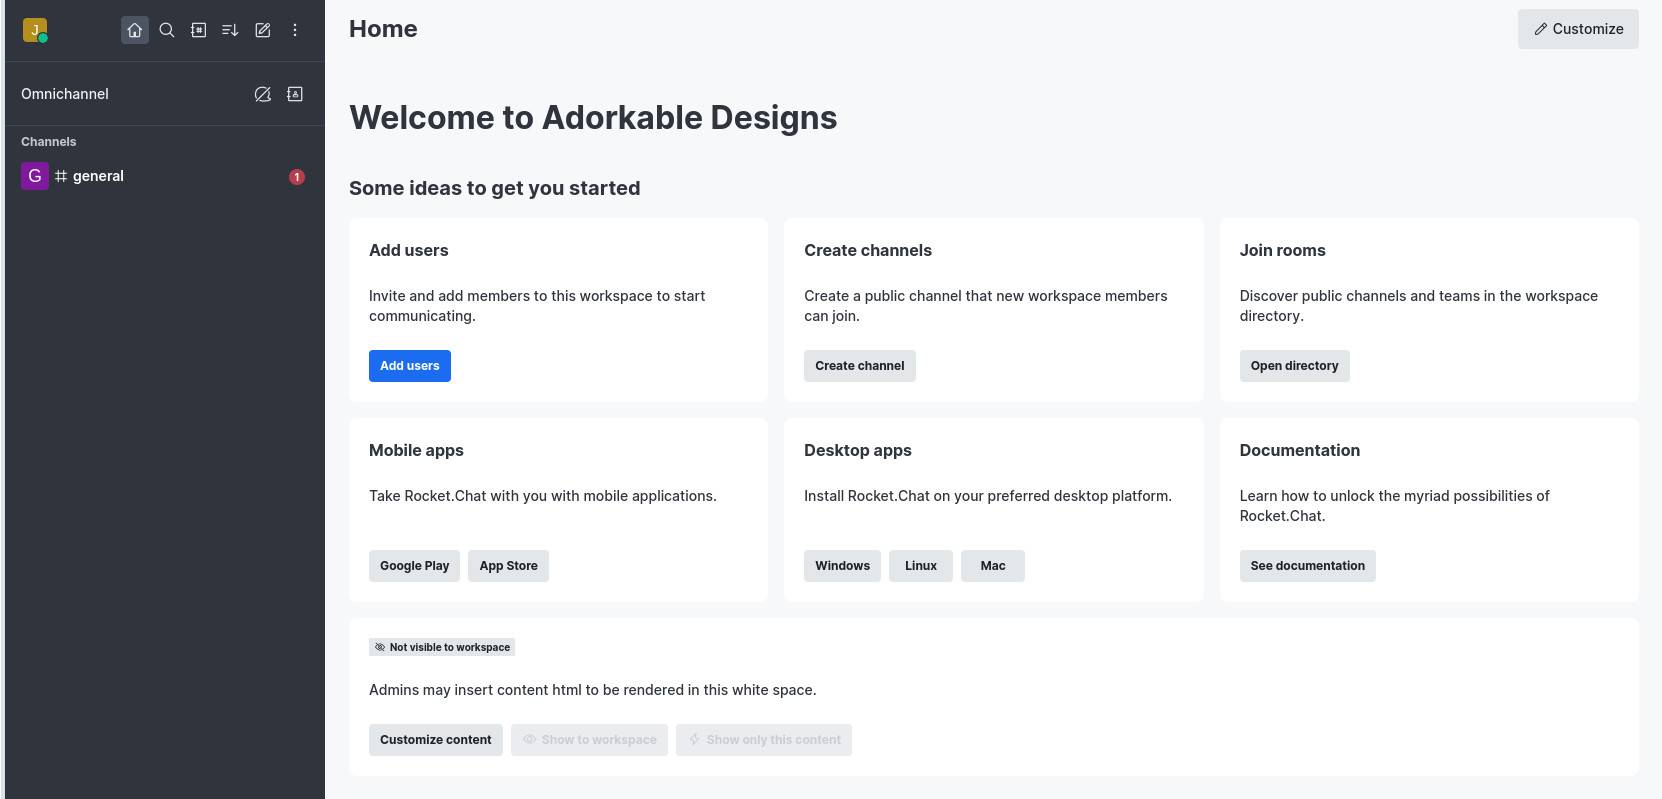
Figure 3: The Rocket.chat admin panel.
Configuring Rocket.chat
Your next step will be to create channels and invite users to the workspace. Both of these steps are fairly straightforward. For user creation, click Add Users and, from the resulting page, click New User in the top right corner (Figure 4).
-
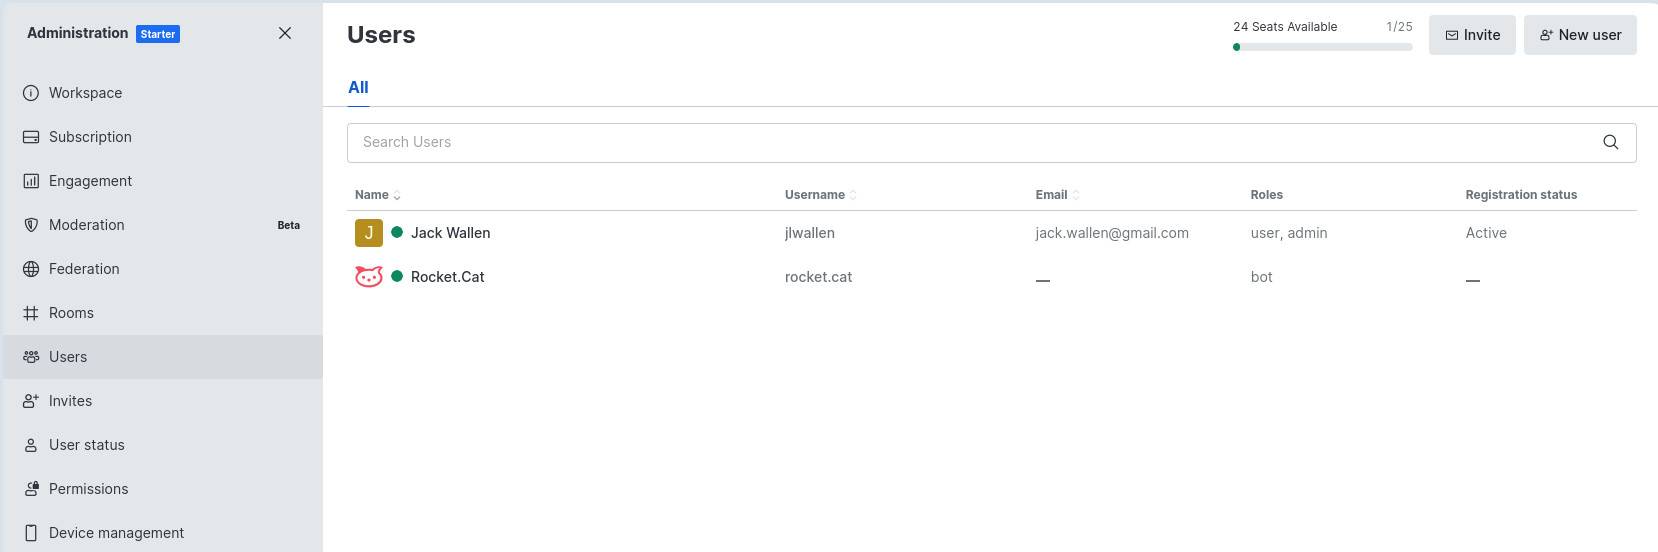
Figure 4: User creation requires the usual information (name, username, email, etc.).
For Channel creation, click Create Channel and fill out the necessary information (name, topic, members, etc) in the pop-up. Once you’ve configured the channel, click Create and it’s ready to use.
And that’s all there is to deploying a Rocket.chat collaboration server to your LAN. Even though you’ll be limited to only 25 users, this free chat tool is amazing. It’s also a handy way to kick the tires of Rocket.chat to see if it’s a collaboration tool your company should invest in.
After all, without collaboration, your company wouldn’t get much done.
YOUTUBE.COM/THENEWSTACK
Tech moves fast, don’t miss an episode. Subscribe to our YouTubechannel to stream all our podcasts, interviews, demos, and more.