
包阅导读总结
1. 关键词:Linux、文本编辑器、vim、nano、配置文件
2. 总结:本文强调了 Linux 文本编辑器的重要性,介绍了基本编辑任务及两种常见编辑器(vim 和 nano),包括其安装、操作模式、基本文档管理等,还提及了其他相关编辑器。
3. 主要内容:
– Linux 文本编辑器的重要性
– 对系统配置和任务关键
– 常见任务如编辑系统和应用配置文件、创建脚本等
– 常见 Linux 文本编辑器
– vim:强大灵活但学习曲线陡
– nano:直观简单但复杂项目受限
– vim 文本编辑器
– 简介及模式
– 命令模式、执行模式、插入模式
– 基本文档管理
– 创建或打开文件
– 编辑文件
– 保存更改
– 关闭文件
– 额外技巧
– 学习资源及注意事项
– 多种学习资源
– 避免以 root 用户登录
思维导图:
文章地址:https://thenewstack.io/the-linux-users-ultimate-guide-to-text-editors/
文章来源:thenewstack.io
作者:Damon M. Garn
发布时间:2024/8/6 16:28
语言:英文
总字数:3744字
预计阅读时间:15分钟
评分:89分
标签:Linux,文本编辑器,vim,nano,系统配置
以下为原文内容
本内容来源于用户推荐转载,旨在分享知识与观点,如有侵权请联系删除 联系邮箱 media@ilingban.com
Basic text editors seem like they should be among the least interesting of Linux utilities when, in reality, they are some of the most critical. These simple and fundamental tools are essential to system configuration and other text-based tasks.
This article explains the importance of text editors for Linux users and demonstrates basic editing tasks using two of the most common editors: vim and nano. By the end of this piece, you will be able to create, edit, save and close text documents using both editors.
It’s essential to practice these skills. You should follow along with the examples in the text on your own Linux system or create a lab computer for these activities. You may need to install vim or nano on the system, though at least one of them is usually available on most distributions. Review this article on Linux commands to ensure you’re comfortable entering information at the command line.
If you need to add vim or nano to a Debian-based distribution, type:
To install vim or nano on a Red Hat-based distribution, type:
Both vim and nano are written in standard documentation using all lowercase characters.
Note: It is a poor security practice to log on to a Linux system as the root (administrator) user. Most systems force you to log on as a regular user and then use the sudo (short for “super user do”) command to elevate your privileges. You may be prompted for your password when usingsudo. You probably mainly needsudo when editing system configuration files that are normally reserved for access by the root user.
Most Linux text editors must provide an alternative system to get around the problem of not having a graphical user interface (GUI). Many Linux deployments avoid the GUI to maintain speed, simplicity and stability. Therefore, these editors don’t include a menu where you can use a mouse to select Save or Exit.
There are two common approaches:
- Modes: Users switch the editor between modes. The keyboard either enters text or accepts commands, depending on the current mode.
- Meta keys: Users press one or more meta keys to enter commands. Meta keys perform special functions when combined with another key. For example, meta keys may include Ctrl or Alt.
The editor must have a way of differentiating between text you’re trying to write into the file and commands you’re trying to issue, such as save or copy/paste. This concept is important, especially if you’re used to GUI-based editors like Windows Notepad or macOS TextEdit.
You may be familiar with some common keyboard shortcuts like Ctrl+S to save or Ctrl+P to print. These are examples of using meta keys.
Why Are Text Editors So Important?
Text editors are standard tools on the system. Since Linux and Linux applications receive their primary settings and options from configuration files, managing these configuration files is clearly essential. If an administrator wants to change how a service like the Apache web server functions, they must edit the Apache configuration file.
Here are a few common tasks for text editors:
- Edit configuration files that control system actions and services.
- Edit configuration files for applications like web servers or databases.
- Create scripts and programming files to automate tasks.
Text editors are lightweight applications that consume few system resources. Some, such as vim, are highly customizable, helping you optimize them for tasks like writing Python code or authoring longer documents.
Common Linux Text Editors
Many text editors are available for Linux, so I’ll just cover two of the most common.
- vim: A powerful and flexible editor with a steep learning curve.
- nano: An intuitive and simple editor that may be limited for more complex projects.
Vim used to be the default editor for most Linux distributions, though these days, many distros rely on nano instead. Vim is highly configurable and customizable with plug-ins. In fact, it may be overpowered for such basic tasks as changing a line in a configuration file from no to yes, while nano is perfect for those sorts of tasks.
Other important but less common editors include Emacs (a favorite of many developers) and gedit, a basic text editor for Linux distributions with a graphical user interface.
The vim Text Editor
The name “vim” stands for “vi improved.” It is a fresh version of an older Unix/Linux editor called vi (pronounced “vee-eye”). It’s been a standard Linux application for decades, and with good reason. It’s highly configurable, very customizable, fast and efficient. It is not, however, the simplest application to learn.
Many resources exist for learning vim basics. Linux training courses nearly always cover it, many tutorials address it and plenty of online forums discuss tweaks and modifications to it. The official vim website includes documentation, too. Finally, the program itself has a built-in tutorial to walk you through its essential features.
While looking at vim’s documentation, check out its unique licensing mechanism, too.
Vim uses modes to change how users interact with the program. Pressing a key on the keyboard has a different effect depending on the mode.
The primary modes to be aware of are listed below:
- Command mode: Pressing keys issues commands to the program. This is how you save or exit vim.
- Execute mode: Think of this as a subset of Command mode. Issue additional commands to vim by using the : character before the command.
- Insert mode: Pressing keys inserts text in the file. This is how you add, edit or remove text.
Modes are less complex than they seem at first. I think of them as different ways of using the keyboard. When in Command mode, you’ll use the keyboard to manage the file, such as saving changes. When in Insert mode, you’ll use the keyboard to manage the text in the file, such as adding data.
The two most basic keys to know are lowercase i and Esc. Vim opens in Command mode. Lowercase i switches from Command mode to Insert mode. The Esc key switches from Insert mode back to Command mode. When in doubt, press the Esc key; then you’ll know you’re in Command mode.
Basic Document Management With vim
Vim offers a truly vast number of options. Many new Linux users find themselves overwhelmed by its extensibility and features. However, there are really only four essential vim skills you must learn immediately. Once you master these, you can explore additional vim capabilities.
The four essential tasks are:
- Create or open a file.
- Edit the file.
- Save your changes.
- Close the file.
To create a file, simply typevim and the name of the new file. Vim opens automatically with a blank document. You can open an existing file the same way. For example, to open a file namedlinux–basics.txt in your home directory, type the following commands:
Remember to use tab completion to autofill filenames. This trick makes you quicker and helps eliminate typos.
Vim opens in Command mode, meaning that if you press a key on the keyboard, you are giving vim a command. You’ll need to switch to Insert mode to edit the file.
Press the i key to enter Insert mode. Vim should display an INSERT message in the lower left corner. Note that other keys exist to put you in Insert mode, too. These variations place the cursor in different locations. For now, use the lowercase i key.
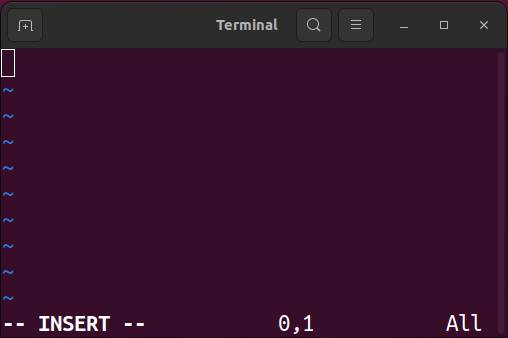
Figure 1: vim open in Insert mode — note the INSERT banner in the lower left.
If you press keyboard keys now, you’ll enter text into the document. Once you’re in Insert mode, add the following text to your document:
|
Linux is a powerful and flexible open–source operating system. |
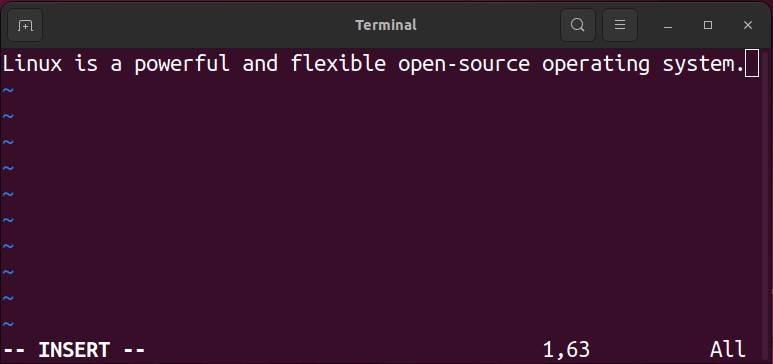
Figure 2: Add text to the file using Insert mode.
Great! You’ve edited the file by entering some text. Next, you need to save your changes. There are several ways of doing this in vim, but for now, press the Esc key to return to Command mode and then press :w (the w character stands for “write the file to disk” or save). The : key puts vim in Execute mode, offering additional ways to enter commands.
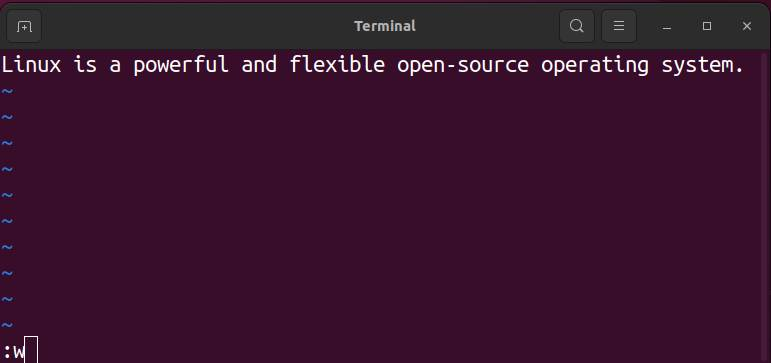
Figure 3: Use the :w command in Command mode to write or save changes.
After saving your document, you can close the vim editor and return to the Linux command prompt. To do so, press Esc to ensure you’re in Command mode, then type :q to quit vim.

Figure 4: Use the :q command in Command mode to quit vim.
By the way — you could have combined the write and quit steps by typing :wq (“write then quit”), but I wanted to demonstrate them as separate steps.
Type the following command to check that your file contains the expected text (remember that Linux is case-sensitive):
You should see the sentence you added to the file.

Figure 5: View the contents of a file by using the cat command.
Use thevim linux–basics.txtcommand to open the file again. Enter Insert mode with the i character and add more text to your file, such as the following sentence:
|
There are many Linux distributions, such as Ubuntu and Fedora. |
Save your changes and exit vim by typing :wq.
You can use the arrow keys on your keyboard to move the cursor up, down, left and right through the text.
One of the first places you may get hung up in vim is when you wish to exit a file without saving the changes. Vim displays an error when you attempt this, saying, “No write since last change.” To exit the file without saving changes, use Esc to enter Command mode and type the :q! combination.
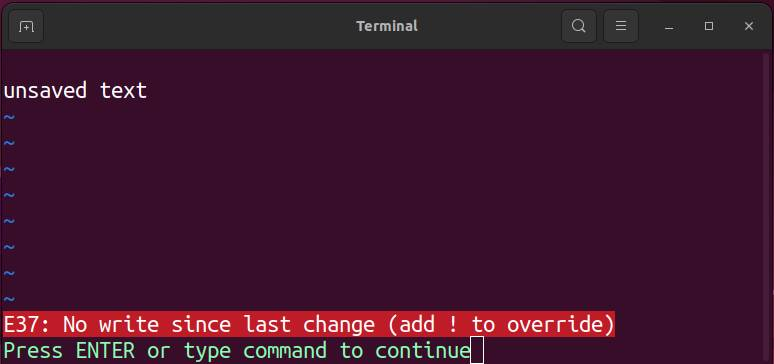
Figure 6: vim displays this error message when you try to quit the program without saving data first.
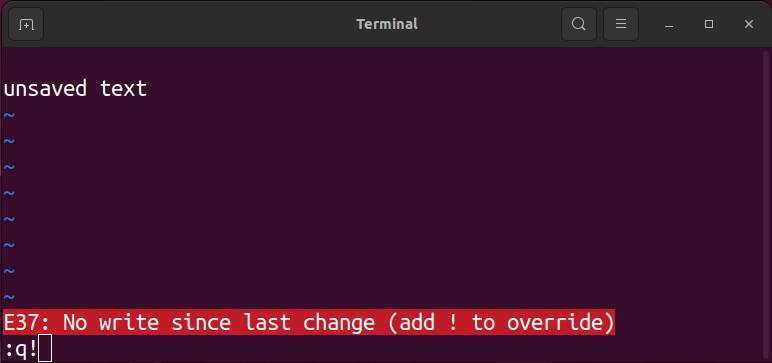
Figure 7: Use the :q! command in Command mode to quit vim without saving changes.
Review and repeat these steps until you are comfortable with them. If you’re looking at other vim tutorials or documentation, you may see many additional (and very useful) options, but without a firm understanding of these four basic tasks, vim gets confusing in a hurry.
Additional vim Tricks
There are several ways to enter Insert mode. These depend on the position of your cursor, so use the arrow keys to place your cursor at the desired location in the file, then use one of these keys to enter Insert mode and begin entering text.
- i: Insert text before the cursor.
- I: Insert text before the first non-blank character of the line.
- o: Start a new line below the cursor and insert text.
- O: Start a new line above the cursor and insert text.
These options assume you’re in Command mode. Use the arrow keys to move the cursor to where you want. Here are some other ways of navigating inside the file:
- gg or [[: Jump to the top of the file.
- G or ]]: Jump to the bottom of the file.
- 22G: Jump to line 22 of the file.
One of my favorite settings is to cause vim to display line numbers within a file.
- :set number: Display line numbers along the left side of the file.
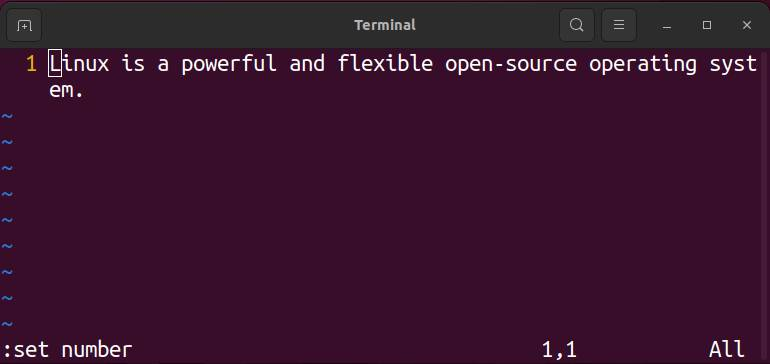
Figure 8: Use the :set number command in Command mode to display line numbers, such as line 1 in this document.
Manage text in Command mode using the following commands:
- x: Delete the character where the cursor is.
- dw: Delete the word where the cursor is.
- dd: Delete the line where the cursor is.
- 3dd: Delete three lines beginning where the cursor is.
- 0: Jump the cursor to the beginning of the line.
- $: Jump the cursor to the end of the line.
Linux configuration files or program code can have hundreds or even thousands of lines. One helpful option is searching for a particular keyword or string of text. Use the / character followed by the text you want to search for. Be sure you’re in Command mode for this. If you want to search for the string “disabled” (representing a disabled or off setting), then use the following command:
/disabled
Use the n and N keys to move forward or backward through the results.
Vim terminology is a bit different than you might be used to. Yank is the vim term for copy, delete is also a cut function and put is the word for paste.
- yy: Yank the current line.
- 4yy: Yank the current line and the following three lines (for a total of four).
- dd: Cut (or delete) the current line.
- 4dd: Cut the current line and the following three lines.
- p: Put or paste the yanked or cut text at the cursor’s position.
Configure Additional vim Options
Vim installs with a common set of defaults most people find useful. You can customize it to fit your needs by using a vim configuration file named.vimrc. The file does not exist by default, so you must create it. Be sure to do so in your home directory. Note that the first character of the file name is a dot.
Begin by moving to your home directory withcdand then creating the .vimrc file:
Press the i key to place vim in Insert mode.
Add whatever custom configurations you prefer. Here are a few common examples, including comment fields to explain them:
|
“Display line numbers set number
“Set tabs equal to four spaces set tabstop=4
“Highlight search results set hlsearch |
Switch to Command mode with Esc, then type :wq to save your changes and quit vim.
Note that the.vimrcfile uses the “ character to mark comments rather than the more common #.
Vim includes many configuration settings. Search online for the interesting and useful ways vim users have customized the tool over the years. For example, many Python developers use vim as their preferred integrated development environment (IDE). Use guides like Vim and Python – A Match Made in Heaven to customize your.vimrcfile for Python.
Vim relies on plug-ins to manage many additional custom features, extending the program’s usefulness. For example, the NerdTree plug-in displays your file structure within a vim window so you can see your entire project.
The nano Text Editor
Nano is simpler and less confusing than vim, though it is also less feature-rich and extensible. Still, it’s a great solution for quick configuration file edits or for authoring short documents. And the menu at the bottom of the nano interface means you don’t have to memorize a bunch of odd keystrokes.
Nano functions using meta keys — mainly, the Ctrl key. It opens in a normal interface, meaning if you press a key on the keyboard, it will enter text into the file. Hold down the Ctrl key and press other keys to give instructions like “save to nano.” Nano uses the ^ character to represent the Ctrl meta key, so if you see ^X, it means Ctrl+X.
Many Linux distributions include nano by default, though you can install it if it’s not already part of your favorite distro. Nano’s homepage includes documentation, FAQs and shortcuts.
Basic Document Management With nano
In the discussion of vim above, I showed four basic tasks: Create/open a file, edit the file, save changes and exit. These fundamental tasks apply to nano, too (and really, they apply to any text editor).
Create a new file or open an existing one in your home directory by typing these commands:
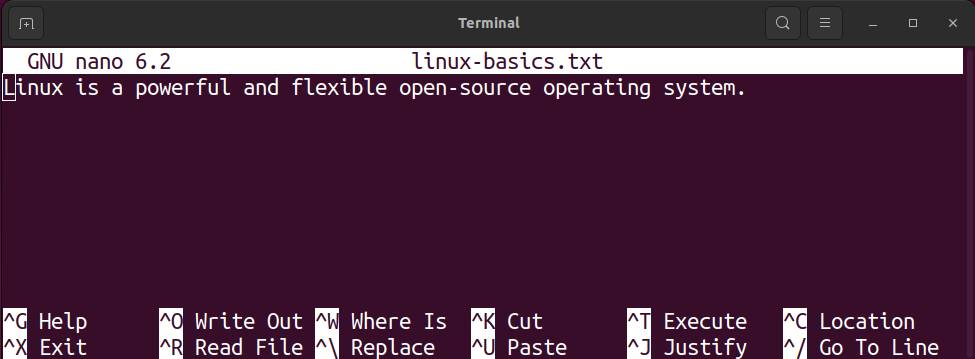
Figure 9: Note the menu options displayed at the bottom of nano.
The file opens, showing the text you entered with vim. Note the menu at the bottom, which displays some standard nano functions. (Others are available but not shown.)
Use the arrow keys to move below the existing lines of text and type the following information:
|
Two common Linux text editors are vim and nano. |
To save your changes, press the Ctrl key and then the S key. Use the O key to “write out” your changes (this is equivalent to “Save As” in other programs). Nano shows you the current file name, so you can just press Enter. You’ve saved the file, so quitting nano is the final step. Press Ctrl again along with the X key to exit nano. The editor will prompt you if you’ve forgotten to save changes.
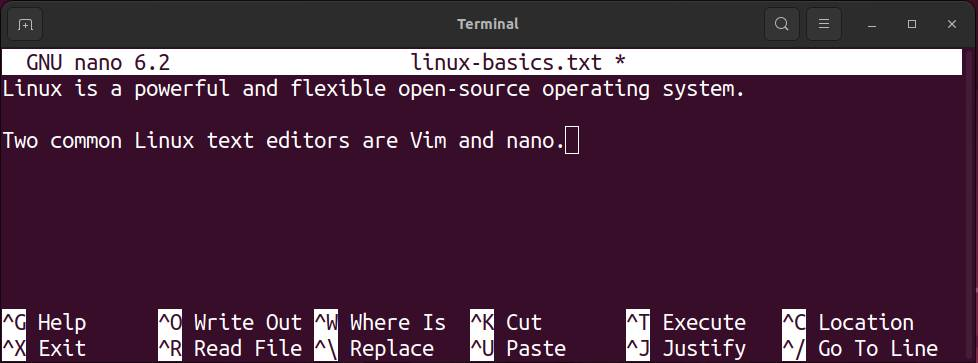
Figure 10: After adding text to the file, press Ctrl+S to save changes, then press Ctrl+X to exit the editor.
Practice these steps a few times. They are the same steps you learned above with vim. You should master these four basic steps for both editors.
Additional nano Tricks
Like vim and other editors, nano offers many basic options. Here are several you will find particularly useful.
- Ctrl+A: Jump to the start of the current line.
- Ctrl+E: Jump to the end of the current line.
- Ctrl+K: Delete the current line.
- Alt+U: Undo the most recent change.
- Ctrl+W: Search for a string of text. You will be prompted to enter the search string.
- Alt+R: Search for a string. You will be prompted to enter the text you want to replace it with.
Nano has a straightforward method for cutting or copying text and pasting it elsewhere. It functions by marking the start and end of the text you want to copy and then specifying where to paste it.
Start marking the text by placing your cursor at the beginning of the desired text, then press Alt+A. Use the arrow keys to move the cursor to the end of the text you want to work with. The text between the two points will be highlighted. You can either cut or copy it.
- Alt+6 copies the text.
- Ctrl+Kcuts the text.
Now that the text is in the buffer (on the “clipboard”), move the cursor to the point where you want the content pasted. Select Ctrl+Uto paste it.
Configure Additional nano Options
Nano offers useful customizations and additional settings. Many of these are handy for development work and managing system configuration files. As with vim, you can set permanent customizations in a configuration file in your home directory. Use nano to create and open a file named.nanorc. (Note the “dot” at the start, marking this as a hidden file.)
Here are a few sample entries. Put these on separate lines. Use the # character to mark comments (explanations) for each entry, as seen below:
|
#Display line numbers set linenumbers
#Set the tab size to four spaces set tabsize 4
#Automatically continue indentions from the previous line (handy for development and configuration file entries) set autoindent |
Head over to the official nanorc page for more ideas and options.
Graphical Text Editors
You may sit at standard Linux workstations with a graphical user interface (GUI) running on it. If that’s the case, you aren’t likely to want to jump out to the Terminal to write text files. Various GUI-based editors exist. One of the most common is GNU gedit.
This menu-driven text editor is similar to macOS TextEdit or Windows Notepad. Use your mouse to select options from the menus at the top of the interface. Many familiar keyboard shortcuts function in gedit, too.
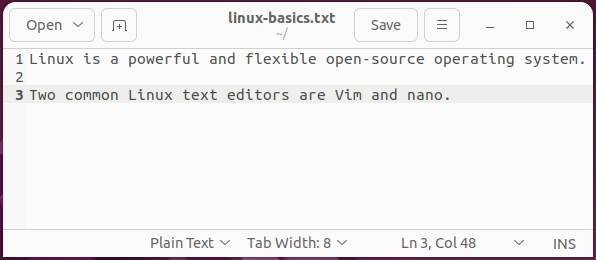
Figure 11: The gedit editor is simple and uses a menu interface on Linux systems with a graphical user interface installed.
Other GUI text editors exist and might be useful, depending on your needs. Here are a few:
- Kate: Robust KDE-based editor good for coding.
- Leafpad: Lightweight editor that emphasizes simplicity.
- Sublime: Developer coding platform that is not open source but still popular in the Linux community.
- VS Code: Microsoft’s cross-platform, extensible coding solution.
Recall that text editors and word processors are not the same. Word processors have far more features oriented on large and complex documentation. They typically embed a lot of hidden instructions within the text that interfere with configuration files and programming languages. Word processors are a different tool with a different job than text editors. One example word processor is LibreOffice Writer.
Add Linux Editors to macOS and Windows
Multiple versions of vim exist for macOS and Windows, too. Adding vim to your daily-use computer (even if it’s not Linux) is a handy way to practice your editing skills.
Nano was included with older macOS versions. You can add it to your current macOS version using a package manager like Homebrew. Various nano versions exist for Windows, too.
Wrap up
I don’t find nano to be as powerful or extensible as vim. Or, to phrase that another way, nano is simpler and less confusing than vim. I really don’t believe one is better than the other, but they are both useful for different things. I find nano to be handy for very quick and basic configuration file edits, such as managing root login via SSH in the/etc/ssh/sshd_config file by using either yes or no. I prefer vim for longer configuration files, where I need to search for various settings. I also use vim periodically to write more substantial documents, like this tutorial. Because I’ve used vim for a long time, I’m more comfortable with it, so it is my go-to editor. (I even use it on my Mac!)
I recommend you get comfortable with opening and editing files using both vim and nano. That skill will serve you well on nearly any Linux distribution you come across. Practice with both whenever you need to generate or edit some basic text!
YOUTUBE.COM/THENEWSTACK
Tech moves fast, don’t miss an episode. Subscribe to our YouTubechannel to stream all our podcasts, interviews, demos, and more.