
包阅导读总结
1. 关键词:Omakub、Ubuntu、DHH、Web 开发、Linux
2. 总结:
本文介绍了由 DHH 打造的精心策划的 Ubuntu 环境 Omakub,它旨在解决软件公司工作电脑设置难题,可通过一条命令安装,作者通过虚拟机安装并体验,介绍了其特点和操作方式,认为其与所选工具配合良好,对开发者有价值。
3. 主要内容:
– Omakub 是由 DHH 打造的精心策划的 Ubuntu 环境
– 名字是“Omakase Ubuntu”的混合词
– 旨在将新的 Ubuntu 安装转变为配置齐全的现代 Web 开发系统
– 软件公司电脑设置存在问题
– 员工电脑工具和配置不一影响项目
– “自带设备”模式带来网络保护等问题
– 开发者常用系统
– 虽有开发者用 MacOS,但 Linux 仍是主流,Ubuntu 受欢迎
– 新开发者常需安装多种工具
– 作者安装 Omakub
– 在虚拟机上安装 Ubuntu 24.04 LTS 和 VirtualBox
– 用命令安装 Omakub,过程有错误但可解决
– Omakub 体验
– 键盘操作中心化,节省空间
– 包含常见工具,有多种操作方式如切换工作区、启动应用等
– 终端和编辑器配合良好
– 认为对从 MacOS 转 Linux 开发有帮助
思维导图: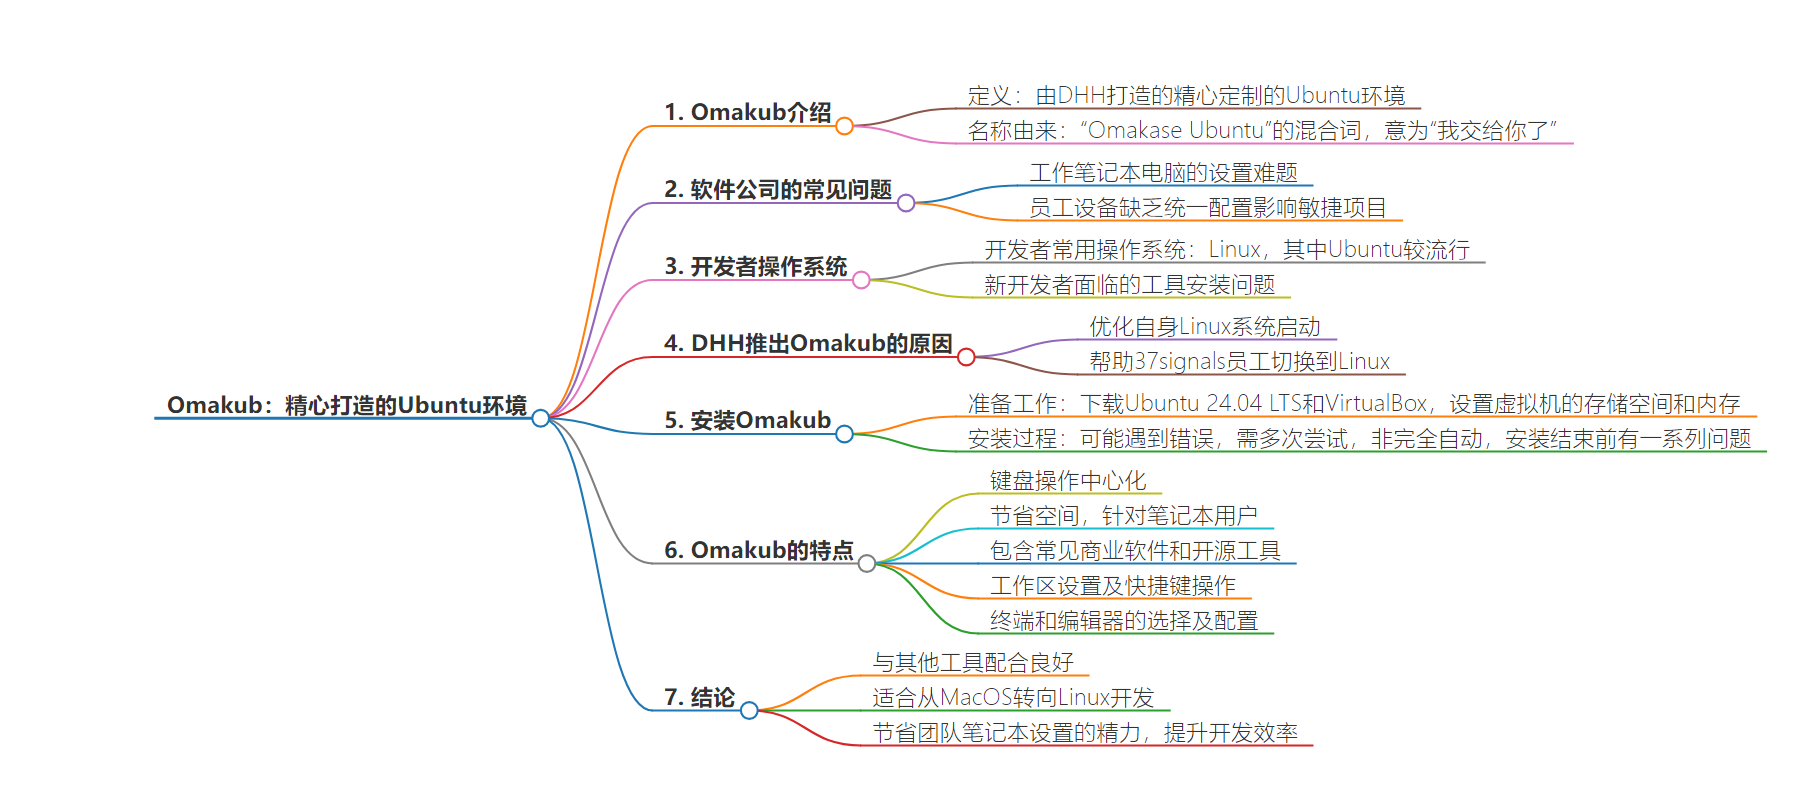
文章地址:https://thenewstack.io/introduction-to-omakub-a-curated-ubuntu-environment-by-dhh/
文章来源:thenewstack.io
作者:David Eastman
发布时间:2024/7/19 17:24
语言:英文
总字数:1282字
预计阅读时间:6分钟
评分:86分
标签:奥马库布,Ubuntu,网络开发,DHH,37signals
以下为原文内容
本内容来源于用户推荐转载,旨在分享知识与观点,如有侵权请联系删除 联系邮箱 media@ilingban.com
Although it sounds like a Genesis album from the 1980s, Omakub is actually a heavily curated Ubuntu environment. Its creator David Heinemeier Hansson (DHH) describes Omakub as turning “a fresh Ubuntu installation into a fully-configured, beautiful, and modern web development system by running a single command.” DHH adds that the name is a portmanteau of “Omakase Ubuntu” (Omakase is a Japanese phrase commonly used in restaurants, meaning ‘I leave it up to you’).
A very familiar problem to all software corporations is how to set up their work laptops. Ensuring that every machine that your employees have (whether marketing staff or developers) looks similar, or at least carries the required tools and configurations, is a hard skill. Not being prepared for rapid onboarding can slow down agile projects more than anything else. Behind the “bring your own device” fad was a squirrel’s nest of network protections, policy software, and update emails from a busy IT department. The current CrowdStrike problem is a result of trying to make different machines outwardly safer when connected up.
While many developers use MacOS, the lingua franca operating system for developers is still Linux; and Ubuntu is a popular distribution.
New developers may be told for weeks about how they just need to install one more tool for everything to work on the current project. Virtuals and containers massively improve the situation, but there is still a great deal of tools, setups and configurations to fiddle with. While many developers use MacOS, the lingua franca operating system for developers is still Linux; and Ubuntu is a popular distribution.
So when DHH recently introduced his curated Ubuntu environment, there was a lot of interest. This was the setup he was giving his own staff, so we were getting a taste of a strong software culture in the form of an opinionated and pragmatic mixtape. “Omakub was started by me, David Heinemeier Hansson, to streamline my own Linux box bootstrapping, as well as to help our technical employees at 37signals switch to Linux,” he wrote. “That’s very much a specific context where Ruby on Rails, web development tooling, and commercial services all intermingle.”
In addition, this can be installed with a single command.
I used to use Ubuntu, although like most developers I abandoned it during one of its less stable periods (I suspect the last distro I used was Mint). But I’ve been back on Windows and MacOS for some time, so I feel fairly unfamiliar with modern Linux development.
Installing Omakub
What I’ll do in this post is install Ubuntu onto a virtual machine, then install Omakub, and then assess the setup.
As I don’t have a spare laptop to try Omakub on, I’m going to install it onto VirtualBox. If you want to try it directly on your laptop, then you can skip this bit.
First, we need Ubuntu 24.04 LTS. Download the ISO file, and then download VirtualBox. We are setting up a virtual machine, and need to allocate drive space and memory from the host machine.
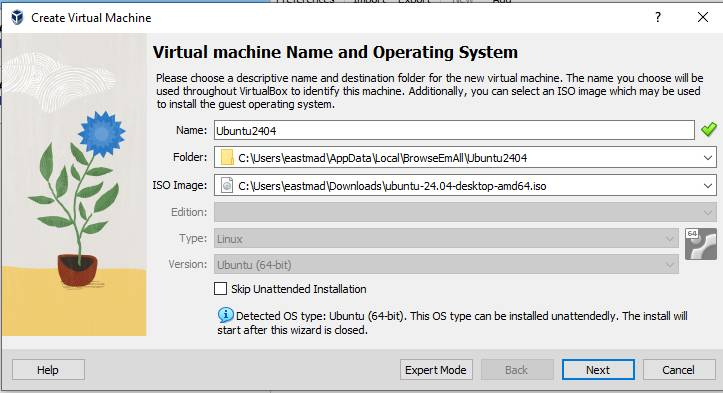
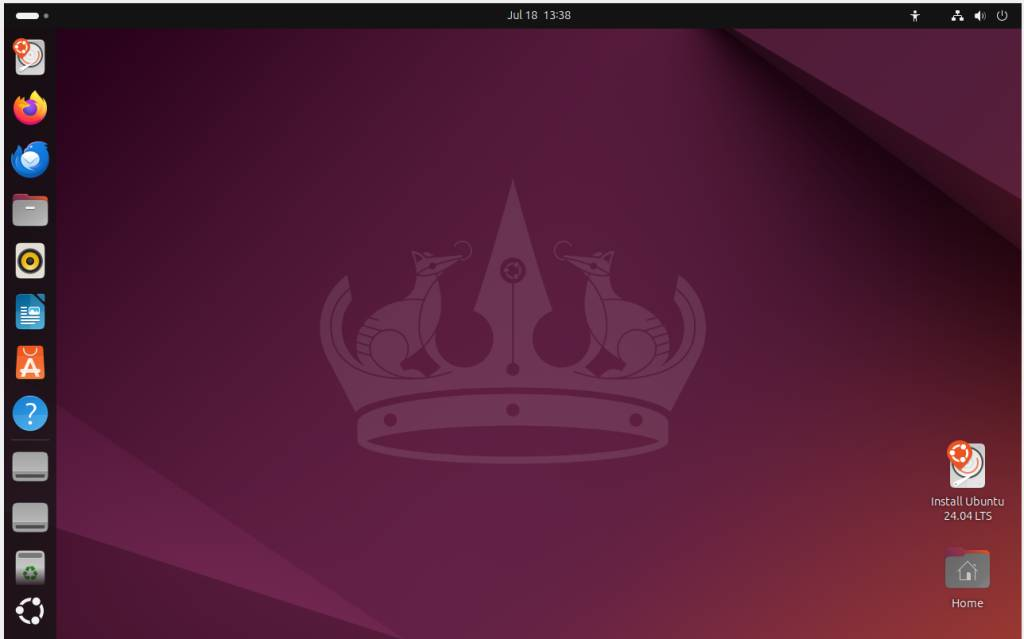
Remember to fully install Ubuntu. Otherwise, we just have the equivalent of the “try-out” mode on what originally would have been a CD-ROM. You need about 4G memory and 32GB of drive for the virtual. When Ubuntu invites you to set up, go through all the steps (but don’t connect to the internet). That way it will install onto the virtual drive you made.
After getting a couple of error messages on screen during setup, Ubuntu seemed to appear, responding to the mouse and keyboard just fine.
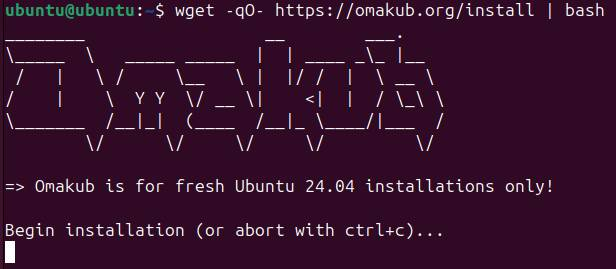
Ok, so we have a fresh Ubuntu 24.04 sitting in our virtual machine. The next trick will be to use the one line installer:
|
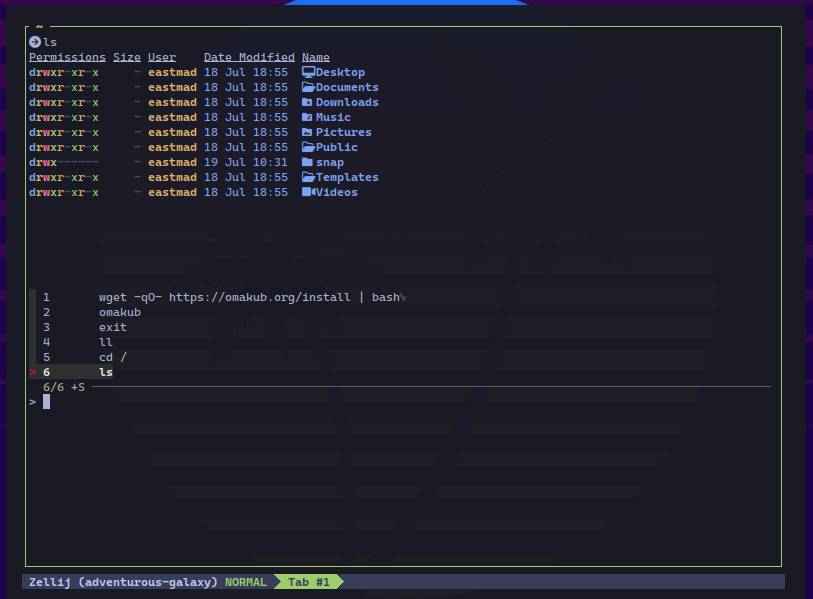
> wget –qO– https://omakub.org/install | bash |
As I was on a virtual, I didn’t set the screen resolution to the suggested 200%, I just pressed Ctrl-Alt-T to get a terminal:
It did have an install error, but eventually, it just carried straight on. It is estimated to take about 30 minutes on a fresh machine. I had to re-run it a couple of times to get it working, but my virtual is running on an old Windows box. If there are install problems, you can then use the Omakub program itself to try again. This is Linux, so everything is a bunch of scripts, which you can always rerun.

The installation is not fully automatic; you will get a set of questions near the end before it asks permission to log out and save everything.
A Tour of Omakub
Ok, all looks good. Let’s now take a tour of Omakub, using the manual.
This is a very keyboard-centric setup, which is natural to most old-school developers. The idea is that much of what you do becomes finger muscle memory, not continual mouse movements. But there are always a few options to do any basic actions.
The other thing to remember is that it is very space conscious, because it is targeting laptop workers.
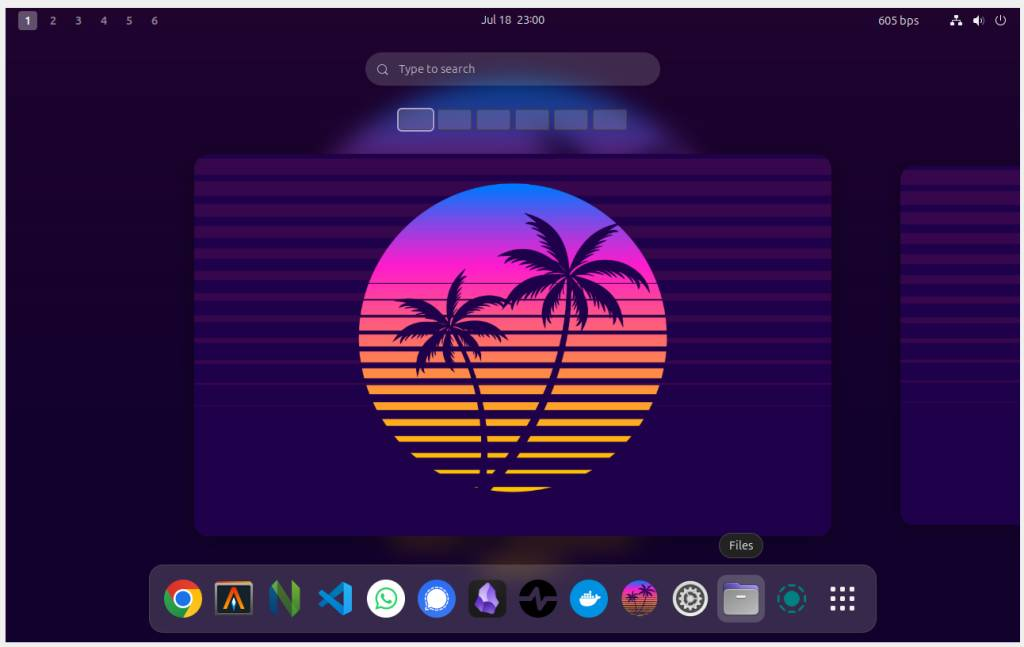
If you were expecting just weird Open Source Nirvana Linux tools, you would only be half right. The default browser is Chrome, and you might recognize Docker, Visual Code and Obsidian. There are, of course, many more tools installed.
Those numbers at the top are workspaces. The idea is that you run one or maybe two apps in any one workspace, and you can return quickly to any workspace to resume flow in that environment.
Omakub documentation refers a lot to a “super key,” which will vary depending on your host machine’s keyboard. It may be the Mac Command key or the Windows key. Pressing “super key”-1 will instantly shift you to the first workspace.
You can fire up apps by keystroke too. So, for example, pressing Alt-1 opens the first app on the dock (Chrome) in your current workspace, and subsequent presses of Alt-1 will take you back to that instance.
Once you are in an app, the dock will disappear — but a tap of the “super key” will make it reappear. If you press “super key”-space, you will get an app search much like the Mac launchpad.
Tiling is used quite a lot to arrange the screen, and using the “super key” and arrow keys, you can easily place two apps next to each other. Again, this makes sense for laptops:
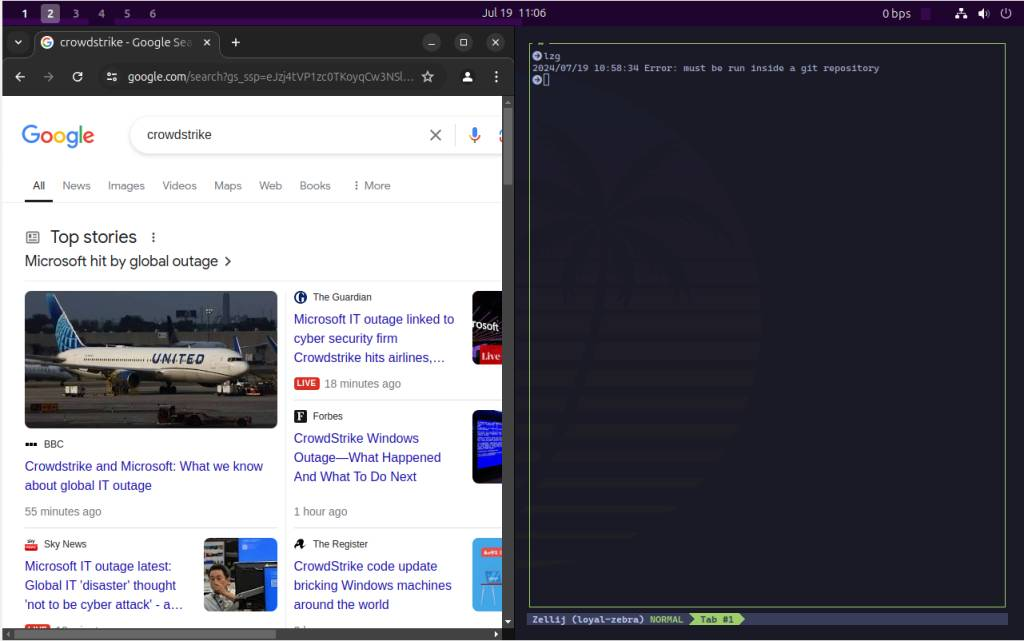
The terminal program Alacrity, which runs several panes/sessions, looks nice, but I would need to practice to get around it. Below I seem to have summoned my command history, but I’m not sure what I did:
Neovim is the in-terminal editor, which I think started to build itself when I first opened it. There are of course options for themes and fonts, many accessible from the omakub command in a terminal.
Conclusion
It is likely I would use Warp and Zed as my terminal and general editor respectively, but what has been chosen in Omakub works well in harmony with the other chosen tools, and is part of a common practical mindset.
I’d be happy to take the plunge if I went from MacOS to Linux for development (the Framework laptop is often recommended), as I’m sure there is already a big enough community to maintain this. Also, I trust the taste of DHH. If you just want to focus on your software, then letting someone else worry about you or your team’s laptop setup seems like a good move. The cost of learning time should be worth it if it will make you a more efficient and organized developer.
YOUTUBE.COM/THENEWSTACK
Tech moves fast, don’t miss an episode. Subscribe to our YouTubechannel to stream all our podcasts, interviews, demos, and more.